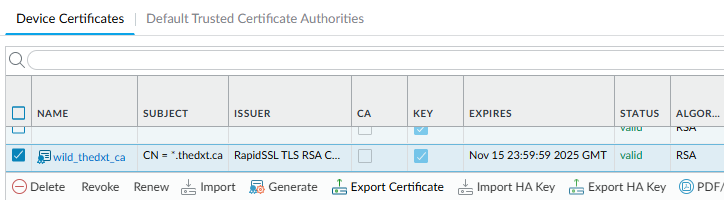
Omnissa Horizon Client Default Server
There are a few ways to preload the Omnissa Horizon client (formerly the VMware Horizon client) with a default Horizon Connection Server.
One method is to deploy the Horizon prefs.txt file with the Horizon connection server. For more information about the prefs.txt file method, my blog post, Omnissa Horizon Client prefs.txt, goes into detail.
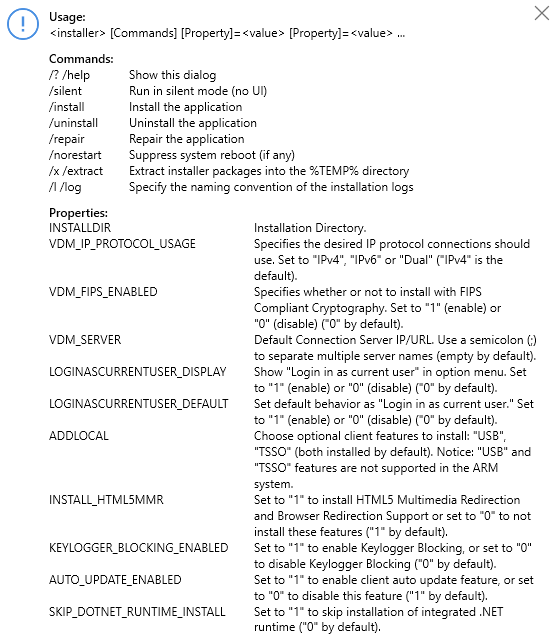
Another method is the VDM_SERVER property. When you install the Horizon client, you can define the VDM_SERVER property. Omnissa does have some documentation about the VDM_Server property. However, it only says that you can use it to set a default horizon connection server for the users. It doesn’t go into detail on how it works. If you run the help command on the Horizon client installer, it doesn’t go into much more detail either.
Given that there isn’t a lot of info about the VDM_Server property, I needed to know more, and down the rabbit hole I went.
How does the VDM_Server property work, and is it better than using the prefs.txt file to preload the Horizon connection server? If the VDM_Server property works better, it could simplify how I’ve been deploying the Horizon client. I also needed to know if it works only for the user that installed the Horizon client or all users. I wanted to see if it did the same thing I did manually with the prefs.txt file.
If you install the Horizon client using the logging command /l or /log, everything the Horizon client install does is logged to a log file.
With logging enabled, I ran the Horizon client install with a value for the VDM_SERVER property. The command I ran was
.\Omnissa-Horizon-Client.exe VDM_SERVER="Horizon.1company.com;Horizon.2company.com" /l C:\temp\HorizonInstall.logCode language: PowerShell (powershell)