
Cloudflare Access IdP with Entra ID
Cloudflare Access is a wonderful tool that can add MFA (Multi-Factor Authentication) to applications that don’t support it.
I’ve previously covered Setting Up Cloudflare Access using email OTP (One-time PIN). What I didn’t cover in that post was how to set up Cloudflare Access with an IdP (Identity Provider).
In this post, I will show step-by-step how to set up Cloudflare Access to use Microsoft Entra ID (formerly Microsoft Azure Active Directory) as the IdP and use Microsoft 365 SSO (Single sign-on) to make everything very transparent to the user.
Prerequisites
- DNS for the web application in Cloudflare with Cloudflare Proxy enabled on the DNS record. (or a Cloudflare Tunnel)
The Process
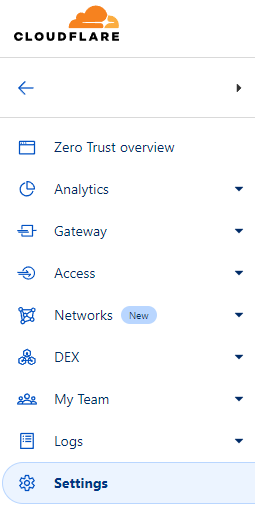
- Login to Cloudflare One (it used to be called Cloudflare Zero Trust Dashboard) (https://one.dash.cloudflare.com/)
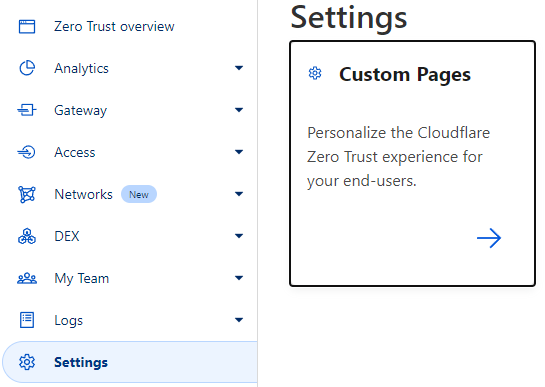
- Click on Settings.
- Click on Custom Pages.
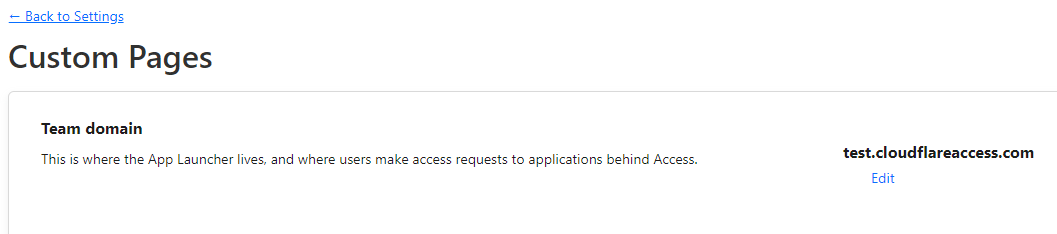
- Make a note of your Team domain.
For this example, I will be using the team domain test.cloudflareaccess.com
Microsoft Entra ID Configuration
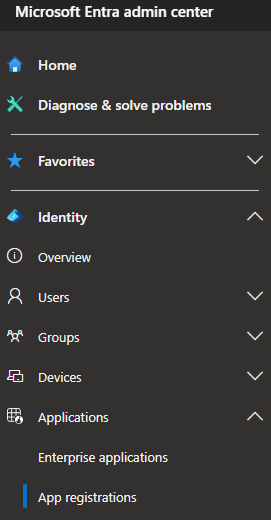
- Login to Microsoft Entra admin center.
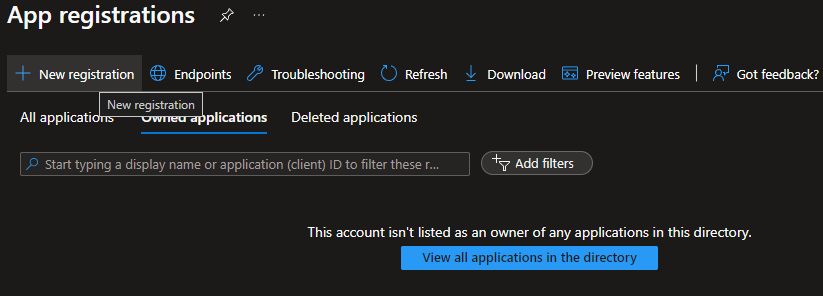
- Click on Applications > App registrations.
- Click on New registration.
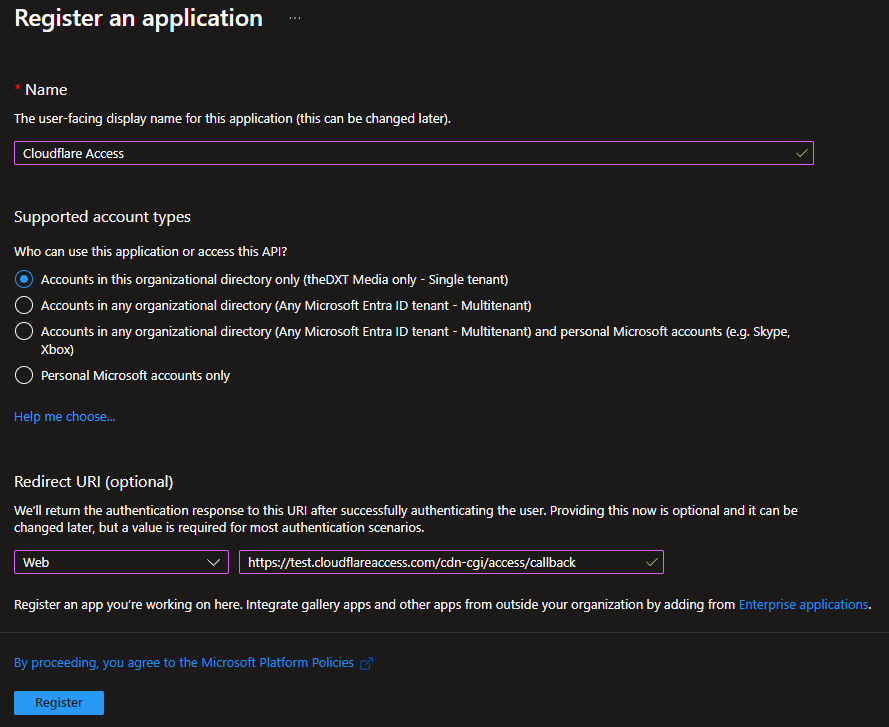
- Name your application. I will use the name Cloudflare Access.
- Select Accounts in this organizational directory only (Single tenant)
- Set the Redirect URI platform to Web.
- Set the Redirect URI to the URL of the Team domain you noted down earlier. Add
https://to the front of it and add/cdn-cgi/access/callbackto the end of it.
In my example, my Team domain is test.cloudflareaccess.com and I will enter the following for the Redirect URI URL: https://test.cloudflareaccess.com/cdn-cgi/access/callback
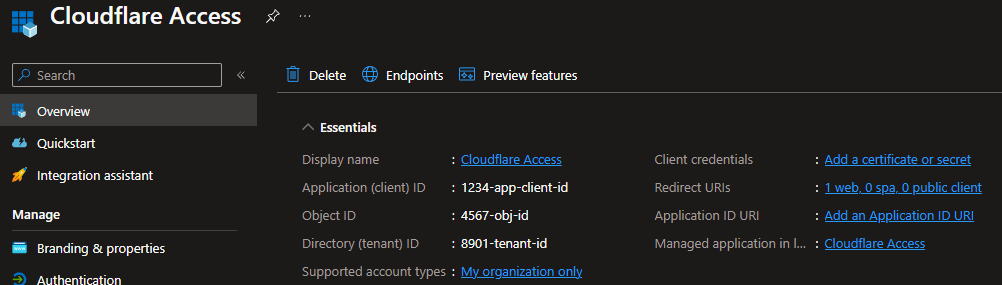
It should look something like this.
- Note the Application (client) ID and the Directory (tenant) ID.
In my example, I will note that my Application (client) ID is 1234-app-client-id and my Directory (tenant) ID is 8901-tenant-id.
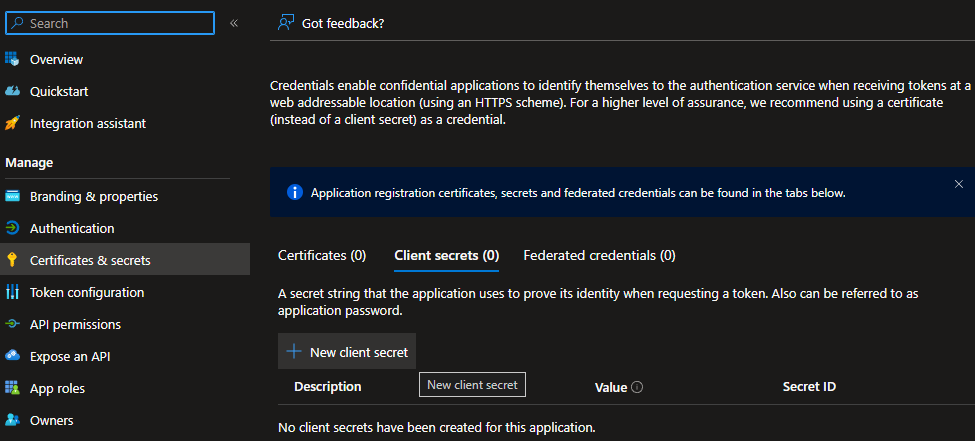
- Click on Certificates & secrets.

- Click on New client secret.
- Enter a Description for the client secret. I will use the description Cloudflare Access Secret
- Select an expiry for the client secret. I will set mine to 24 months.

- Make a note of the expiry and, the Secret ID, and the Value.
Once you navigate away, you can no longer access the Value again.

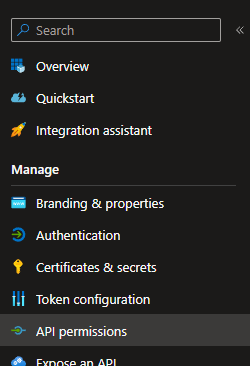
- Click API permissions.
- Click Add a permission.
- Select Microsoft Graph.
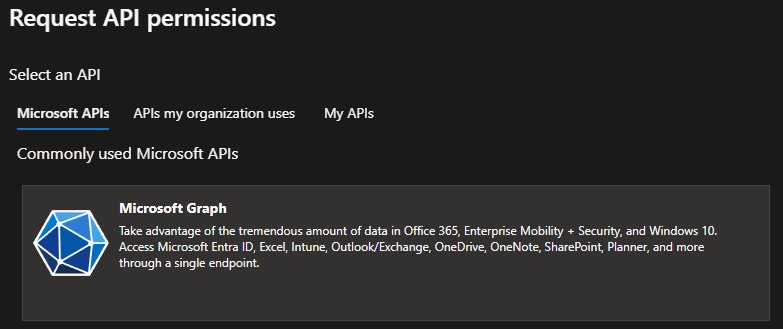
- Select Delegated permissions.

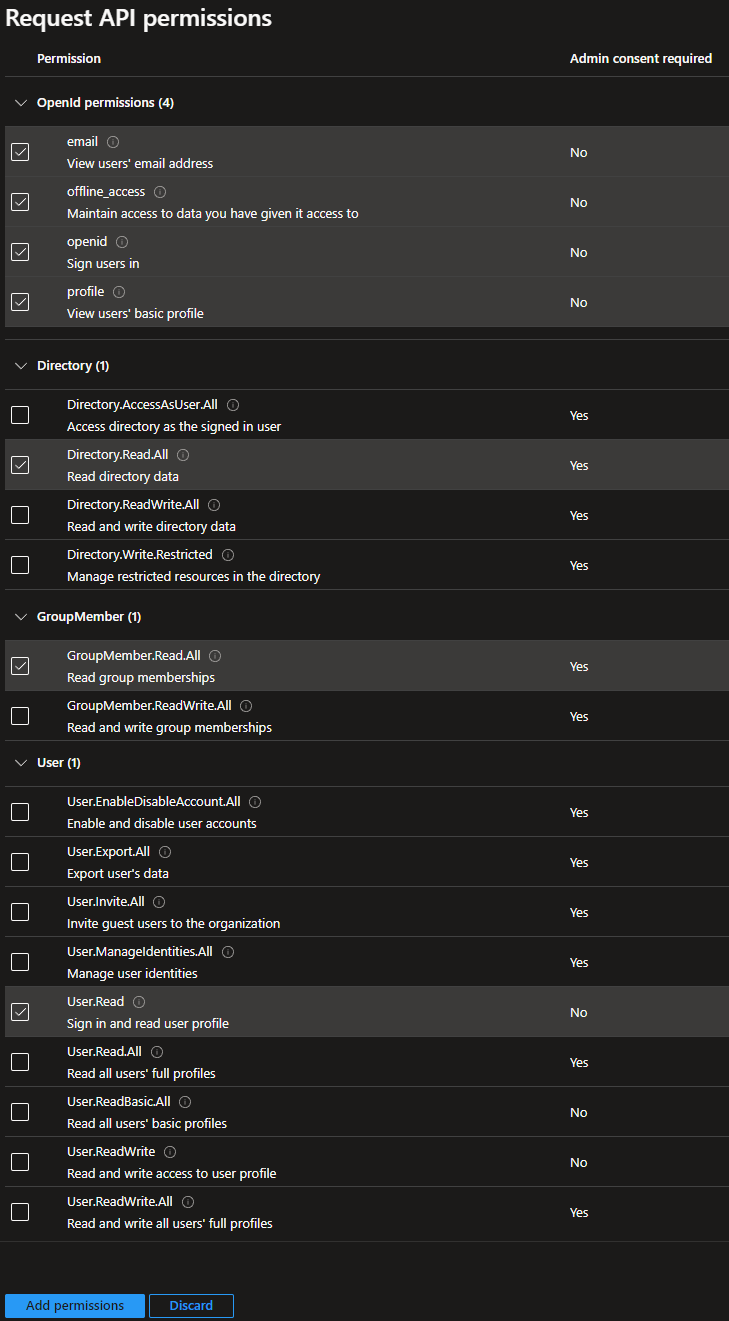
- Select the following permissions:
- OpenId permissions
emailoffline_accessopenidprofile
- Directory
Directory.Read.All
- GroupMember
GroupMember.Read.All
- User
User.Read
- OpenId permissions
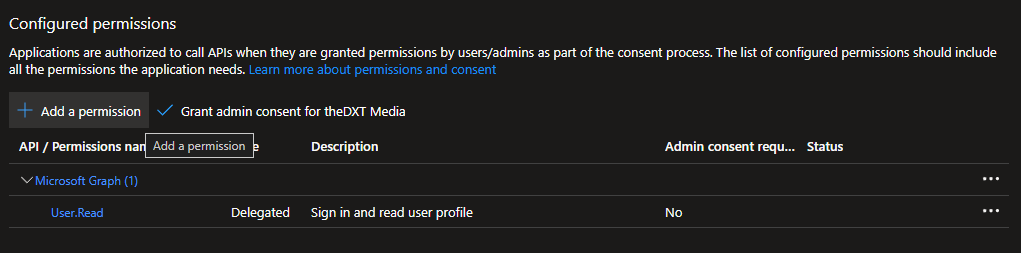
- Click on Grant Admin consent.
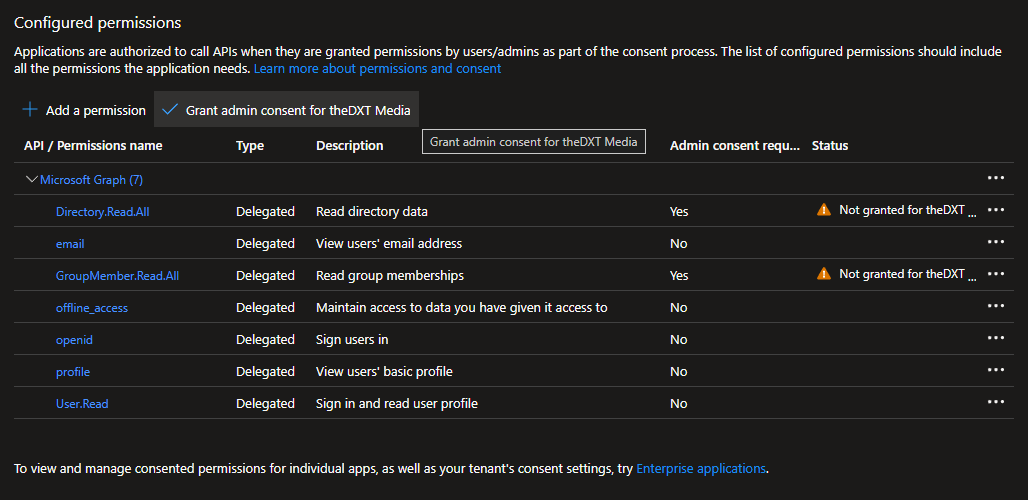
- Click Yes to confirm you are granting admin consent.

Once admin consent is granted, the permissions should look like this.

I want to lock down the users who can authenticate to the Cloudflare Access application in Entra ID. I can do that by enabling the assignment required on the Cloudflare Access Enterprise application.
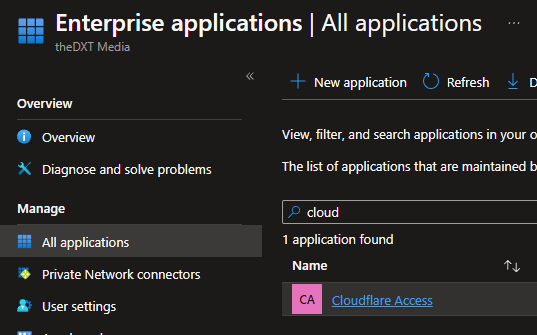
- Click on Click on Applications > Enterprise applications
- Click on the application with the same name you gave to the App registration.
In my case, that will be the application named Cloudflare Access.
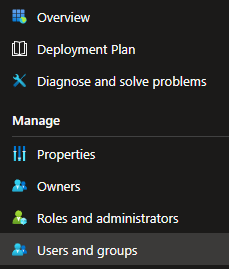
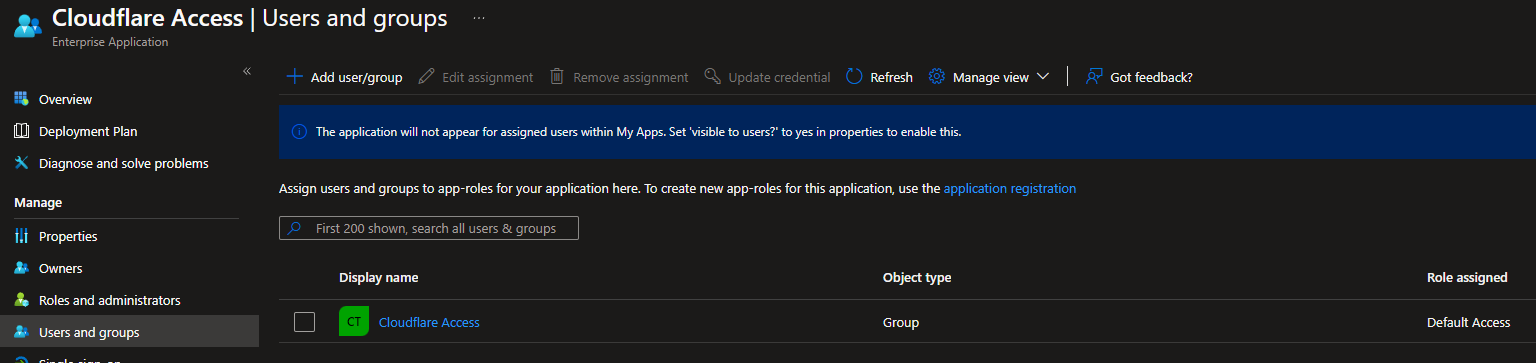
- Click on Users and groups.
- Add the groups of users for whom you want to be able to use Cloudflare Access.
In my example, I will be using a group named Cloudflare Access.
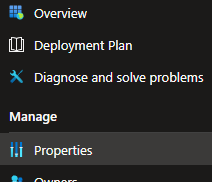
- Click on Properties
- Set Assignment required to Yes
- Save the changes.
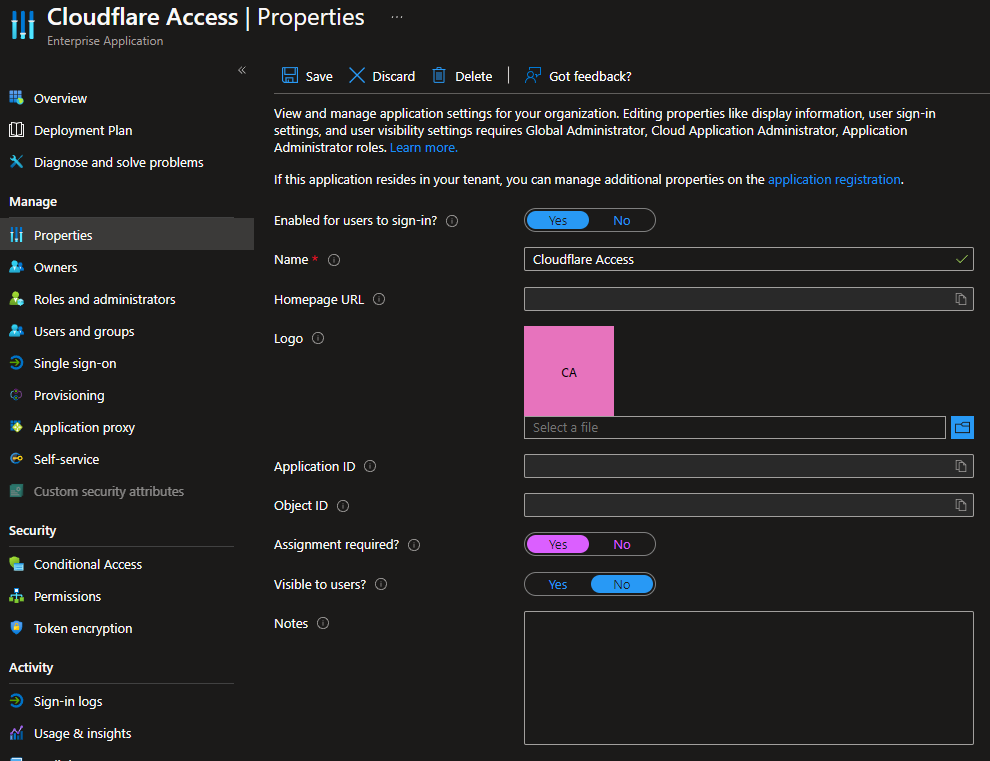
Now no one can use the Cloudflare Access application in Entra ID unless they are a direct member of the group.
Cloudflare Configuration
- Login to Cloudflare One
- Click on Settings
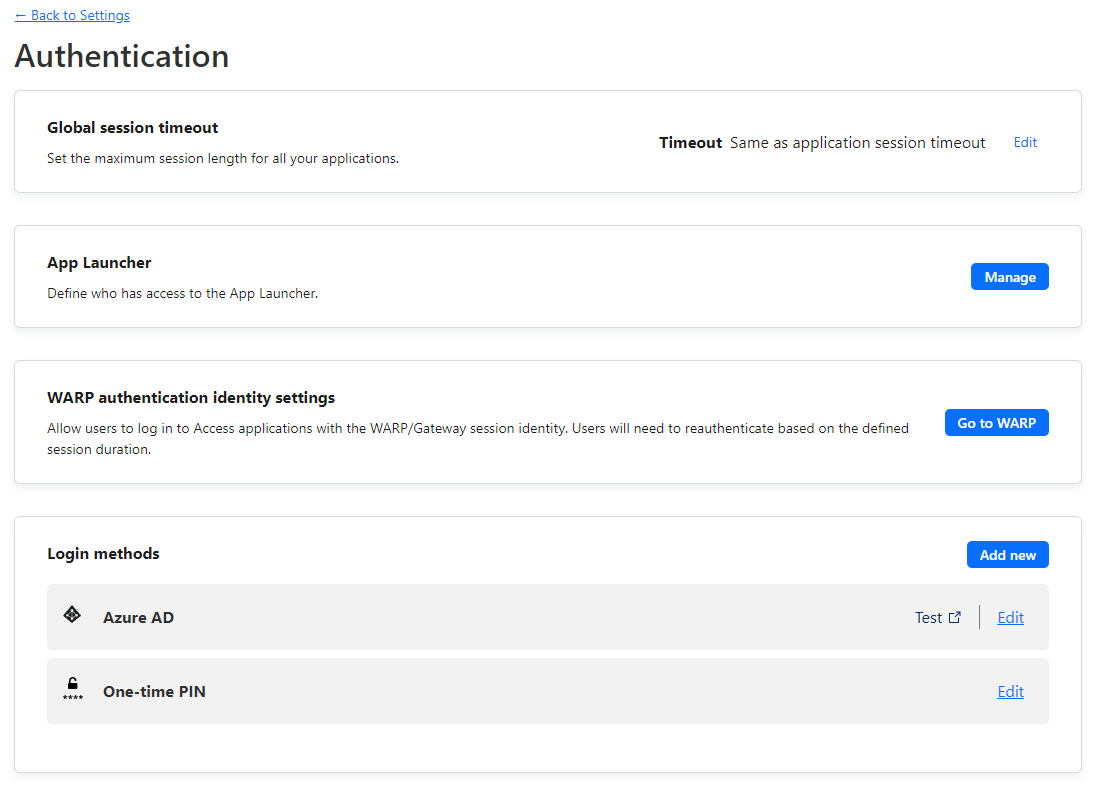
- Click on Authentication

- Under Login methods, click on Add new.

- Click on Azure AD

- You can change the name to something else if you want. I’m going to leave it as Azure AD.
- For Application ID, we need to enter the Application (client) ID from Entra ID.
- For Application secret, we need to enter the client secret Value we noted earlier from Entra ID.
- For Directory ID, we need to enter the Directory (tenant) ID we noted earlier from Entra ID.
- Enable Support groups
- Click Save.

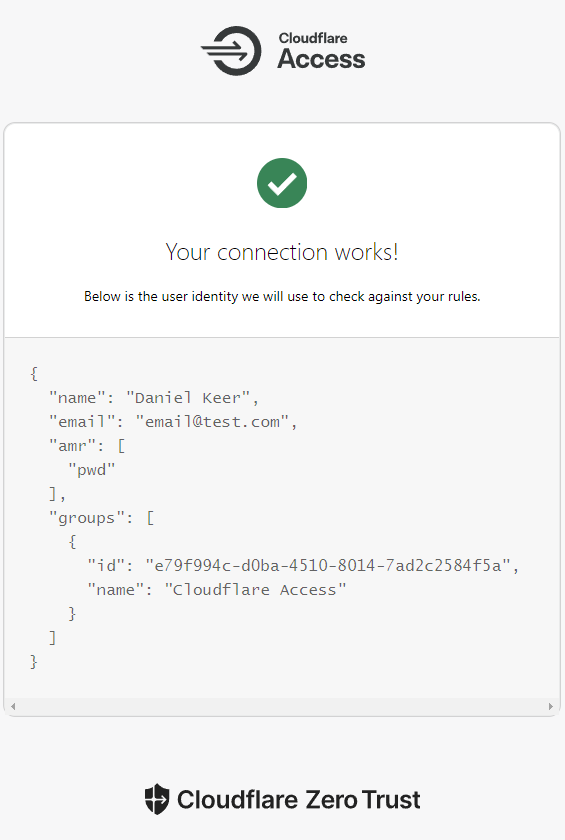
Let’s test and ensure everything works between Cloudflare and Microsoft Entra ID.
- Click Test
If everything works, you should see a screen like this.
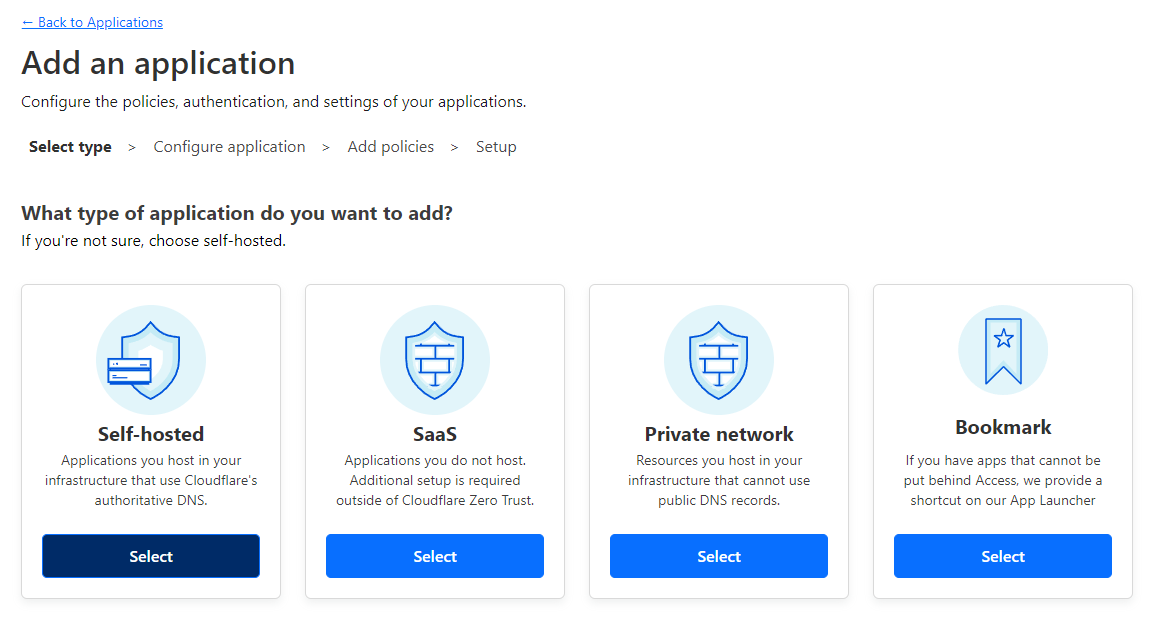
- Click on Access > Applications.

- Click on Add an application.

- Select Self-hosted
- Enter the Application name. I will use the name example.
- For the Block pages, I’ve left it as the default and entered the Cloudflare error text to display the message to contact IT support.
- For Identity providers, disable the Accept all identity providers option.
- Select Azure AD
- For Instant Auth, Enable the Skip identity provider selection if only one is configured option.
- Click Next.

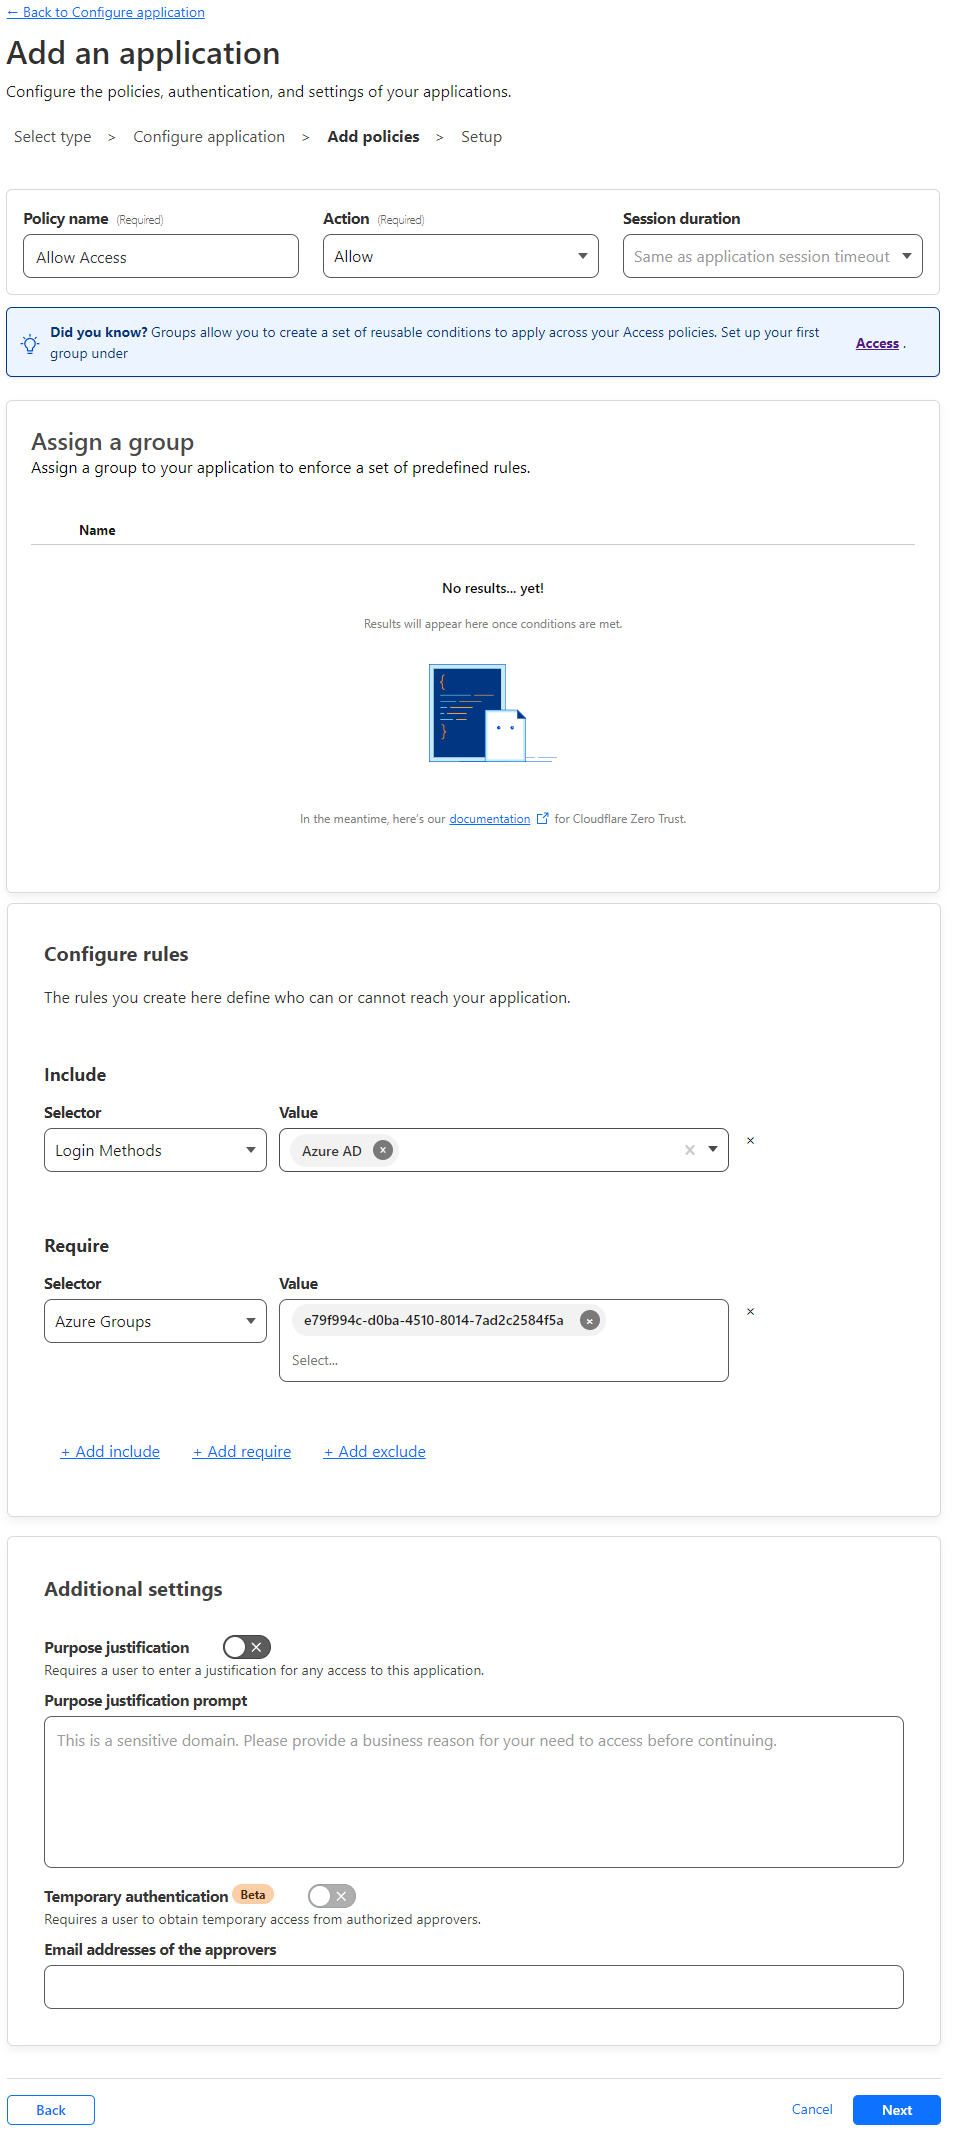
- Give the Policy a name. I will use the name Allow Access with the Action of Allow and the Session duration set to the same as application session timeout.
- For Configure rules
- Set the include selector to Login Methods and select Azure AD.
- Add a require with a selector of Azure Groups, and I will enter the Object ID of the group I want to allow access to the application as the Value.
- Click Next.
- Under the Cookie settings, adjust them as needed. I am enabling HTTP Only as my application will work correctly with this.
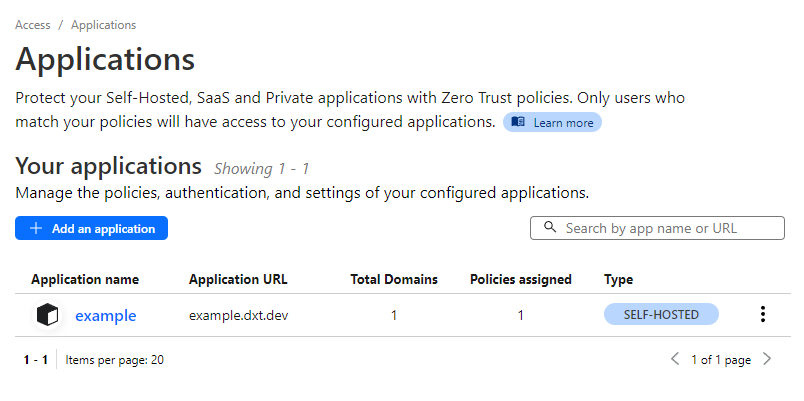
- Click Add Application.

We should now have the application configured, and the Applications screen should look like this.
If we try to access the application, we will have to satisfy the Cloudflare Access conditions before we can do so.
Because we have it configured to automatically assume the use of Entra ID when visiting the application, the user will see the Microsoft 365 login prompt before they can access the application.
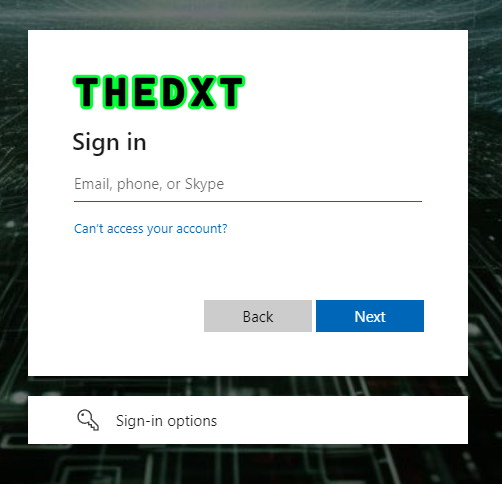
This configuration also takes advantage of Microsoft 365 SSO and will reduce the number of times the user sees the additional login prompt before accessing the application.
If a user is not a member of the required groups specified in the Entra ID Enterprise application, they will get a Microsoft 365 error screen that looks like this.

Another error message users can encounter is the Cloudflare Access denied screen. This typically shows up if you don’t lock down the Microsoft Entra ID application to assigned access and you specify the group as a required group in Cloudflare only and the user is not a member of the group.

This configuration is ideal for web applications lacking MFA support, commonly seen with SCADA and internal corporate web applications.
If you want to read more about SSO with Cloudflare Access here is the Cloudflare documentation about it.


4 thoughts on “Cloudflare Access IdP with Entra ID”
Thanks a lot for providing such a detailed tutorial!
It helped us a lot to configure secure access to self-hosted app
You are most welcome! I’m glad that it helped.