Swap Microsoft 365 Licenses with Microsoft Graph
A few years ago I wrote a post about how to Swap Office 365 Licenses. Microsoft has deprecated the cmdlets that were used in that post specifically Set-MsolUserLicense and has replaced them with Microsoft Graph cmdlets specifically Set-MgUserLicense.
In this post, I will show step-by-step how to swap Microsoft 365 licenses using Microsoft Graph and PowerShell.
Prerequisites
- Microsoft Graph installed and configured. If you don’t know how to do that. Here’s my blog post about the Microsoft 365 Setup for Microsoft Graph PowerShell SDK
The Process
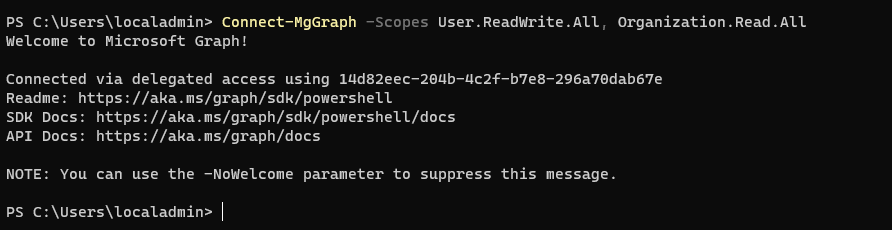
We need a few more permissions than the default permissions for Microsoft Graph.
- Run the following command to connect Microsoft Graph to your Microsoft 365 tenant with the necessary permissions
Connect-MgGraph -Scopes User.ReadWrite.All, Organization.Read.All
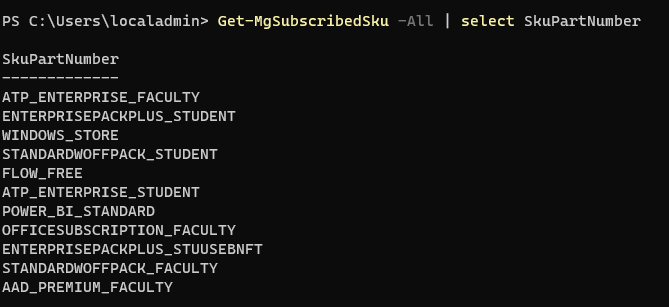
Now let’s find out what SKUs we have to work with.
- Run the following command to get the list of SKUs in your Microsoft 365 tenant
Get-MgSubscribedSku -All | select SkuPartNumber
If you aren’t sure what product the SKU correlates to Microsoft has made a decoder ring, you can find that here.
Now for the license swap part, I’ve created a PowerShell script to do it.
…