
Upgrade Palo Alto HA Pair (Active/Passive) with CLI
I’m a big fan of CLI, I love to use it when I can, it always feels more complete and absolute. A while back I posted how to Upgrade Palo Alto Firewall HA Pair (Active/Passive) in that post I only covered the GUI method this post will detail how to complete everything with CLI only.
Here is step-by-step how to upgrade a Palo Alto Networks firewall in an Active/Passive High Availability Pair with CLI only.
In my example, I am running a Palo Alto Active/Passive HA pair. The firewall named DXT-FW-PA01 is the primary firewall and is the currently Active firewall. The firewall named DXT-FW-PA02 is the secondary and Passive firewall. Both are running PAN-OS 10.2 version 10.2.3. I will be upgrading them to PAN-OS 11.0 version 11.0.2-h2 which is the current preferred release for that version.
The Process
- Confirm local firewall admin access
- Confirm management network access
- Confirm the upgrade path
- Review the release notes
- Review the upgrade and downgrade considerations
- Complete the upgrade checklist
- Check Content Updates
- Disable HA Preemptive Election
- Export running config on each firewall
- Export tech support files on each firewall
- Download the main version and preferred version of PAN-OS
- Make the primary firewall the Passive firewall
- Upgrade the primary firewall
- Make the primary firewall the Active firewall
- Upgrade the Secondary firewall
- Confirm all works
- Enable HA Preemptive Election
Confirm Upgrade Path
- You always need to do every PAN-OS update as in you can’t jump from 9.1 to 11.0 you need to do 10.0 then 10.1 then 10.2 then 11.0
- Check your upgrade path with Palo Alto’s documentation. Here is the upgrade path to PAN-OS 11.0.
- Check what the preferred releases are for your upgrade path. You can do that here. (You will need a Palo Alto support account to access the link)
Review Release Notes
- Review the release notes for the version you are upgrading to for each version along your upgrade path. Here are the release notes for PAN-OS 11.0.
Review Upgrade/Downgrade Considerations
- Review the upgrade and downgrade considerations. Here are the Upgrade/Downgrade Considerations for PAN-OS 11.0.
Upgrade Checklist
- Review and complete the PAN-OS Upgrade Checklist. Here is the Upgrade Checklist for PAN-OS 11.0.
Check Content Updates
- Connect to the currently Active firewall with SSH.
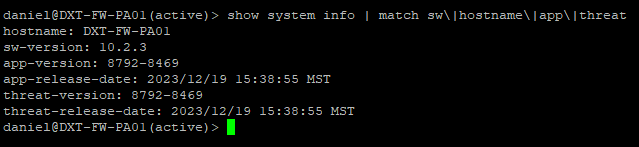
- Run the following command to list out the PAN-OS version you are running along with the hostname and application and threat content versions.
show system info | match sw\|hostname\|app\|threat
- Run the following command to check if there are any new versions of the content updates.
request content upgrade check
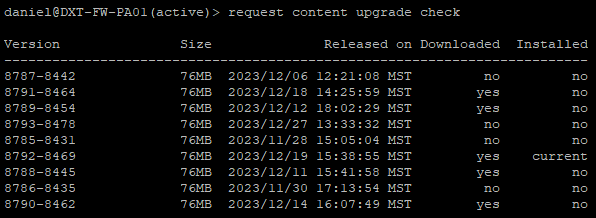
Pro tip: The newest one isn’t always the top one listed.
- Run the following command to download the latest content updates and sync it to the HA peer.
request content upgrade download latest sync-to-peer yes

If you want to monitor the progress of the job run the following command with your job id show jobs id

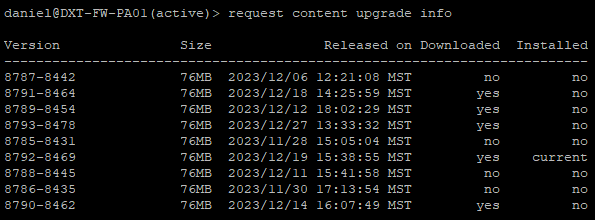
- Run the following command to confirm the latest content update is downloaded to the firewall
request content upgrade info
- Run the following command to install the newly downloaded content update and sync it to the HA peer.
request content upgrade install sync-to-peer yes version latest

- Confirm that the latest content update is now installed by running the following command
request content upgrade info

HA Election Settings
This only needs to be done on the primary firewall and only if you have it enabled.
- Enter the configuration mode by running the command
configure

- Run the following command to output your HA election settings
show deviceconfig high-availability group election-option

If preemptive is set to yes make a note of that. If it is set to no move on to the Export Running Config section.
- Run the following command to disable the HA preemptive election
set deviceconfig high-availability group election-option preemptive no

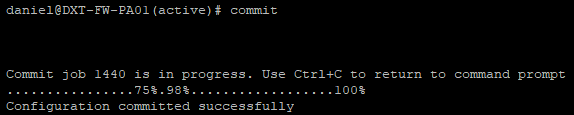
- Run the following command to save the changes
commit
- Exit configuration mode by running the command
exit

Export Running Config
On each firewall, we need to export the running configuration. You will need some kind of TFTP server, you can use something like SolarWinds TFTP.
- Run the following command to export the running config, replace TFTP_IP with the IP of your TFTP server
tftp export configuration from running-config.xml to TFTP_IP
For me, that command will look like tftp export configuration from running-config.xml to 192.168.3.125

- Repeat on the Passive firewall.

Export Tech Support File
On each firewall, we need to export the tech support file. I personally always prefer doing this with CLI as it is much more verbose and less of a feeling that the process is hung or something.
- Run the following command to generate and export your tech support file, replace TFTP_IP with the IP of your TFTP server
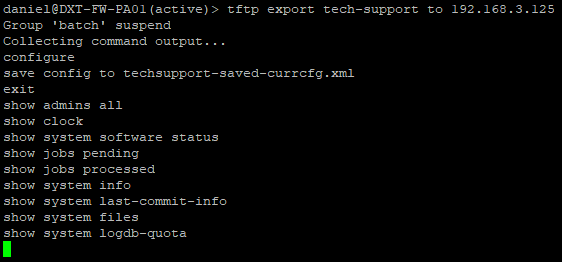
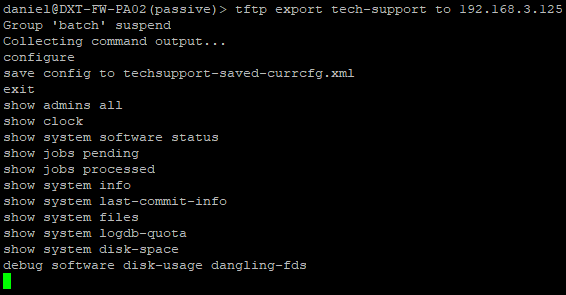
tftp export tech-support to TFTP_IP
For me, that command will look like tftp export tech-support to 192.168.3.125
- Repeat the steps on the Passive firewall.
Download PAN-OS Software
- Run the following command to check for the latest versions of PAN-OS that are available from Palo Alto.
request system software check
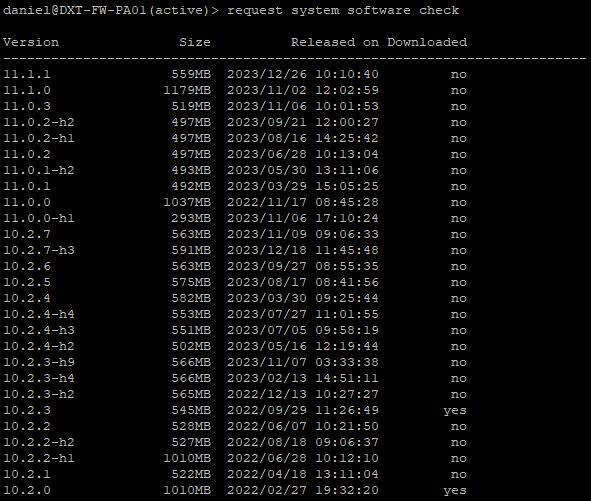
In my setup, I will be going from 10.2.3 to 11.0.2-h2. I will need to download PAN-OS versions 11.0.0 and 11.0.2-h2.
- Run the following command to download the version you need and sync it to the HA peer.
request system software download sync-to-peer yes version 11.0.0

- Once completed repeat the download command to get to the preferred release. I will run
request system software download sync-to-peer yes version 11.0.2-h2

Suspend HA on the Active Firewall
- Run the following command to suspend HA on the currently Active firewall
request high-availability state suspend

- Confirm that your secondary firewall is now active by logging into it. It should no longer say passive in SSH. If you are already logged into SSH on the secondary firewall just press enter and it should switch.

- Confirm that traffic is still working to confirm that your failover worked.
Install PAN-OS on the Passive Firewall
Now that DXT-FW-PA01 is the Passive firewall we can perform the install.
- Run the following command to install PAN-OS
request system software install version 11.0.2-h2

- Confirm that you want to continue by pressing y
- Monitor the install status by running
show jobs idwith your job id number.

- Once PAN-OS is installed we need to reboot. Run the following command to reboot the firewall
request restart system

- Once the firewall is online again confirm that the install was successful by running the following command to confirm the version
show system info | match sw\|hostname

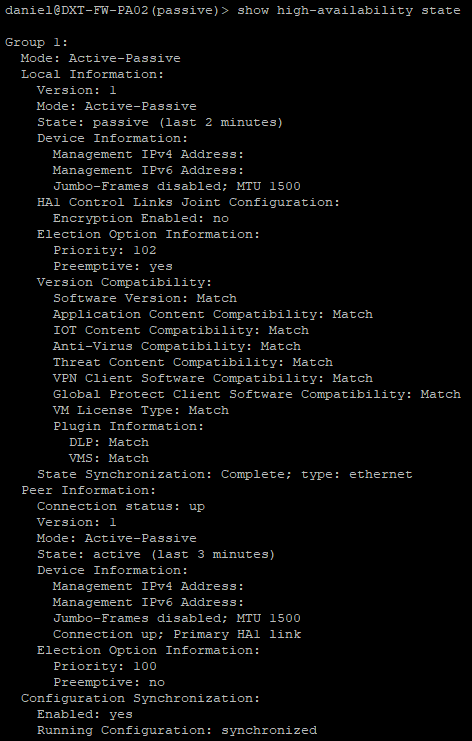
Your SSH prompt should no longer show as suspended, if you want to double-check that your firewall is no longer in HA Suspended mode and to view more details about the HA status run the following command show high-availability state
Secondary Firewall
Now that the primary firewall is all upgraded we need to upgrade our secondary firewall.
- Suspend the HA on the secondary firewall

Suspending the HA on the secondary firewall will make the primary firewall the Active firewall again.
- Confirm that the primary firewall is now the Active firewall.

- Confirm that traffic is working.
- Now that the secondary firewall is the Passive firewall again repeat the steps in the section Install PAN-OS on the Passive Firewall as we will be performing them on the secondary firewall.
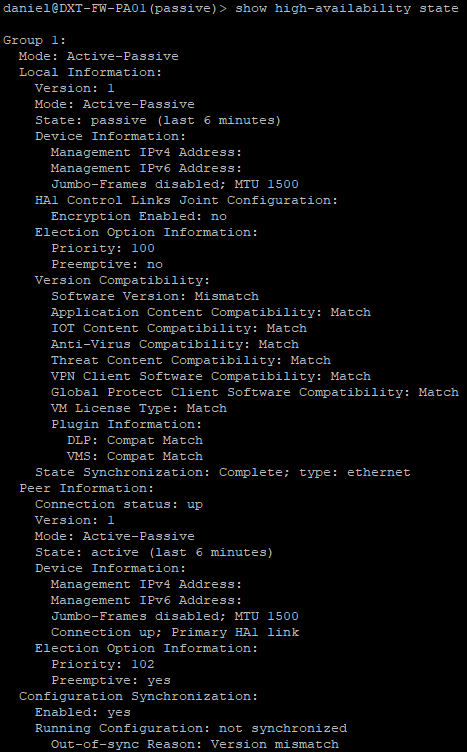
- Once the secondary firewall is upgraded confirm that the HA state no longer has any issues by running the following command
show high-availability state
Enable HA Election
If you disabled HA election we need to turn that back on.
- Connect to the primary firewall.
- Enter the configuration mode by running the command
configure
- Run the following command to enable the HA preemptive election
set deviceconfig high-availability group election-option preemptive yes

- Run the following command to save the changes
commit
- Exit configuration mode by running the command
exit
That’s all it takes to upgrade a Palo Alto Networks Firewall with CLI only in an Active/Passive High Availability configuration.
Palo Alto does have some basic documentation about performing a PAN-OS upgrade with CLI you can find that here.


2 thoughts on “Upgrade Palo Alto HA Pair (Active/Passive) with CLI”