
ONIE and Onyx (MLNX-OS) Install
Switches that support ONIE (Open Network Install Environment) are amazing switches because you can just change which NOS (Network Operating System) you are running relatively easily.
ONIE was created by Cumulus Networks in 2012. In 2020 Nvidia bought Cumulus just after purchasing Mellanox the year before.
I will detail step-by-step how to install ONIE and how to install the Onyx (MLNX-OS) NOS on the SN2410 switch. The process for other NOS and other switches should be similar.
Prerequisites
- Compiled ONIE recovery image for your switch.
I need the one for Mellanox/Nvidia that file will have a name similar to this onie-recovery-x86_64-mlnx_x86-r0.iso
- The NOS install file.
I’ll be installing Onyx, the Onyx install file will have a name similar to this one X86_64-3.9.3202-installer.bin if you google around you should be able to find it.
- Console connection to the switch
- USB drive
- Network cable plugged into mgmt0 on a network with DHCP.
- BIOS password if one is applied. Here’s how to reset the BIOS password for Onyx (MLNX-OS) switches. If the SSD in the switch has nothing on it then you can get by without the BIOS password.
Installing ONIE
- Download the most recent version of Rufus.
- Write the ONIE recovery image to the USB drive.
The default settings should be fine. This is what I used.
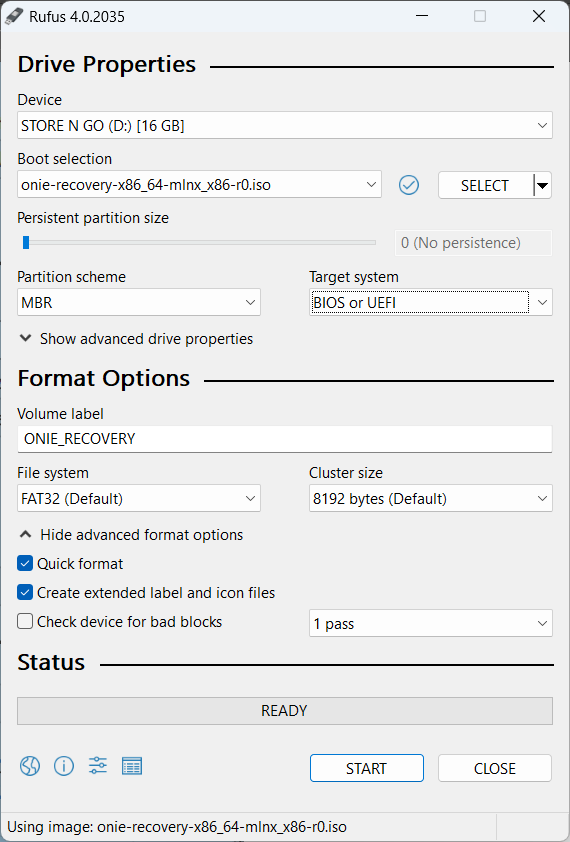
If Rufus detects ISOHybrid then select Write in ISO Image mode.

- Plug the USB drive into the switch
- Connect to the console of the switch
The Console Settings are:- Speed:
115200 - Data bits:
8 - Stop bits:
1 - Parity:
None - Flow control:
None
- Speed:
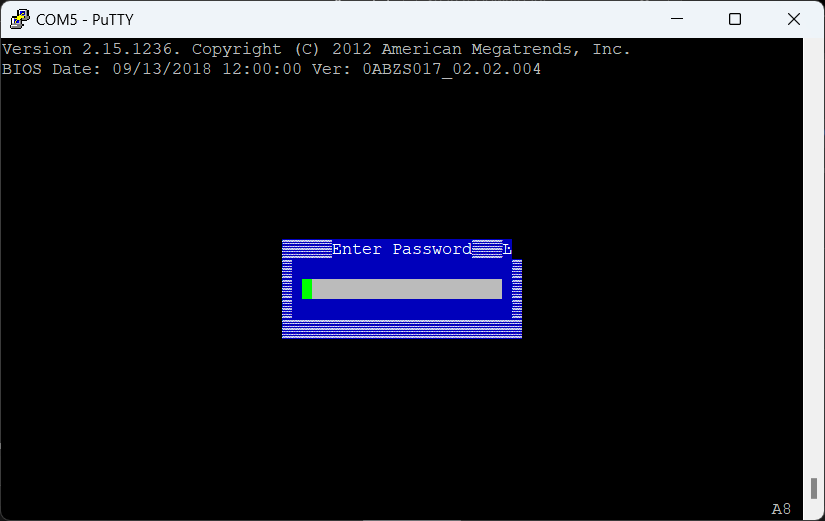
- As the switch boots press
Ctrl+Bto enter BIOS and enter the passwordadminor your custom BIOS password.
If there is nothing installed on SSD in the switch it will boot off USB even if you don’t have the BIOS password.
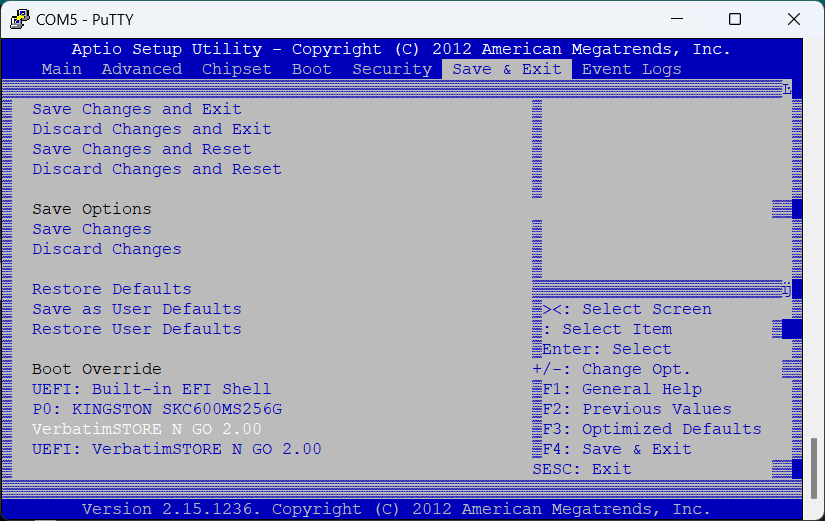
- Select the Save & Exit menu and select your USB drive from the Boot Override options. (don’t select UEFI as there have been known issues with some switches getting stuck in boot loops)
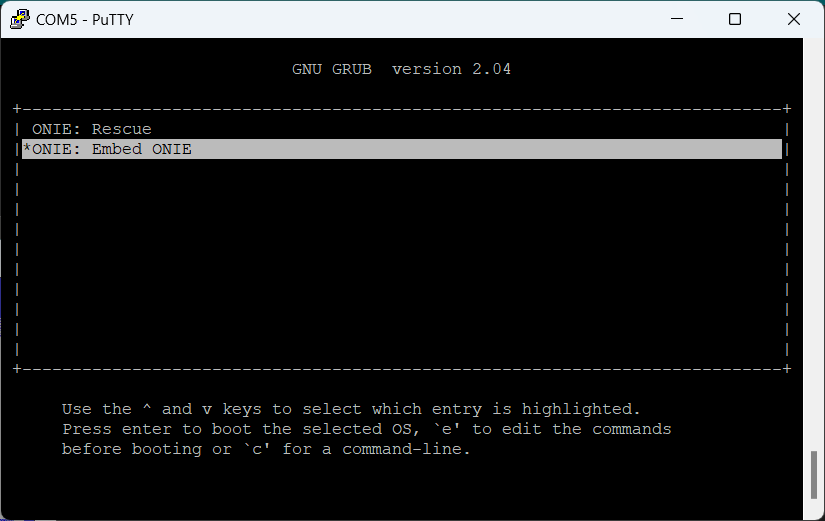
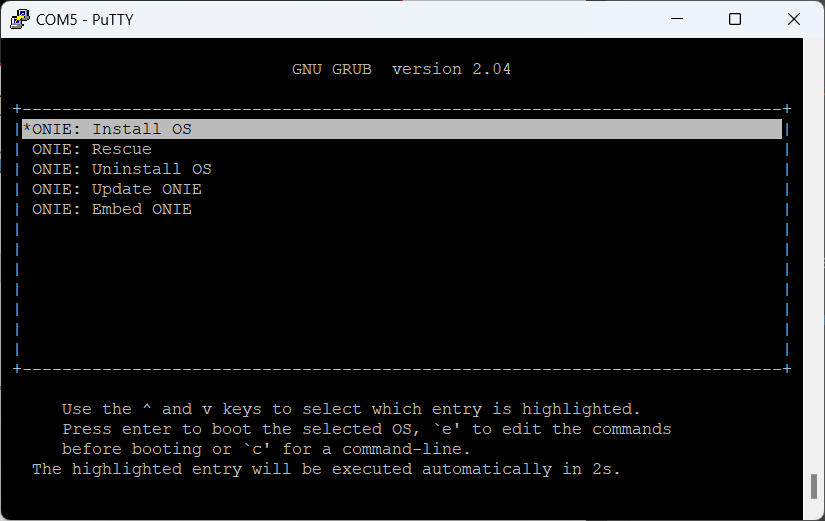
- Select ONIE: Embed ONIE
- ONIE will begin installing
- Once the ONIE install is completed the switch will reboot.
Installing NOS
In my case I will be installing Onyx however these steps should be similar for other NOS.
- Select ONIE: Install OS
ONIE has a discovery mode that will keep looking for the install file, we need to tell it to stop doing that.
- Run the following command to stop the ONIE discovery
onie-stop

Now we need to copy the NOS install file to the switch. ONIE support a few methods to do that such as HTTP, FTP, TFTP, and SCP.
I tried with TFTP but I found it to be very slow, I ended up using a quick HTTP server called HFS.
- Run the following company to copy the install file to /tmp/
wget http://IP_HTTP_Server/FOLDER/INSTALL_FILE.bin -P /tmp/
For me that command will look like this wget http://192.168.3.105/TFTP-Root/X86_64-3.9.3202-installer.bin -P /tmp/

Now we need to install the NOS.
- Run the following command to install the NOS
onie-nos-install /tmp/INSTALL_FILE.bin
For me that command will look like onie-nos-install /tmp/X86_64-3.9.3202-installer.bin
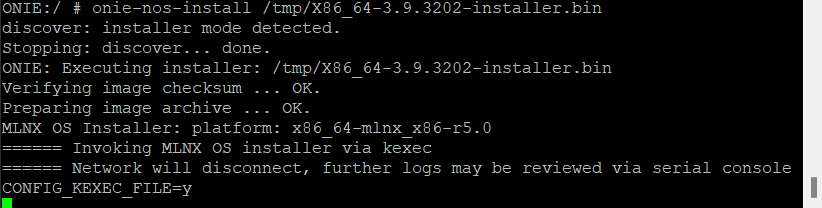
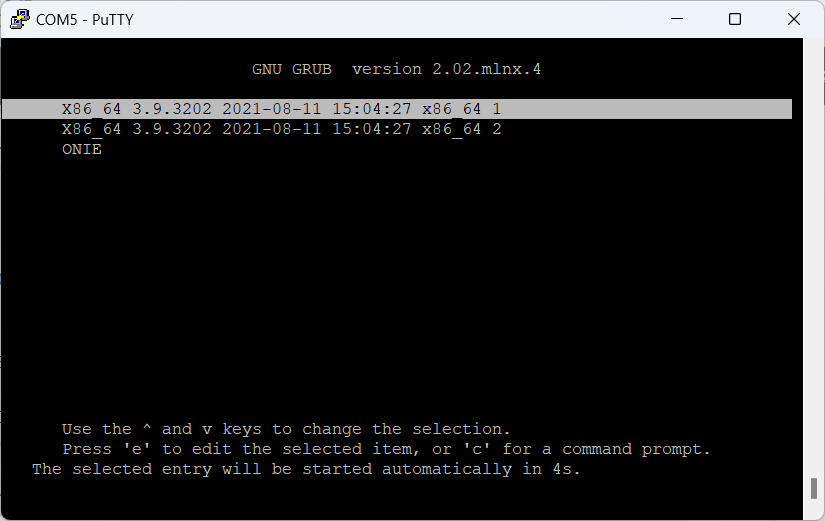
- Once the NOS install is completed the switch will reboot and load the NOS you just installed.
That is all it takes to install ONIE and NOS onto a switch.
If you want to read more about ONIE you can do so on their website here https://opencomputeproject.github.io/onie/

2 thoughts on “ONIE and Onyx (MLNX-OS) Install”
do you have the X86_64-3.9.3202-installer.bin file
I like the way you wrote the instructions step by step. For a beginner this is very helpful
I’m glad you found the post helpful.
Unfortunately I do not have the installer.bin file.