Latest posts

Delete Microsoft 365 Tenant

There are various reasons why you may need to delete a Microsoft 365 tenant. The most common one I run into is after a corporate merger or acquisition. In this post, I will show step-by-step how to delete a Microsoft 365 tenant.

Prerequisites

  • All invoices are paid
  • All domains are removed other than the CompanyName.onmicrosoft.com domain name
  • All users are deleted and deleted from deleted users except for one Global Admin.
  • All App registration and Enterprise applications are deleted.
  • No Azure subscriptions.
  • All licenses are deleted and removed.

Completing all of those perquisites will take time and sometimes things are stuck but it is possible to complete all of them.

The Process

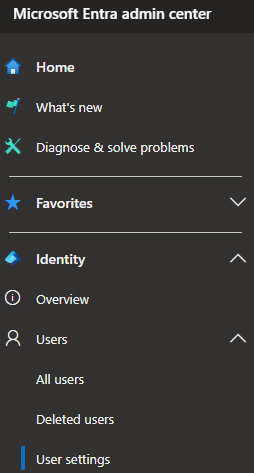
  • Login to Entra admin center
  • Click on Identity > Overview
  • Click on Manage tenants
  • Select the tenant and click Delete
  • It will check if the tenant can be deleted.

Saved Browser Passwords

It’s super convenient to save your passwords to your web browser but it isn’t very secure. In this post, I will show you step-by-step how to easily reveal a saved browser password.

Normally if you want to view a saved password you need to go into settings and click on it, then enter the password of the logged-in user account to view it. This isn’t always true, let me show you how to get around this.

The Process

  • Go to any website that has the login credentials saved.
  • Right-click on the password field and select inspect or just inspect the whole page.
  • Find the line for the password field this should show up as type="password"

Control Microsoft 365 Group Creation

Controlling who can and can’t create Microsoft 365 groups can be a very powerful tool. In this post, I will detail step-by-step how to prevent users from creating Microsoft 365 groups unless they are members of a specific security group.

Prerequisites

  • Microsoft Entra ID P1 or P2 is needed for the users who are allowed to create groups. (The old name was Azure Active Directory Premium P1 or P2)
  • Microsoft Graph Beta Installed.

The Process

  • Login to Microsoft Entra admin center
  • Click on Groups > All Groups
  • Click on New group
  • Make sure the Group type is set to Security.
  • Give your group a name. In my example, I will use the name Group Creators.
  • Add anyone that you want to have the power to create Microsoft 365 Groups to the security group you just created.
  • Open PowerShell ISE.
  • Copy the script from Microsoft here.
  • On line 6 enter the name of the security group you just created. In my case, that group is called Group Creators.

The beginning of the script should look something like this.

Import-Module Microsoft.Graph.Beta.Identity.DirectoryManagement
Import-Module Microsoft.Graph.Beta.Groups

Connect-MgGraph -Scopes "Directory.ReadWrite.All", "Group.Read.All"

$GroupName = "Group Creators"
$AllowGroupCreation = "False"

$settingsObjectID = (Get-MgBetaDirectorySetting | Where-object -Property Displayname -Value "Group.Unified" -EQ).id
Code language: PowerShell (powershell)

VMware Tools on Windows Server Core

I’m a fan of using Microsoft Windows Server Core for as many things as possible when it makes sense. In this post, I’ll cover step-by-step how to install VMware Tools on Windows Server Core via the GUI and PowerShell.

The GUI Way

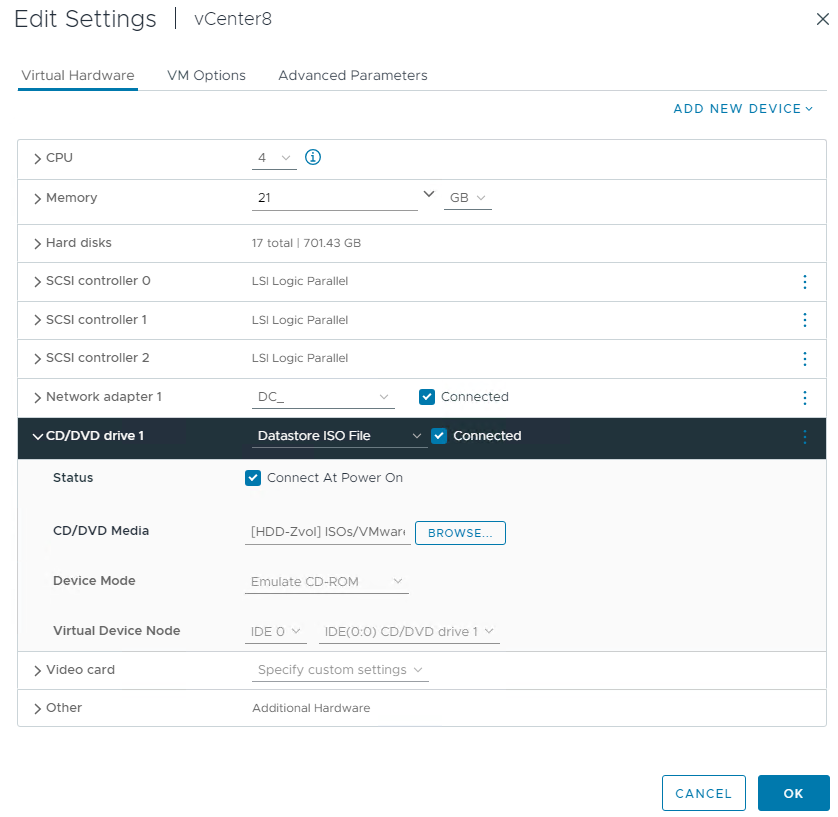
  • From ESXi or vCenter mount VMware tools to the VM.
  • Login to the Windows Server Core VM.
  • Change to the D drive (or whichever drive your disk drive is on your install)
  • Enter the following command to being the install .\setup64.exe

Sometimes the VMware tools install screen hides behind the command line window.

  • Click Next
  • Select Typical and click Next.
  • Click Install.

Policy Based Forwarding

I needed to route an FQDN (Fully Qualified Domain Name) down an IPSEC VPN tunnel but couldn’t because it was an external address and the IP is dynamic so I wasn’t able to just make a static route to force it down the IPSEC VPN tunnel. To solve this I discovered something called policy based forwarding.

In this post, I will explain the setup and the reason for why I used policy-based forwarding to solve my problem and I will show step-by-step how to do all of this with a Palo Alto Networks firewall.

The Background

For the setup, Palo Alto Networks firewalls are being used. There are two sites the Head Office and the Data Center. There is an IPSEC VPN tunnel between both sites. The Data Center firewall also has various vendor IPSEC VPN tunnels.

The Head Office firewall has its own internet connection as does the Data Center firewall. The Head Office firewall is configured with static routes to only send traffic for the Data Center down the Data Center IPSEC tunnel. All other traffic goes out the Head Office WAN.

Configuring it this way allows for a very simple and basic SD-WAN type configuration, only essential traffic is sent down the Data Center IPSEC VPN tunnel freeing up the IPSEC tunnel from normal internet traffic that does not need to be routed to the Data Center.

The Problem

There are two vendors we’ll call them Vendor1 and Vendor2. Both of them have an Oracle database that users at the Head Office site need to connect to.

Vendor1 has an IPSEC VPN tunnel from the Data Center firewall to the firewall at Vendor1. The Oracle database on their end is on a private IP. All traffic from the Data Center to Vendor1 is NATed behind a specific IP. Vendor1 only allows connections that are from that NATed IP over the IPSEC VPN tunnel.

Vendor2 won’t set up an IPSEC VPN tunnel. The Oracle database for Vendor2 is an FQDN we’ll say that the FQDN is Oracle.Vendor2.com the resolving IP of that FQDN can and will change without notice. The only way users can connect to the Oracle database at Vendor2 is for Vendor2 to add the WAN IP to an allowed list on their side. This process is slow and doesn’t scale well. To help with this we can have Vendor2 add a specific WAN IP to their allow list that we can NAT our traffic to them behind.

Now this works for the most part when you tunnel all traffic from the Head Office to the Data Center firewall. The problem with this solution is that it can be very costly as you may need an E-Line/MPLS/VPLS connection back to the Data Center and depending on the location they can be very expensive. If the Head Office moves to a new physical location coordinating an E-Line/MPLS/VPLS move is not always the quickest option. Ideally, we want a solution that allows for flexibility.

Yes, you could IPSEC tunnel all the Head Office traffic back to the Data Center but why? Why would you want Microsoft 365 traffic and other normal internet traffic going down your Data Center IPSEC tunnel? This just adds unnecessary overhead and can cause slowness, especially today as so many applications are web-based.

The overarching problem in all of this is how to scale it without needing to reach out to the vendors to add a new IP to the allow list or to build a new IPSEC VPN tunnel.

The Solutions

The solution for Vendor1 is simple because it’s a private IP. We can just add a static route on the Head Office firewall telling it to go down the Data Center IPSEC VPN tunnel and out the Vendor1 IPSEC tunnel from the Data Center.

ONIE Partition Exists Fix

I recently ran into an issue where I had uninstalled Onyx on my switch and I was trying to reinstall it but couldn’t because I was getting an error. Below is an example of the error.

partition exists - please uninstall first
EXT4-fs (sda3): couldn't mount as ext3 due to feature incompatibilities
cp: write error: No space left on device

There is also another variation of this error that I ran into. Below is an example of that error too.

umount: can't unmount /mnt/onie-boot: Invalid argument
/mnt/onie-boot not mounted
Error: You requested a partition from 1000MiB to 2000MiB (sectors 2048000..4095999).
The closest location we can manage is 1000MiB to 1000MiB (sectors 2047999..2047999).

The issue seems to be that somewhere along the lines the NOS uninstall process left behind a partition or two. To fix this we need to delete them. In this post, I’ll show you step-by-step how to delete the leftover partitions with ONIE.

The Fix

This fix works for the Nvidia/Mellanox switches and will likely work on other ONIE switches however, I’ve only tested this on Nvidia/Mellanox switches.

  • Connect to ONIE. I’ll be using a console connection and PuTTY.
  • Enter GNU Parted for the disk by running the command parted /dev/sda

In my case the disk was sda it’s likely the same in most setups.

Upgrade Palo Alto HA Pair (Active/Passive) with CLI

I’m a big fan of CLI, I love to use it when I can, it always feels more complete and absolute. A while back I posted how to Upgrade Palo Alto Firewall HA Pair (Active/Passive) in that post I only covered the GUI method this post will detail how to complete everything with CLI only.

Here is step-by-step how to upgrade a Palo Alto Networks firewall in an Active/Passive High Availability Pair with CLI only.

In my example, I am running a Palo Alto Active/Passive HA pair. The firewall named DXT-FW-PA01 is the primary firewall and is the currently Active firewall. The firewall named DXT-FW-PA02 is the secondary and Passive firewall. Both are running PAN-OS 10.2 version 10.2.3. I will be upgrading them to PAN-OS 11.0 version 11.0.2-h2 which is the current preferred release for that version.

The Process

Confirm Upgrade Path

  • You always need to do every PAN-OS update as in you can’t jump from 9.1 to 11.0 you need to do 10.0 then 10.1 then 10.2 then 11.0
  • Check your upgrade path with Palo Alto’s documentation. Here is the upgrade path to PAN-OS 11.0.
  • Check what the preferred releases are for your upgrade path. You can do that here. (You will need a Palo Alto support account to access the link)

Review Release Notes

Review Upgrade/Downgrade Considerations

Upgrade Checklist

Check Content Updates

  • Connect to the currently Active firewall with SSH.
  • Run the following command to list out the PAN-OS version you are running along with the hostname and application and threat content versions.  show system info | match sw\|hostname\|app\|threat

TrueNAS Install Tweaks

I’m a long-time user of TrueNAS going back to the days when it was still called FreeNAS. I’ll always love the FreeNAS logo. In this post, I’ll go over step-by-step some of the tweaks that I like to make on a fresh install for TrueNAS specifically TrueNAS Core or TrueNAS Enterprise.

The Tweaks

HTTPS Redirection

HTTPS is always a good idea. Here is how to enable HTTP to HTTPS redirection.

  • Click on System > General
  • Select Web Interface HTTP -> HTTPS Redirect and click Save.
  • Confirm that you are restarting the web service by selecting Confirm and click on Continue.

Now if you try to access your TrueNAS on HTTP it will automatically send you over to HTTPS.

Autotune

Autotune is a Python script that is created by iXsystems that will automatically optimize your TrueNAS. If you want to see what the script is doing here is the location of it /usr/local/bin/autotune this is on by default on systems purchased from iXsystems.

  • Click on System > Advanced

Palo Alto Config Set Commands

By default Palo Alto Networks firewalls export their configuration as an XML file which is great however, I’m more used to set commands such as the ones commonly used in switches. Fortunately, there’s a way to have the best of both worlds.

In this post, I’ll show you step-by-step how to output the Palo Alto running config to set commands and show a way to export it.

The Process

  • Connect to the firewall with SSH (I’ll be using PuTTY)
  • Run the following command to change the command output from XML to set commands set cli config-output-format set
  • Enter the configuration mode by running the following command configure
  • Now when you run the show command it will show you the set command versions of the configuration.

Exporting

I wasn’t able to find a way to easily export the running config of PAN-OS in the set format without using paid tools like Kiwi CatTools however, I did find a workaround by using PuTYY logging.

Microsoft 365 Report Message Button

Providing your users with a centralized and user-friendly way to report phishing, junk, and non-junk emails is a great quality-of-life improvement for everyone.

In this post, I’ll cover step-by-step how to deploy the Microsoft Report Message add-in for Microsoft Outlook with Microsoft 365.

  • Login to the Microsoft 365 admin center.
  • Click on Settings > Integrated apps
  • Click on Get apps
  • Search for Report Message