Convert a system with VMware Converter
There are a few ways to convert a system either P2V (Physical to Virtual) or V2V (Hyper V to VMware). This will show you how to convert a system using VMware vCenter Converter Standalone Client.
Before you start you should check a few things to make the whole process streamlined.
- Check that the system is fully up to date (you might get stuck in an update trap if you don’t)
- Check that you have remote access to the system (so that if needed you can at least get back into the system easily)
- Make a note of the IP configurations (you will likely need to re add them)
- If the system a domain member make sure that you know the local admin username and password (this is so that if it fails to talk to the domain you at least have a way back into the system)
- Install VMware vCenter Converter Standalone Client on the system you will be converting.
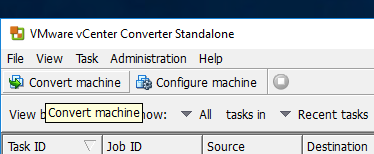
- Run VMware vCenter Converter Standalone Client as Admin
- Click on Convert machine
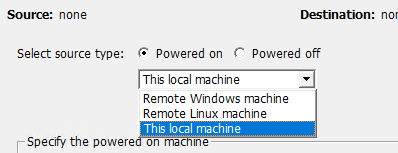
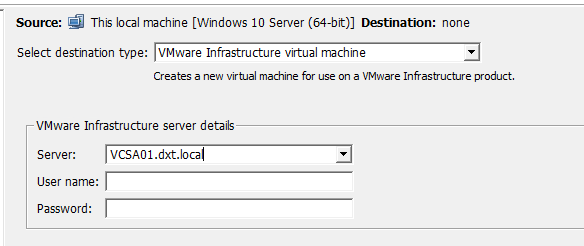
- Change the setting to Powered on and select This local machine
- Feed it your VCSA or ESXi info
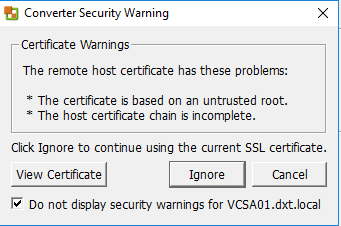
If you get an SSL warning click do not display and click Ignore
- Select the location where you want to put the VM and give it a name.

- Select the specific host and the datastore for the VM
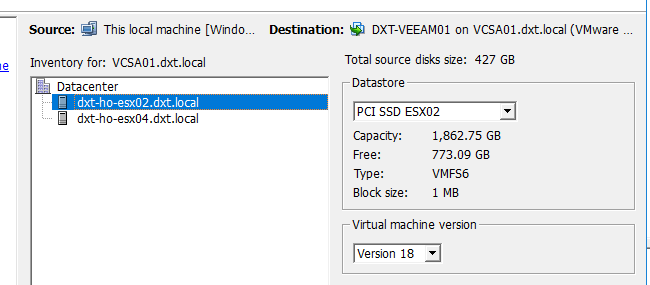
Here you can change some of the VM settings if needed
For this we will be seeding the system to the VMware server. Doing this will allow you to have a shorter outage and will let you do the final cutover at a later time.
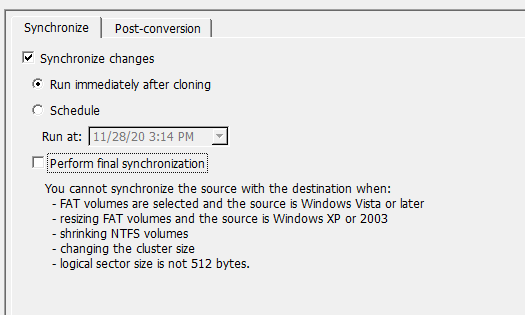
- Click on Edit beside Advanced options

- Click on Synchronize changes and uncheck final synchronization then click on Next.
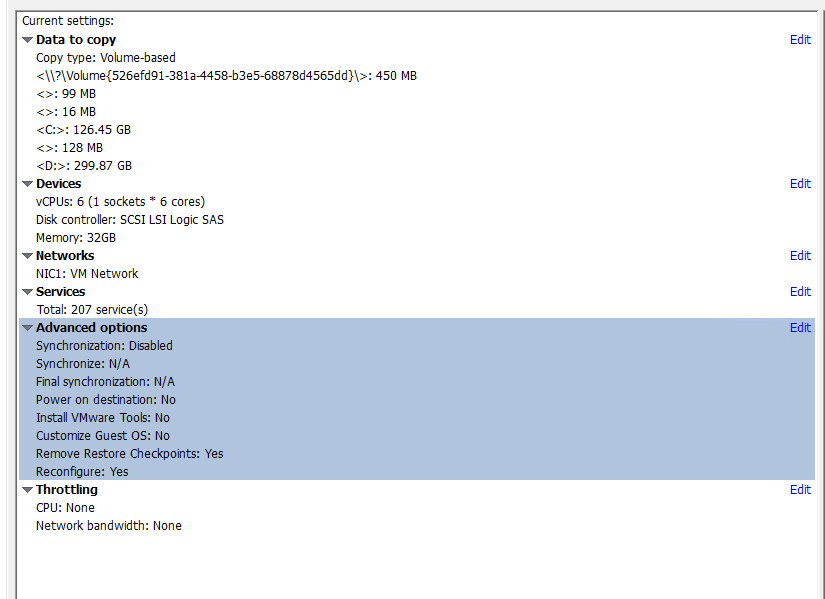
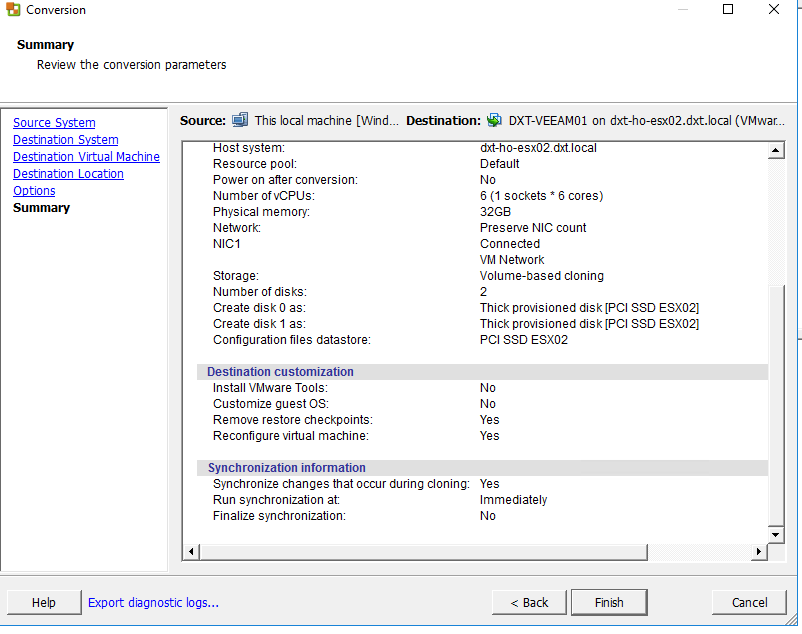
- Review the settings and make sure everything looks right.
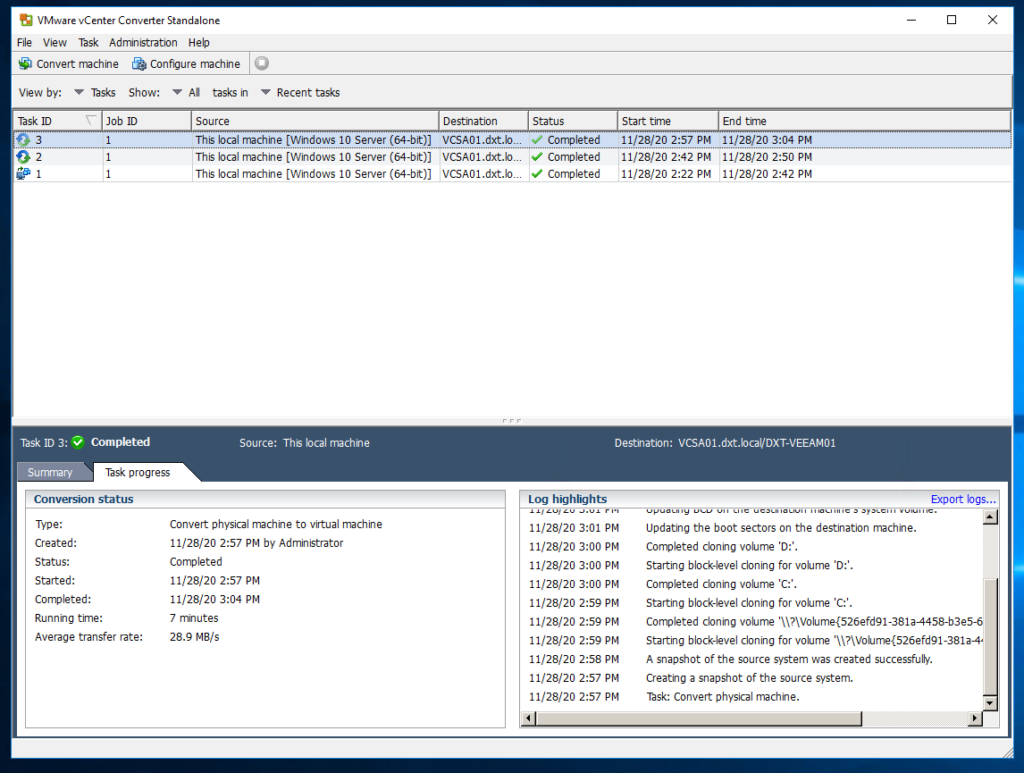
You will now see that it has created a task in VMware vCenter Converter Standalone

Right now VMware vCenter Converter Standalone is sending the system to your VMware server.
After it finishes the first task it will make another one to sync up any changes since the first task.
Now that we have the system seeded it’s time to do the final sync and cutover
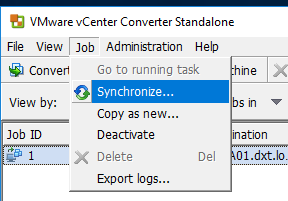
- Click on Job > Synchronize
- Click on Edit beside Advanced options
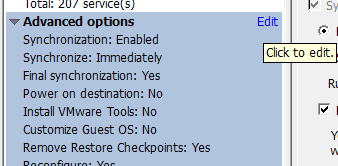
- Select Preform final synchronization
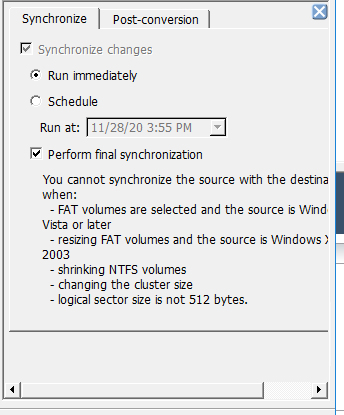
- Review everything if it looks correct click Finish

Right now VMware vCenter Converter Standalone is doing all the final tweaks needed to make the system work on your VMware server and sending over any information that has changed from the time of the first sync.
- Once it is finished turn off the system that you were converting.
- Turn on your converted system and set the IP and install VMware tools
- Uninstall VMware vCenter Converter Standalone Client
- It’s probably a good idea to defrag the system as a lot has changed.
That’s it you are done.