
Microsoft 365 Passkey Setup
Microsoft 365 supports hardware security keys with passkeys. Passkeys are sometimes called FIDO2. Passkeys are one of many ways you can secure your accounts.
In this post, I will show you step-by-step how to set up a passkey in Microsoft 365, including configuring a passkey with a break glass emergency access account.
Prerequisites
- Hardware security key that is FIDO2 compliant. (A common one is YubiKey 5)
- Microsoft Entra ID Authentication Method for Passkey (FIDO2) and Temporary Access Pass enabled.
The Process
- Login to Microsoft 365.
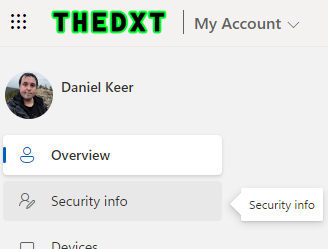
- Click on your account in the top right and click on View account.

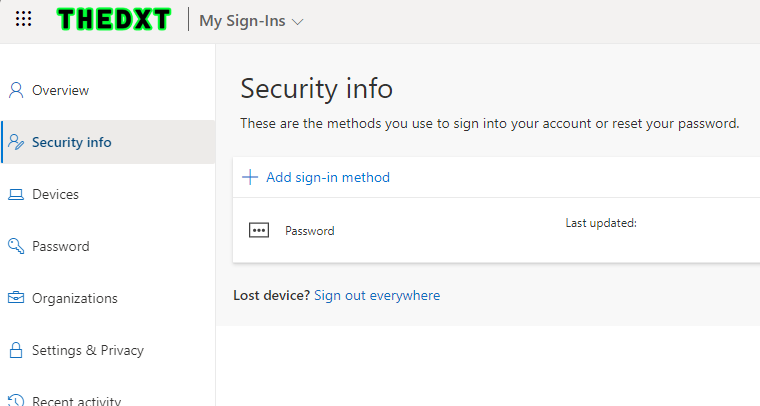
- Click on Security info.
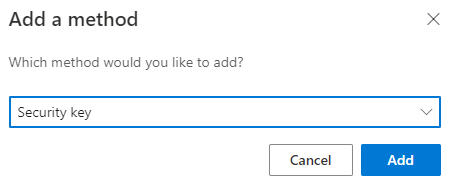
- Click on Add sign-in method.
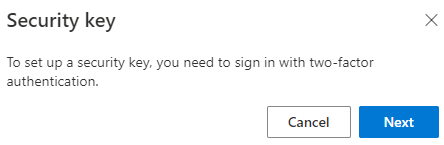
- Select Security key and click Add.
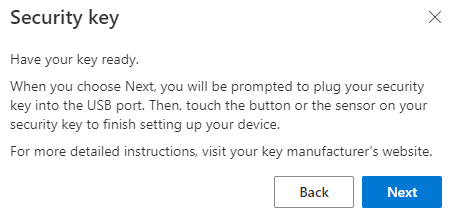
- Select the type of security key you have.

In this example, I will use a USB device.
- Plug your security key into your computer and click Next.
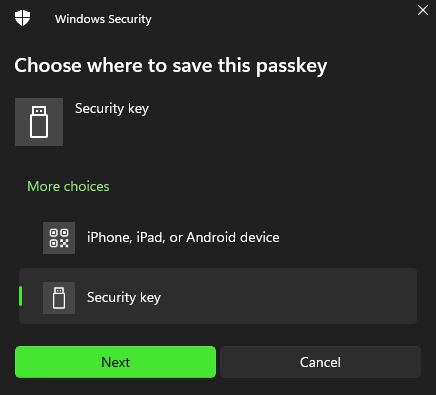
- On the new window select the Security key option to save the passkey to the security key and click Next.
- Click Ok to confirm that you are setting up the account with the security key.
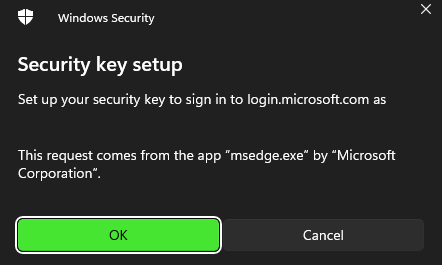
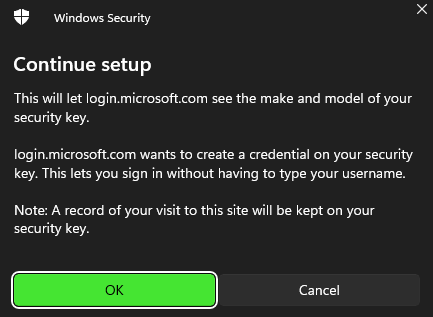
- Allow Microsoft to view the make and model of the security key.
- Pick a PIN for your security key.
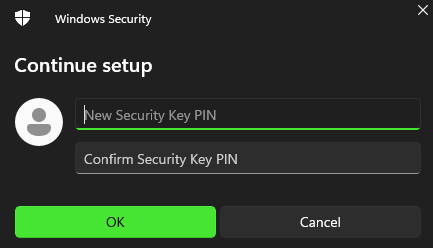
The PIN is required to access the passkey saved on the security key. Some security keys use biometrics instead of a PIN.
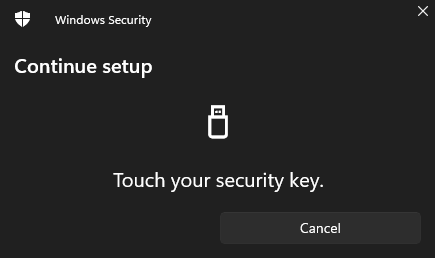
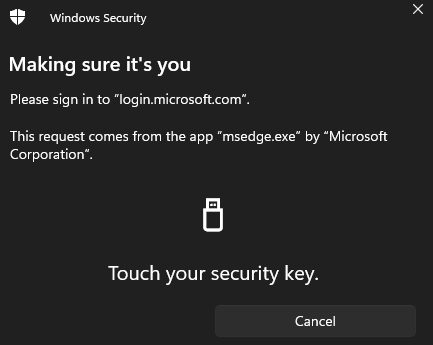
- Touch the security key.
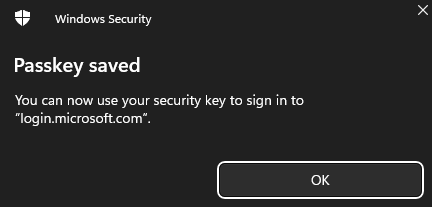
- Click Ok to confirm the passkey is saved to the security key.
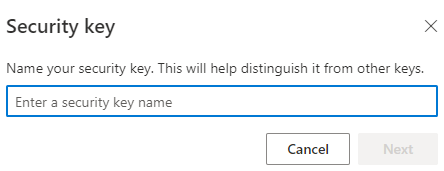
- Give the security key a name and click Next.
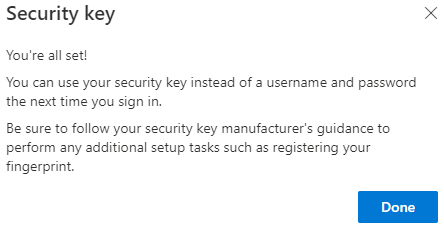
- Click Done.
Now that everything is all set, we should test it to double-check everything.
Testing
- Login to Microsoft 365.
Depending on your setup, when you log in to Microsoft 365, you may need to select Use your face, fingerprint, PIN or security key instead.
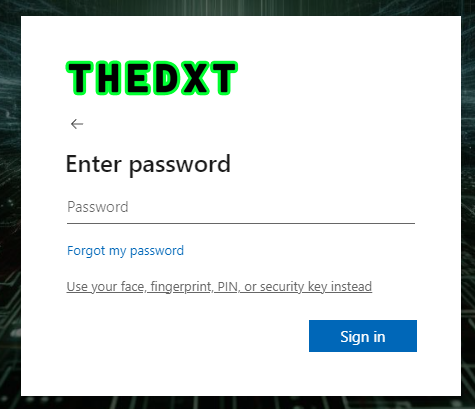
You should also be able to click on Sign-in options and select Face, fingerprint, PIN or security key from the login page.
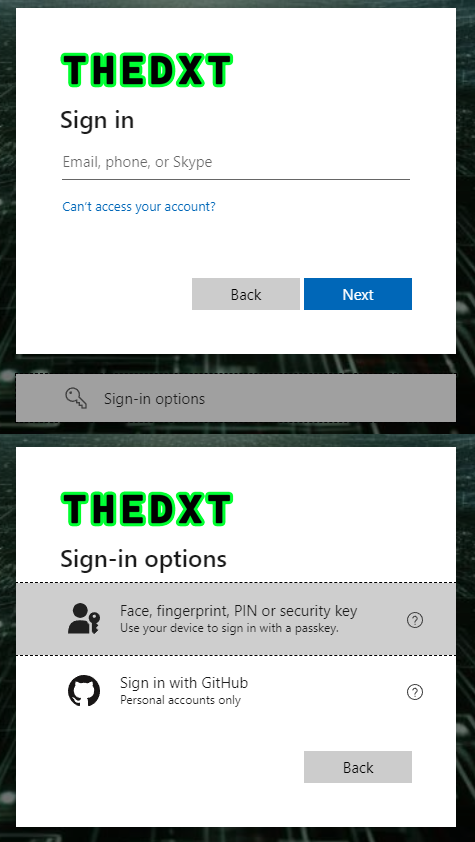
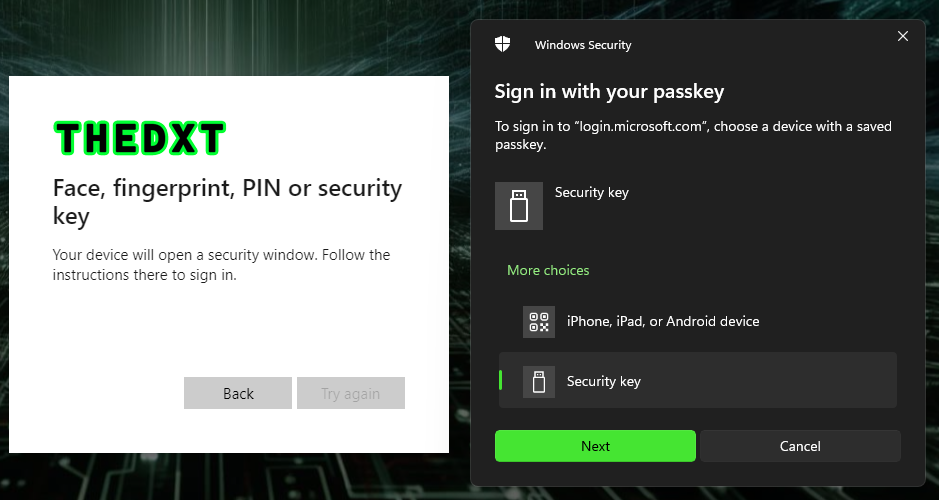
- On the new window, select Security key and click Next.
- Enter the Security Key PIN.
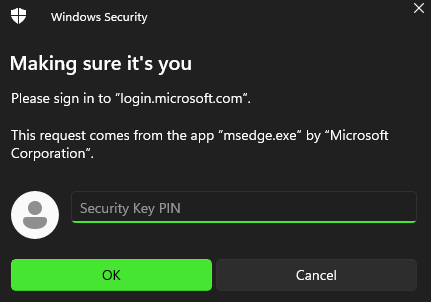
- Touch the security key.
You should now be logged in.
Emergency Access Accounts
Emergency access accounts also require MFA. A passkey is considered MFA. However, you need to log in with MFA before you can set up a passkey.
One of the ways to satisfy MFA in setting up a passkey is to use a TAP (Temporary Access Pass).
- Generate a Temporary Access Pass from the Microsoft Entra admin center for the account.
- Go to https://aka.ms/mysecurityinfo
- Use the Temporary Access Pass to log in to the account.

- You should now be able to add a security key sign-in method to the account.
Summary
That’s all it takes to configure and set up a passkey in Microsoft 365 using a physical hardware security key.
If you want to read more about setting up passkeys, here is the Microsoft documentation.
If you want to learn more about Temporary Access Pass, here is the Microsoft documentation.