
Sophos Firewall Interface Mapping on vSphere
When you deploy a Sophos firewall on VMware vSphere, you start with 3 network interfaces PortA for LAN, PortB for WAN, and PortC is unassigned.
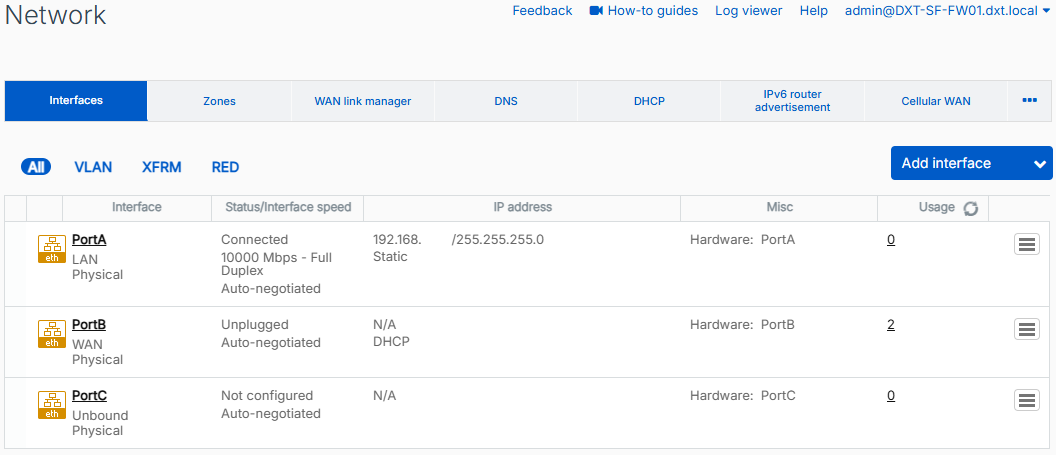
In VMware vCenter, PortA is Network adapter 1, PortB is Network adapter 2, and PortC is Network adapter 3.
However, when you add more network adapters in VMware vSphere, the mappings between SFOS (Sophos Firewall Operating System) and VMware vSphere no longer align.
In this post, I will show you, step by step, how to add more network interfaces to SFOS (Sophos Firewall Operating System) running on VMware vSphere and how to map the interfaces between SFOS and VMware vCenter.
The Process
Adding Interfaces
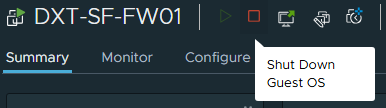
- In vCenter, shut down the SFOS VM.
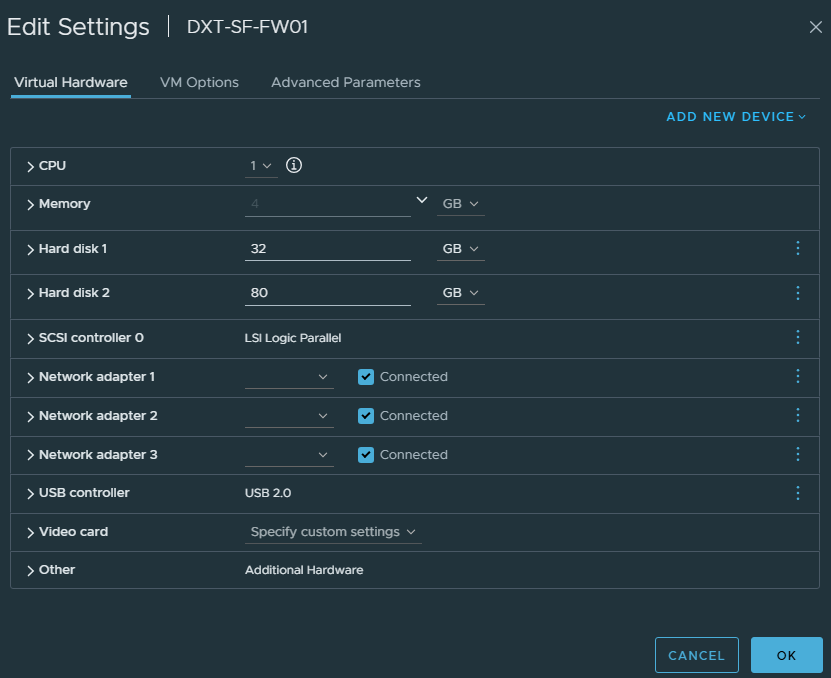
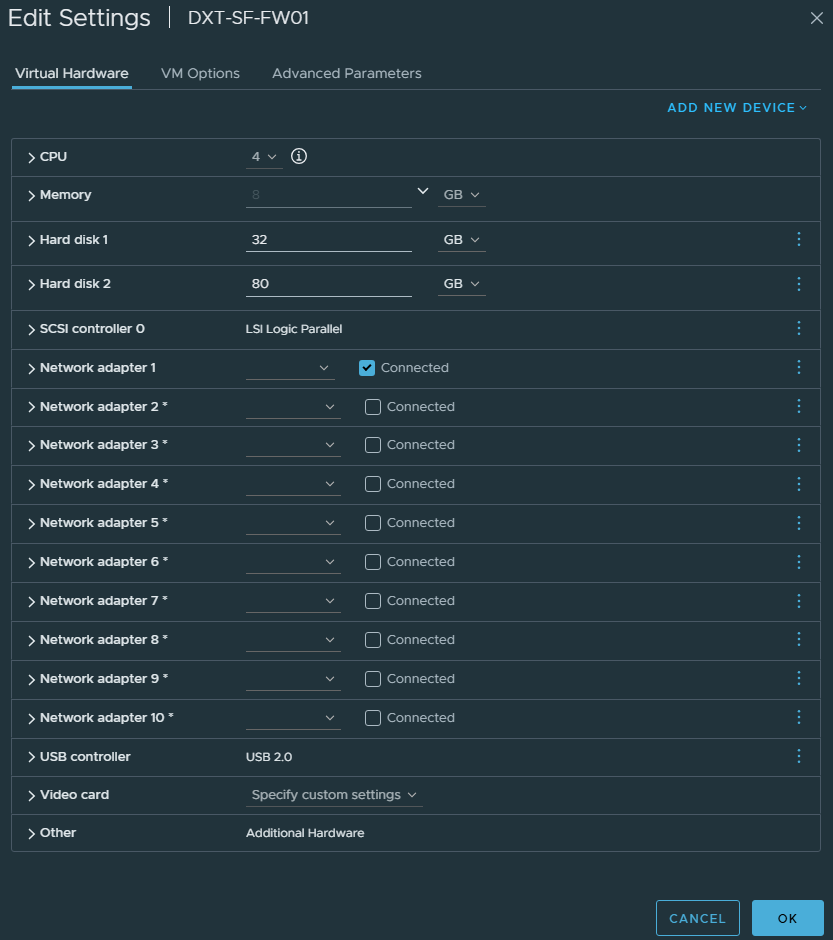
- Once the SFOS VM has shut down, click on Edit Settings.

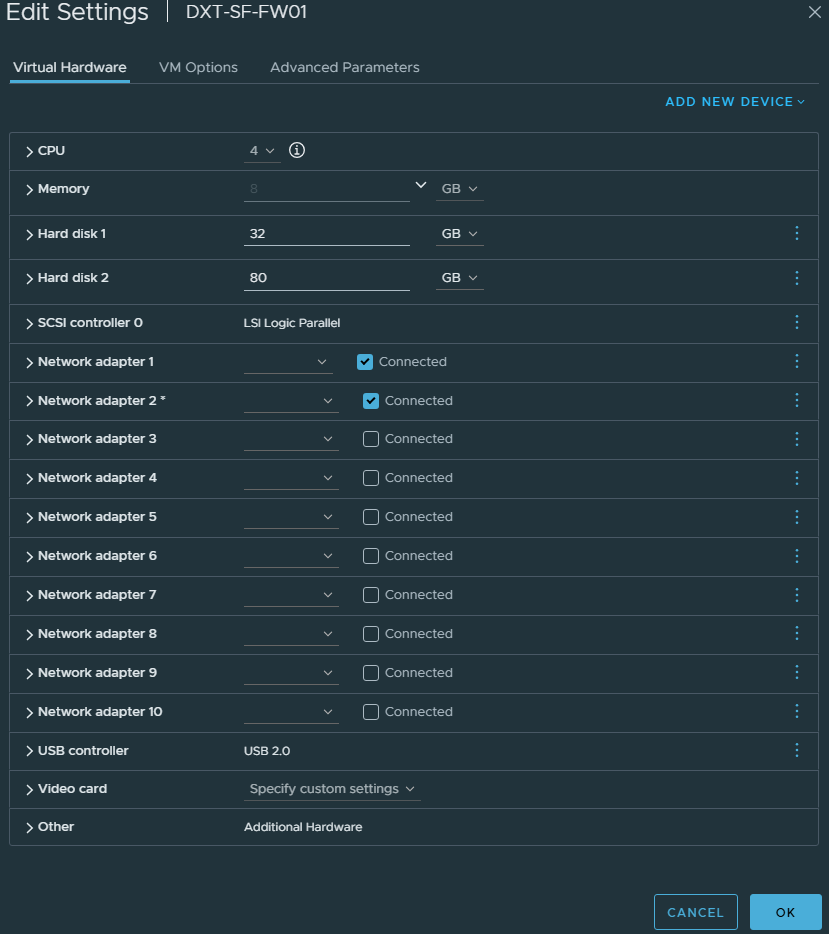
- To add additional network adapters, click Add New Device, then click Network Adapter.
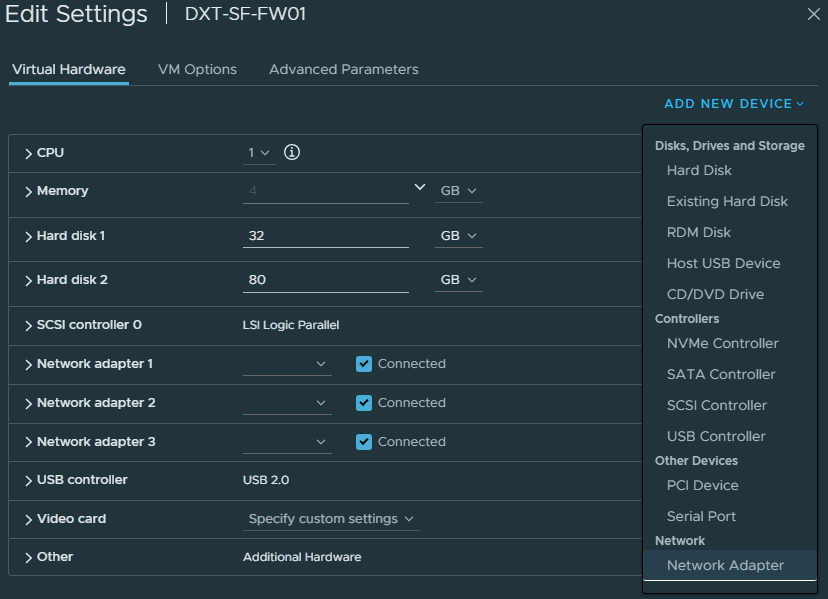
VMware vCenter VMs can have up to 10 network adapters.
In my example, I will add 7 more network adapters, bringing the total to 10.
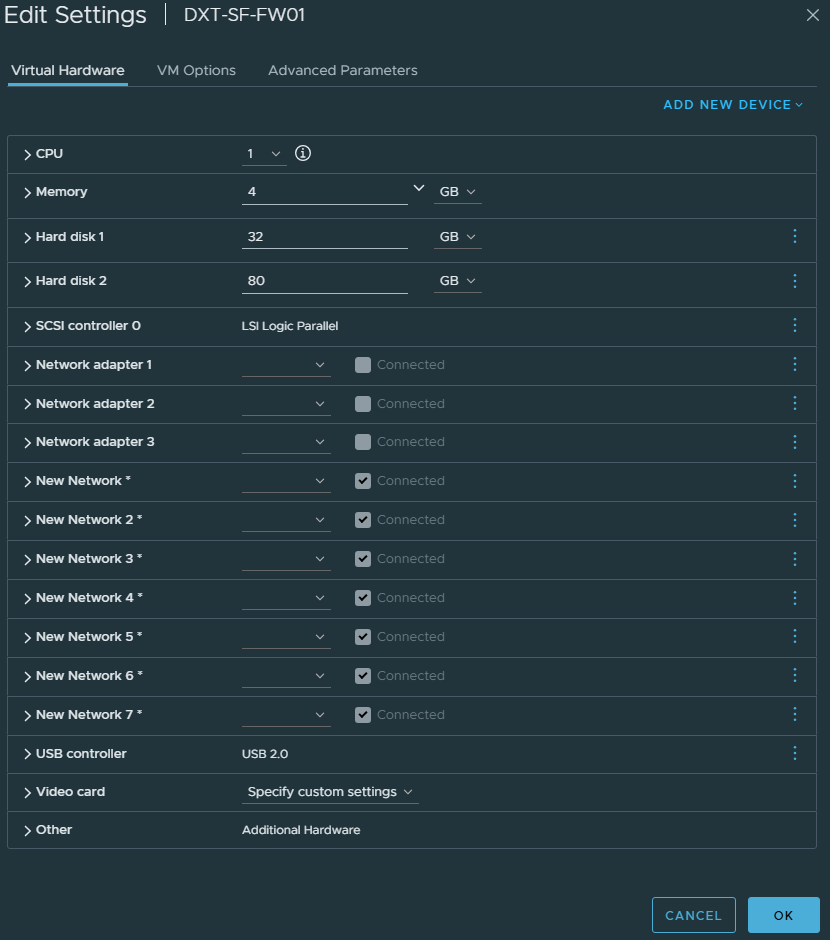
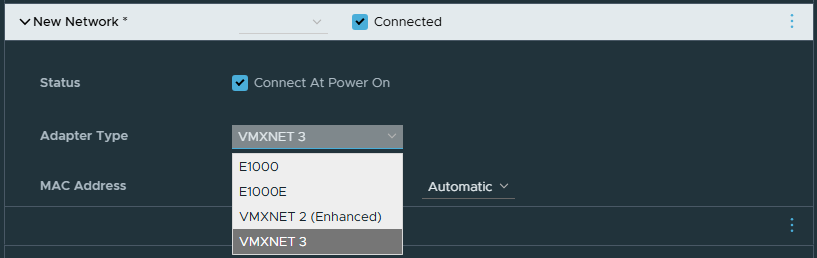
When adding network adapters, it defaults to the E1000 adapter type, which you can use, but it’s recommended to use the VMXNET 3 adapter type.
- On each new network adapter, change the Adapter Type from E1000 to VMXNET 3.
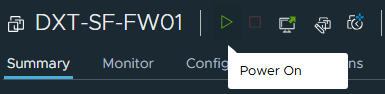
- Power on the SFOS VM.
Mapping Interfaces
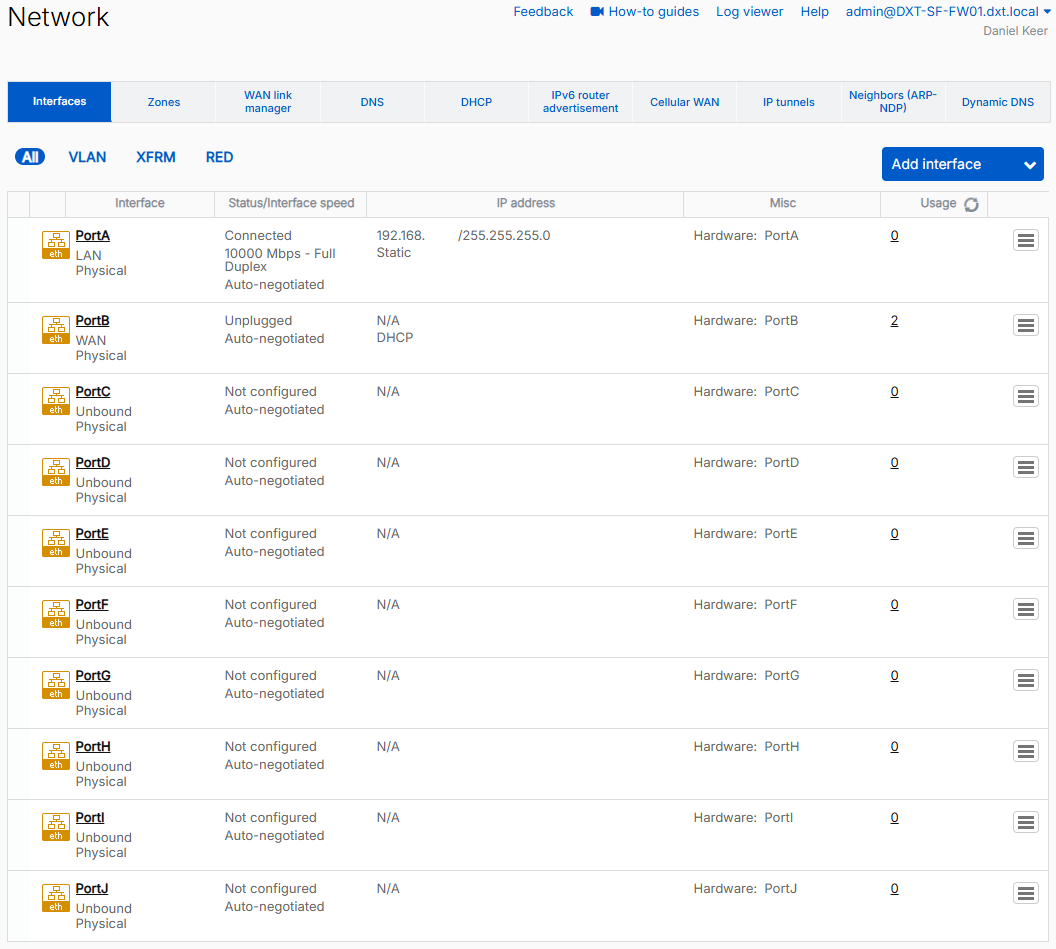
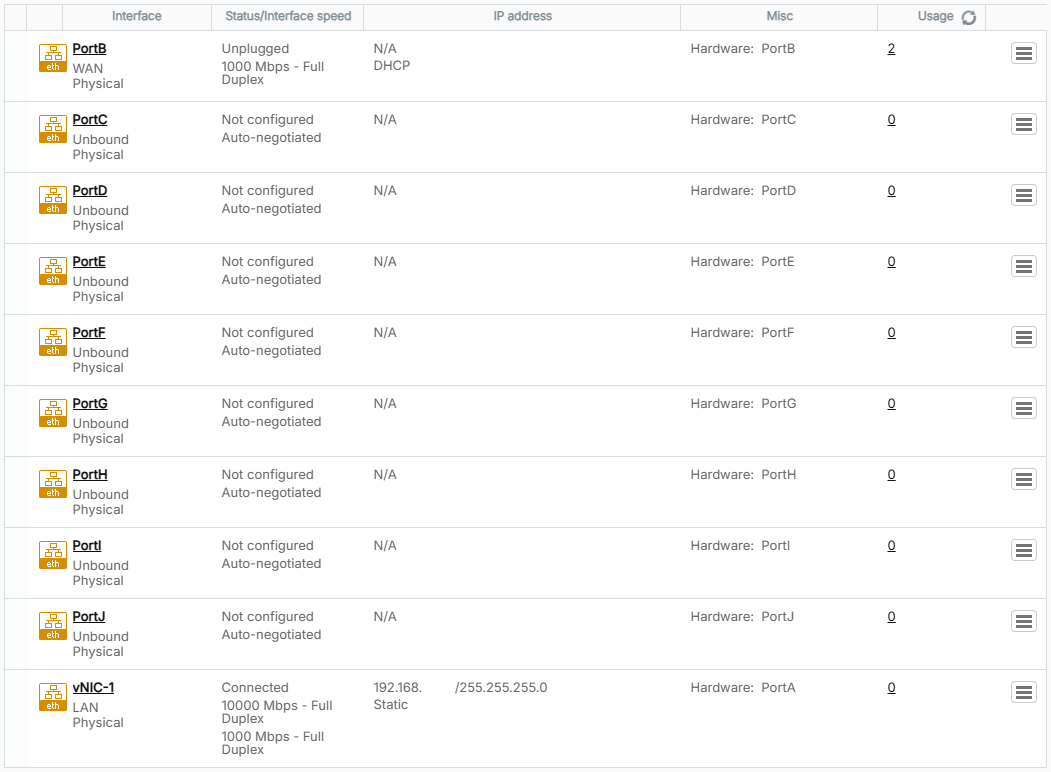
Once the SFOS VM has booted after adding the additional network adapters, the interface mapping between vCenter and SFOS won’t match, except that the SFOS network interface PortA always maps to network adapter 1 in vCenter.
Since PortA in SFOS is always vCenter network adapter 1, we will update its name in SFOS to reflect this mapping in vCenter.
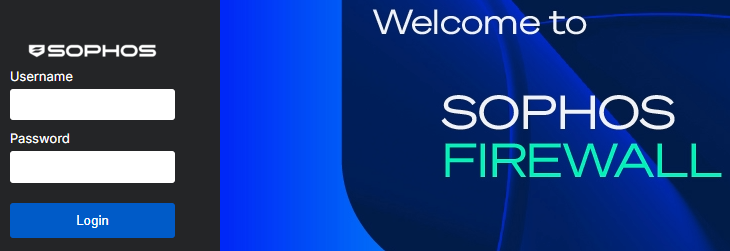
- Login to the SFOS.
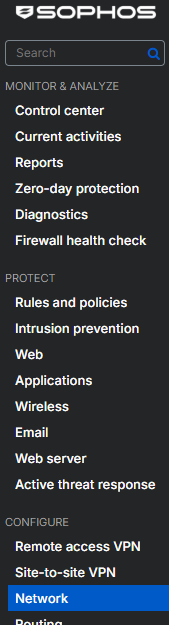
- Click on Configure > Network.
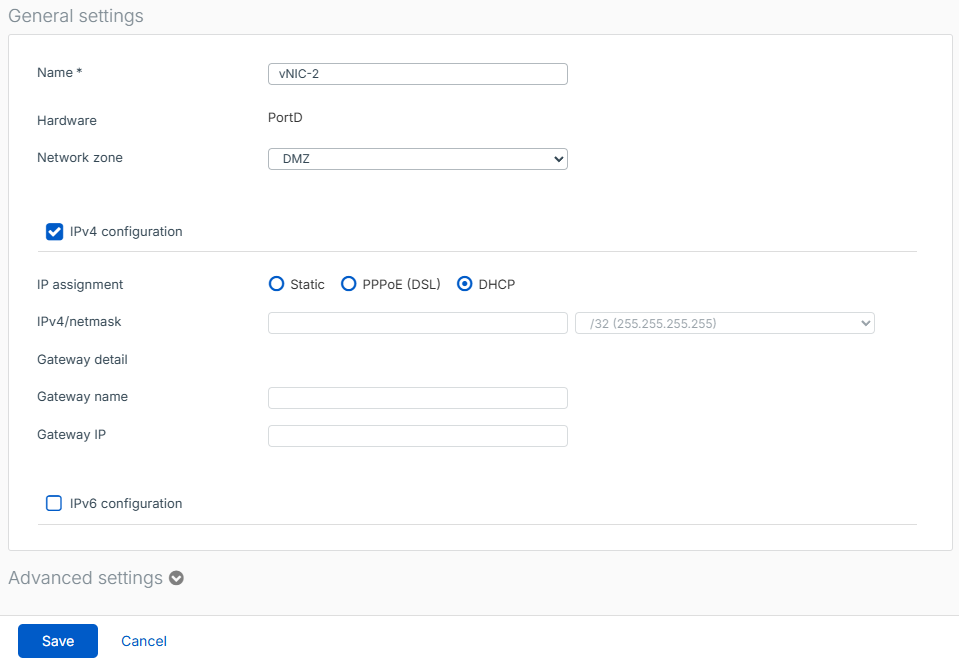
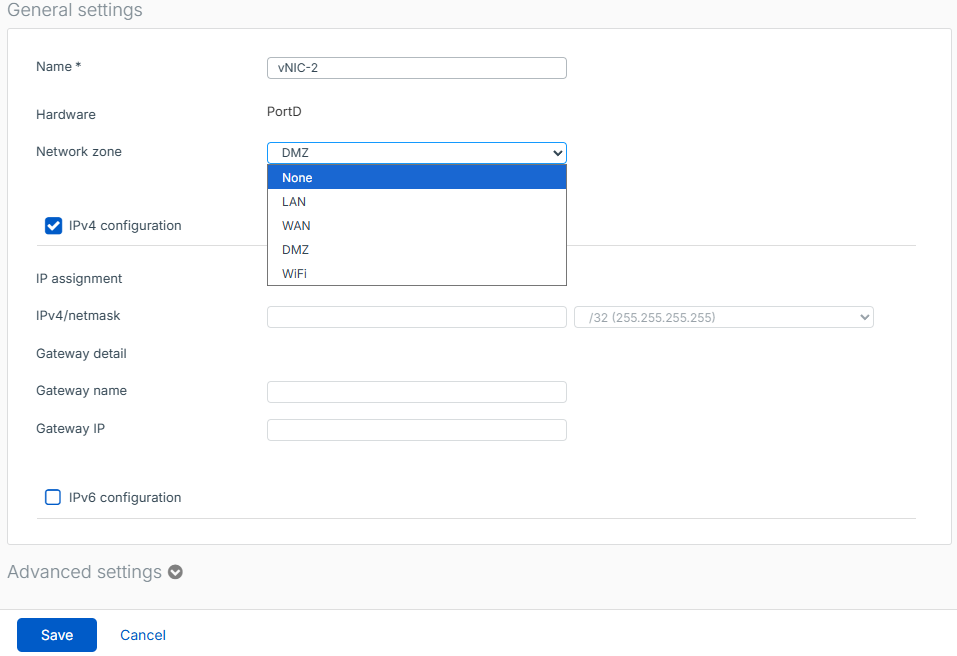
- Click on the interface PortA.
- Update the name to reflect the mapping between SFOS and vCenter, then click Save.
In my example, I will refer to the vCenter network adapters as vNICs and set PortA’s name to vNIC-1.

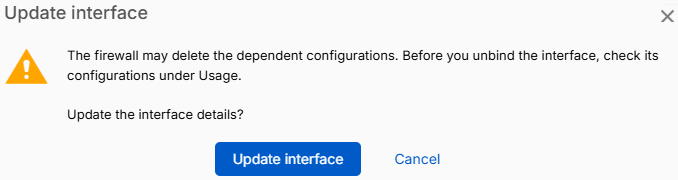
- Once you click save, you will see a pop-up message confirming that you want to make the change. Because we are only updating the name, the change is safe. Click Update interface to confirm the change.
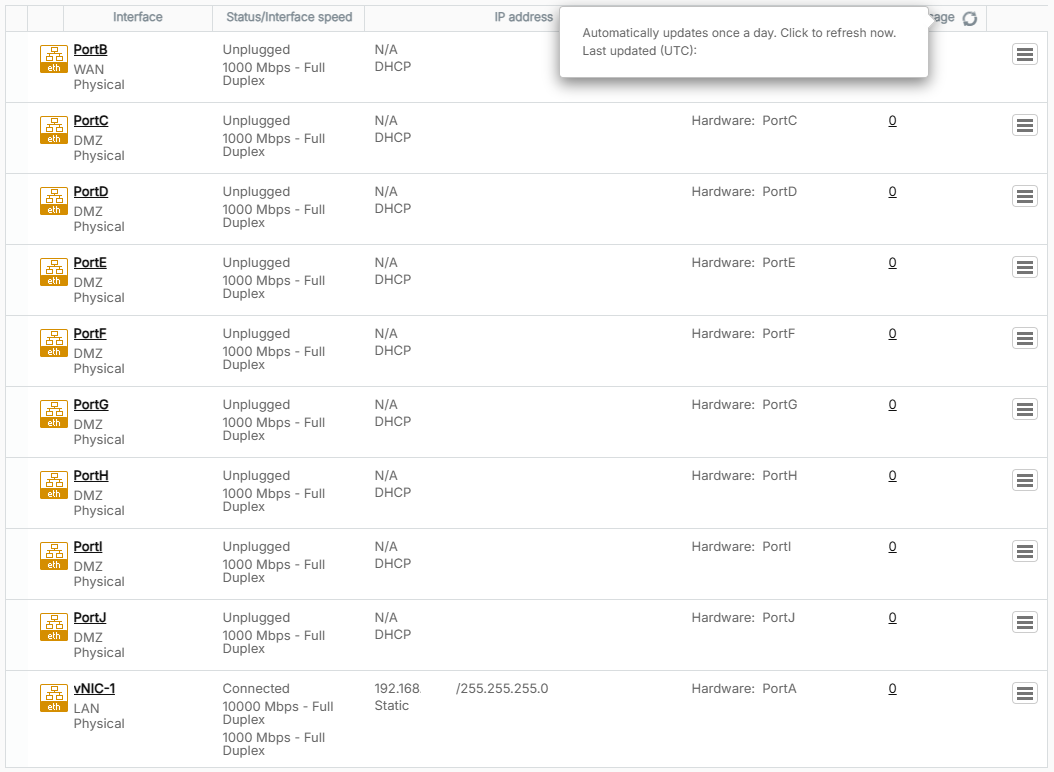
To identify the other interfaces in SFOS and vCenter, we will disconnect all of the network adapters on the SFOS VM in vCenter except vNIC 1, since we already know which one it is.
- While the SFOS VM is running, in vCenter, click on Edit Settings.

- Disconnect each vNIC except for vNIC 1, and click OK.
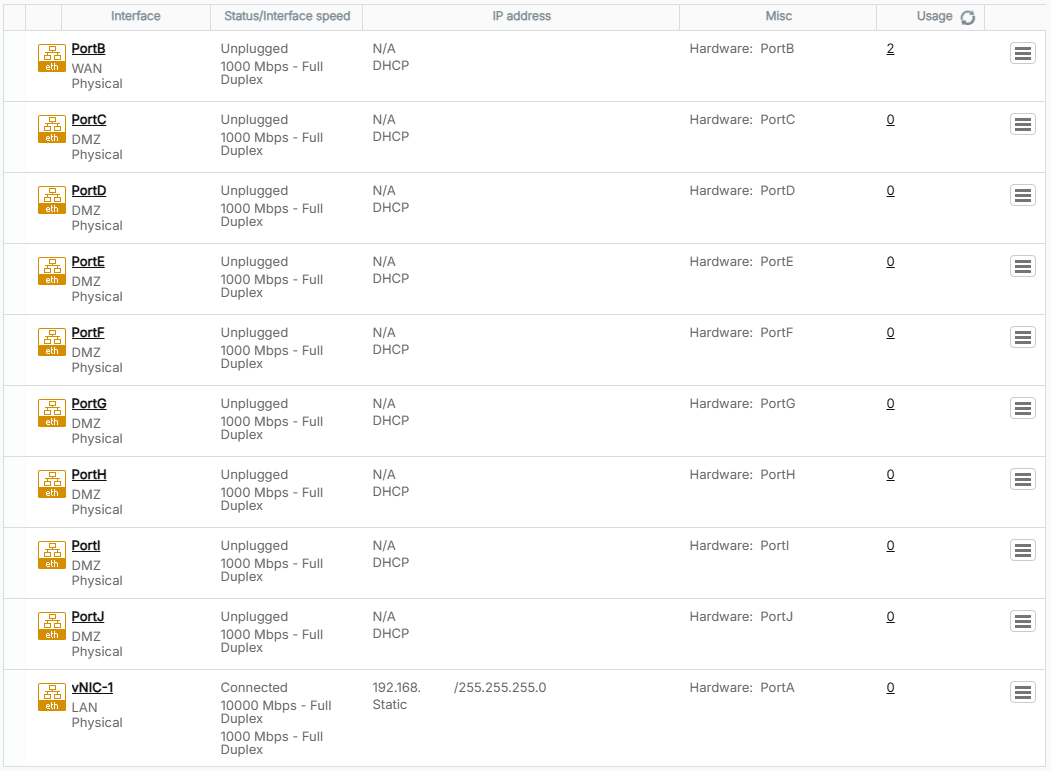
To display the VMware vCenter network adapter status in SFOS, we need to temporarily assign each interface in SFOS with a network zone and an IP assignment.
- In SFOS on the network interface page, click on network interface PortC.
- Set the Network zone to DMZ.
The network zone doesn’t matter, as we are temporarily setting it to map the interfaces.
In my example, I will set it to DMZ.

- Set the IP assignment to DHCP and click Save.
It doesn’t matter whether the network has DHCP, since it will be temporary while we map the interfaces.
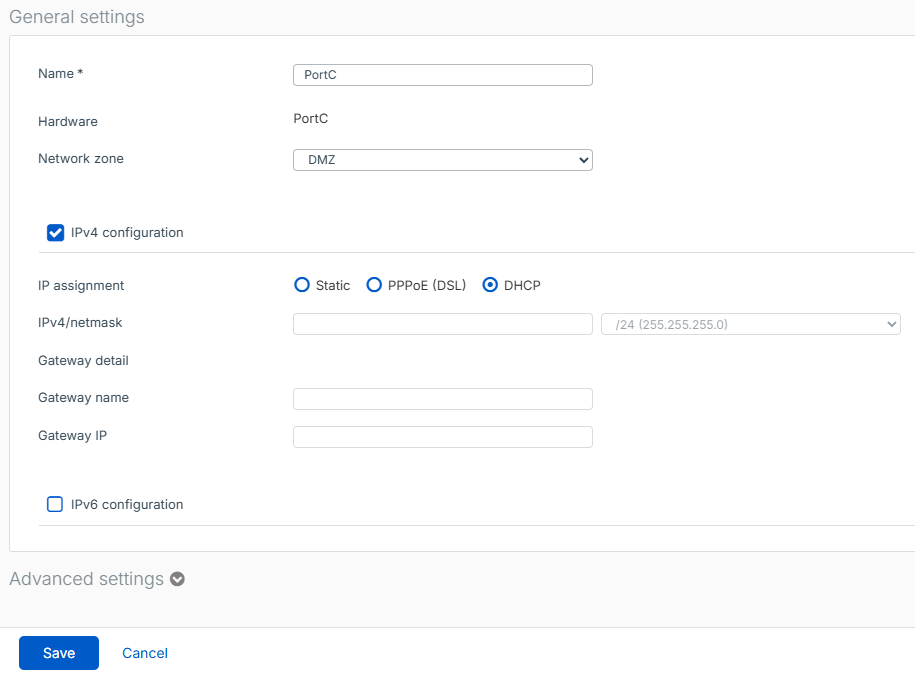
- Click Update interface to confirm the changes.
- Repeat the process for each interface.
Once all interfaces, except vNIC-1, are completed, they will appear as unplugged.
- While the SFOS VM is running, in vCenter, click on Edit Settings.
- Connect Network adapter 2 and click OK.
- Refresh the Interfaces page in SFOS by clicking the refresh icon next to usage.
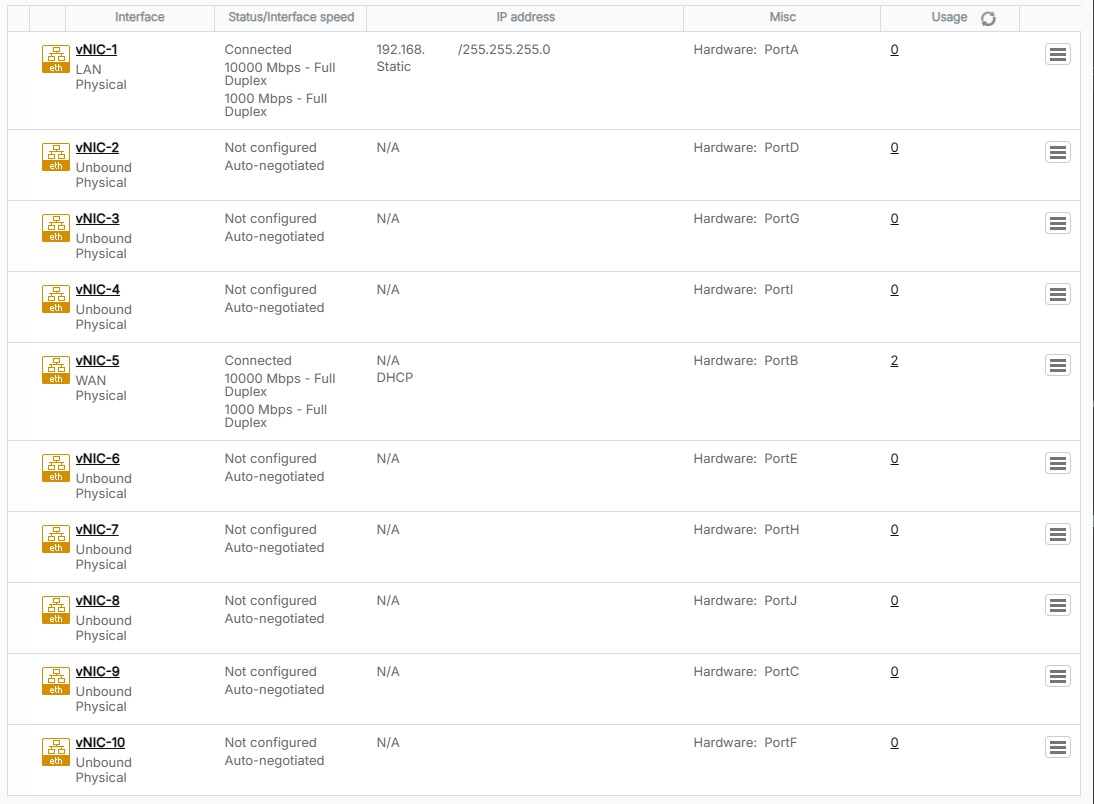
- A second interface will now show as connected in SFOS.
In my example, vCenter network adapter 2 is PortD in SFOS.
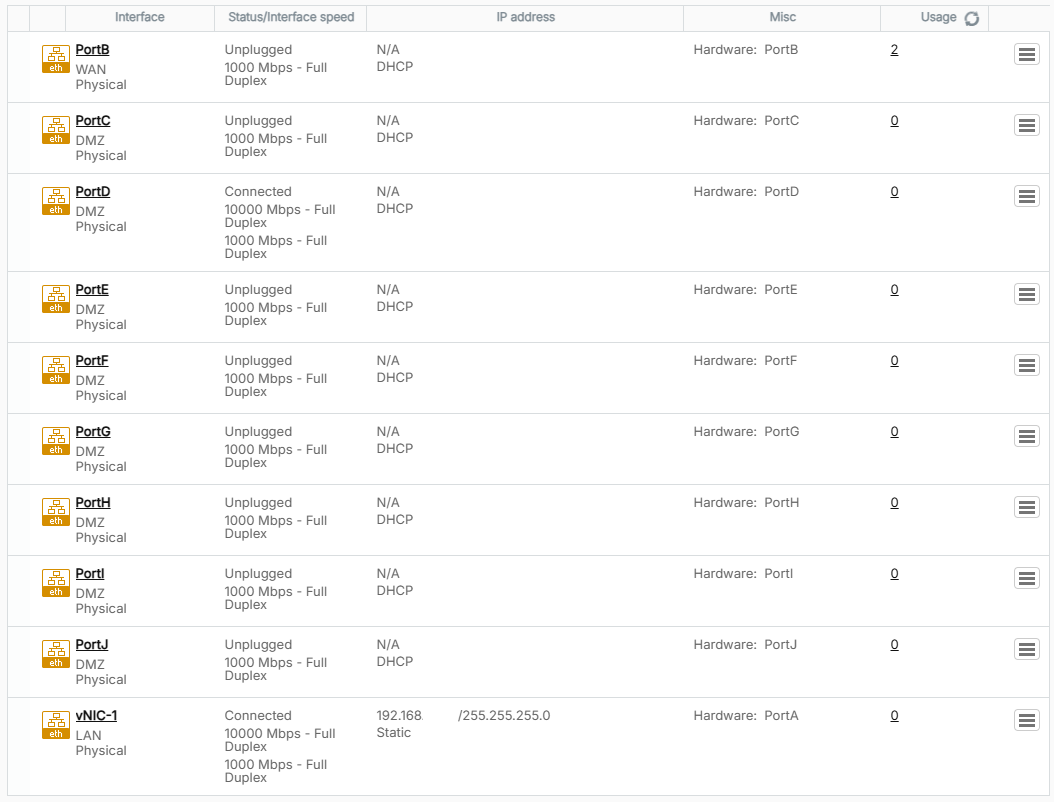
- Click on the newly connected interface.
- Update the name to reflect the mapping between SFOS and vCenter, and click Save.
In my example, I will name it vNIC-2, as it is vCenter network adapter 2.
- Click Update interface to confirm the change.
- Repeat the process for each interface.
Once you are completed, you will see all interfaces as connected.
In my example, interface PortB became vNIC 5.
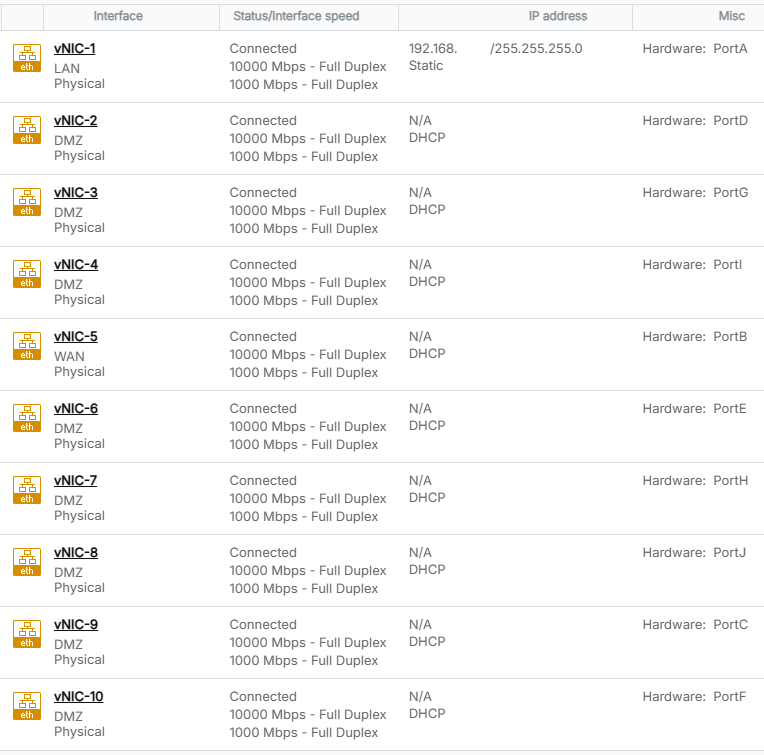
In the end, my mappings were as follows.
| vCenter | SFOS |
| vNIC 1 | Port A |
| vNIC 2 | Port D |
| vNIC 3 | Port G |
| vNIC 4 | Port I |
| vNIC 5 | Port B |
| vNIC 6 | Port E |
| vNIC 7 | Port H |
| vNIC 8 | Port J |
| vNIC 9 | Port C |
| vNIC 10 | Port F |
Now that the mapping is complete, we can set the interfaces to their correct network zone or set them to none.
- Click on a network interface.
- Set the Network zone to none, and click Save.
- Click Update interface to confirm the change.
- Repeat the process as needed.
When you look at the network interfaces, even though you can’t change the name of an interface when the network zone is set to none, the previous name is still retained.
That’s all it takes to add more network interfaces to a Sophos firewall running on VMware vSphere, and how to map the VMware vCenter network adapters to the SFOS network interfaces.
If you want to read more about Sophos firewall network interfaces, here is the Sophos documentation.