Palo Alto Device Certificate
Palo Alto Networks firewalls often require a device certificate. A device certificate is needed for items like device telemetry and for some of the CDSS (Cloud-Delivered Security Services) items, such as WildFire, DNS and URL filtering, and others.
In this post, I show you step-by-step how to check if a device certificate is installed and how to install a device certificate on a Palo Alto Networks firewall.
Before we proceed with installing the device certificate, we should double-check whether the firewall already has one.
Checking Device Certificate
- Log in to the Palo Alto Networks Firewall
CLI
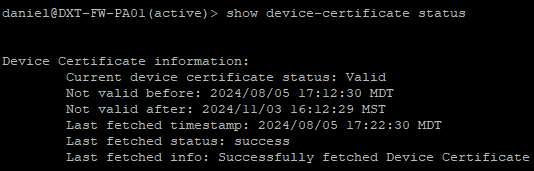
- To check if a device certificate is installed, run the following command
show device-certificate status
If the result is No device certificate found, move ahead with installing the device certificate.

GUI
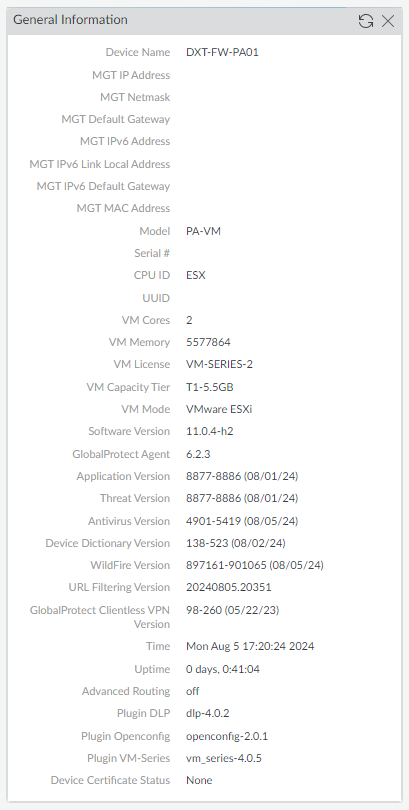
- Click on Dashboard

- The General Information widget will display the Device Certificate Status.
With the GUI, you can also check if a device certificate exists in another place.
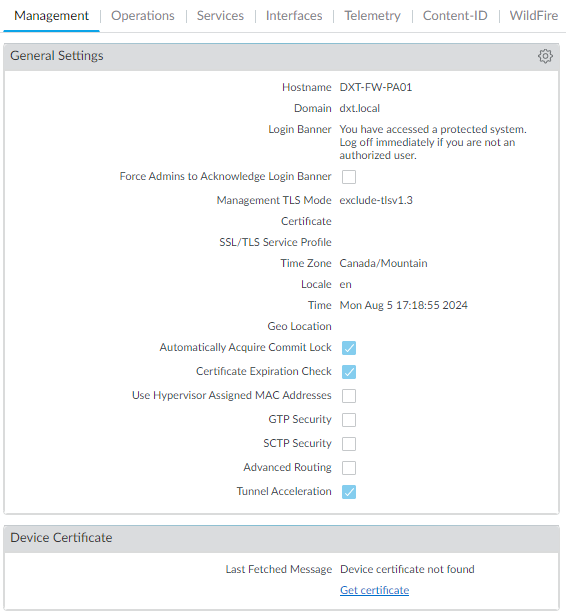
- Click on the Device tab.

- Click on Setup.
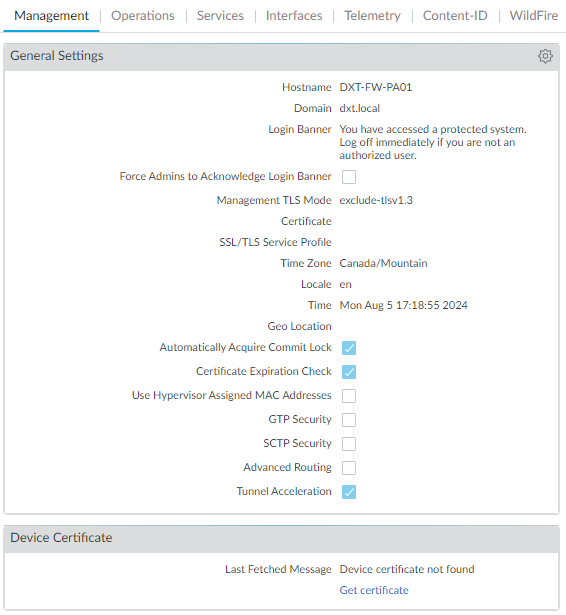
- The Management tab will have a widget about the Device Certificate.
If there is no device certificate installed, we can move ahead with installing the device certificate.
Installing Device Certificate
- Log in to the Palo Alto Networks Customer Support Portal.
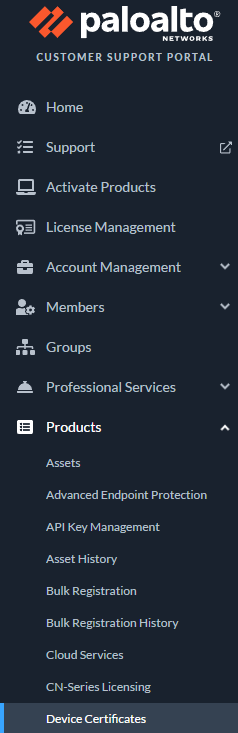
- Click on Products > Device Certificates.
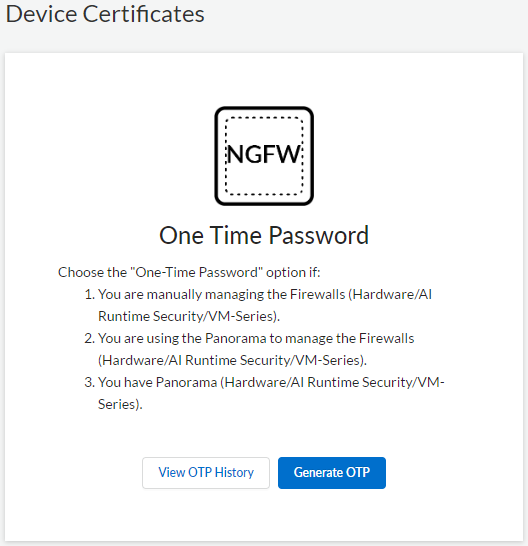
- Under the One Time Password section, click on Generate OTP.
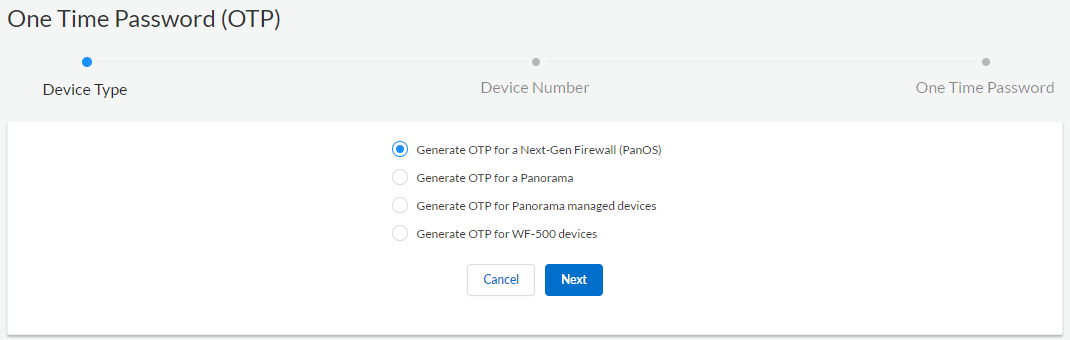
- Select Generate OTP for a Next-Gen Firewall (PanOS) and click Next.
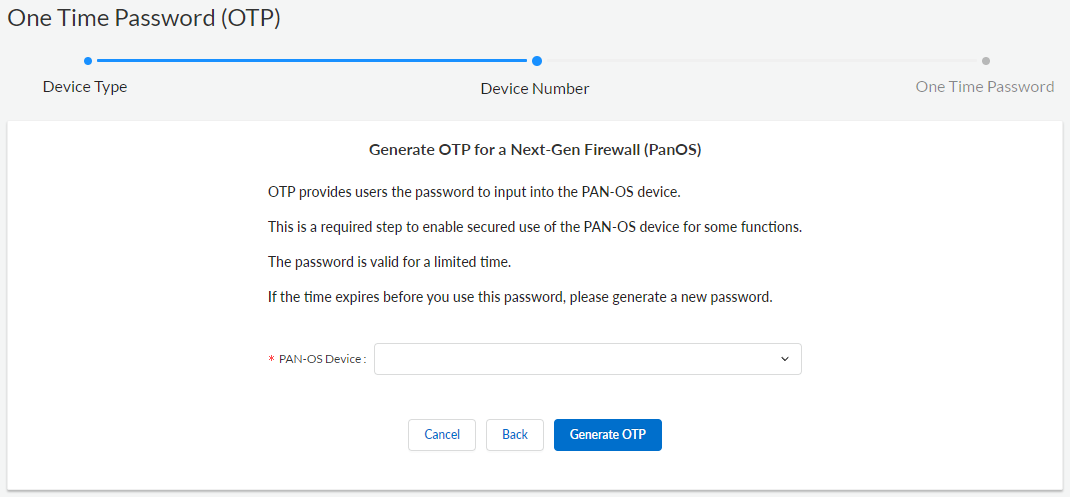
- Select the PAN-OS Device’s serial number and click Generate OTP.
- Make a note of the generated OTP.
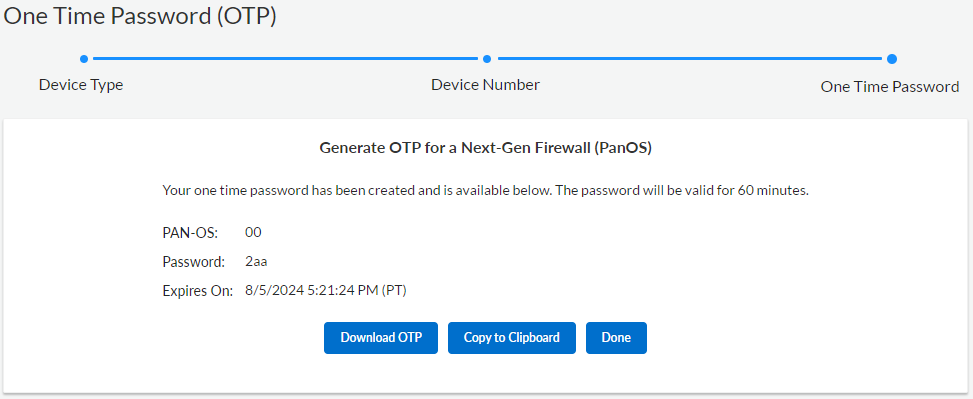
We will use the OTP to retrieve and install the device certificate.
- Log in to the Palo Alto Networks firewall.
CLI
- To use the OTP and install the device certificate, run the following command with your OTP
request certificate fetch otp
For me, that command will look like request certificate fetch otp 2aa

If you want to monitor the progress of the device certificate installation, run the following command with your job id show jobs id

- Confirm that the device certificate is installed by running the following command
show device-certificate status
GUI
- Click on the Device tab.
- Click on Setup.
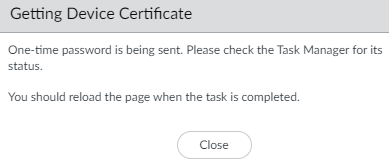
- On the Management tab on the Device Certificate widget, click on Get certificate.
- Enter the One-time Password and click OK.
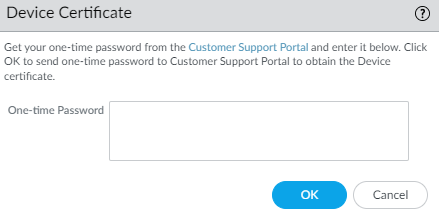
- The firewall will begin installing the device certificate.
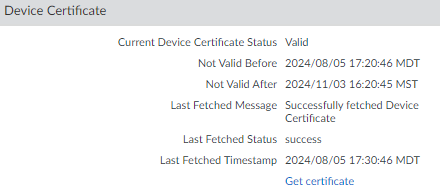
- Once the device certificate is installed and you have refreshed the page, the device certificate status in the Device Certificate widget will show as valid.
Closing
That’s all it takes to install a device certificate on a Palo Alto Networks firewall. If you use HA, you must perform these steps on each firewall individually. The certificates will automatically renew 15 days before they expire.
If you want to read more about installing the device certificate, here is the Palo Alto documentation.