
Sophos Firewall Initial Setup
Before you can start using a Sophos firewall, you must complete the initial setup.
In this post, I will show you step by step, how to complete the initial setup of a virtual SFOS (Sophos Firewall Operating System). The process will be similar on a physical Sophos firewall.
Prerequisites
- Internet access.
- Console access.
The Process
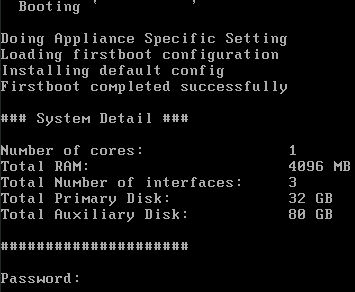
- Connect to the SFOS VM console.
- Enter the admin password.
The default admin password is admin.
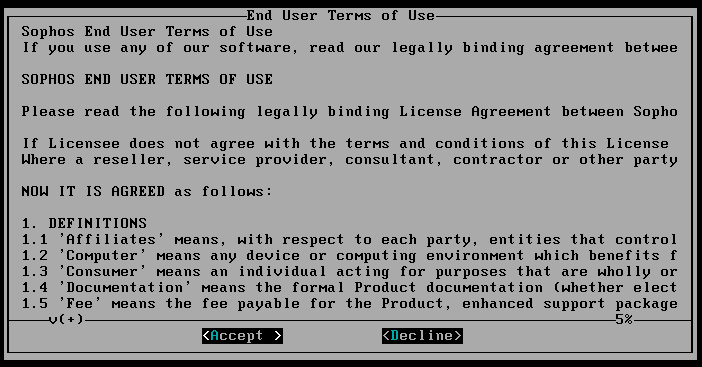
- Review the End User Terms of Use and accept them if you agree.
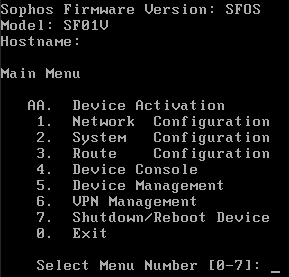
- Enter 1 for Network Configuration Menu.
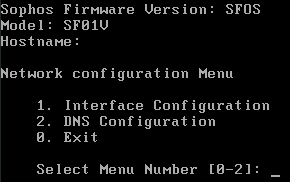
- Enter 1 for Interface configuration.
SFOS will show the current IP address for PortA. The default IP address for PortA is 172.16.16.16.
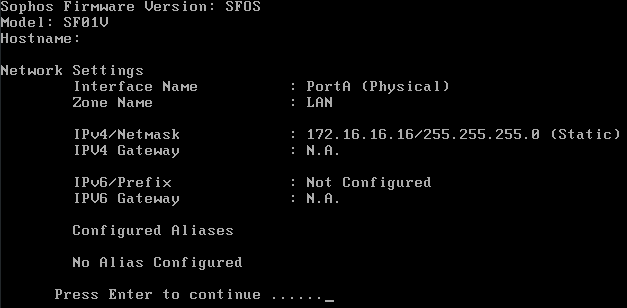
- Press Enter to continue.
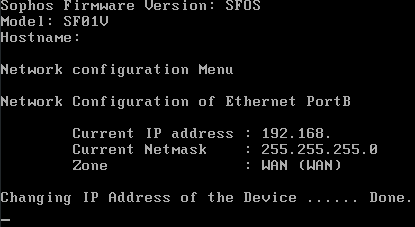
SFOS will display the current IP address for PortB. The default setting for PortB is DHCP.
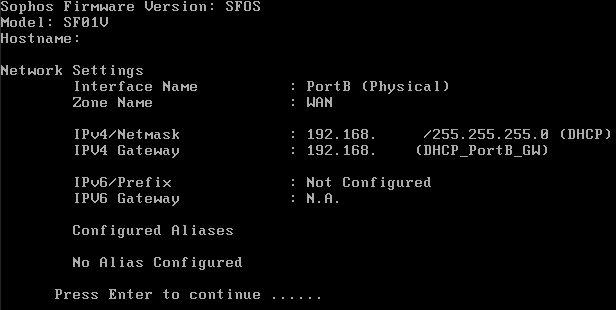
- Press Enter to continue.
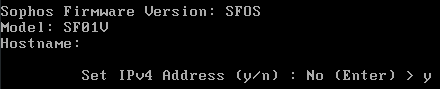
- Press Y to set the IPv4 Address for PortA.
- Enter the IP address you would like to use, then press Enter.
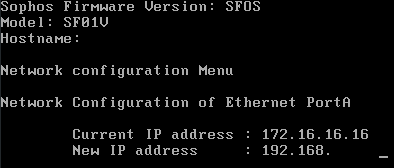
- Enter a new netmask if needed, then press Enter.
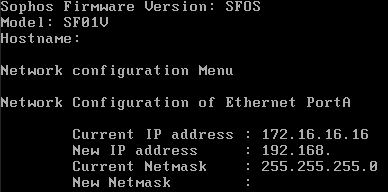
- Once Changing IP Address of the Device says Done, press Enter.
- Press N to skip the IPv6 address setup.

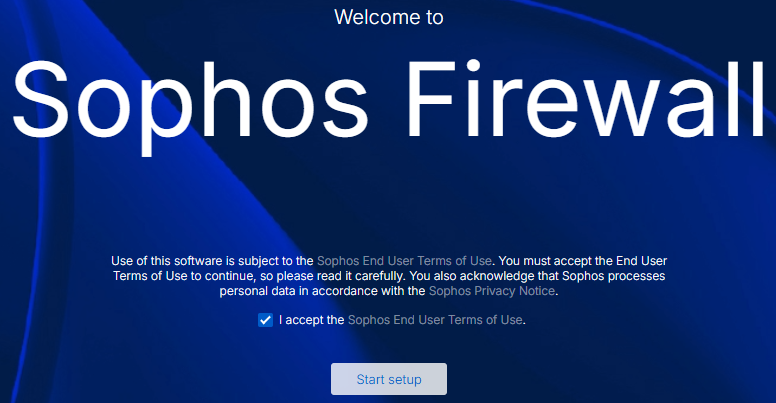
- In a web browser, go to the IP you just set using HTTPS on port 4444.
- Review and Sophos End User Terms of Use. If you agree, select I accept and click Start setup.
The first item we need to configure is a new password for the admin account. The password must be at least ten characters, one uppercase letter, one lowercase letter, one number, and one special character.
- Type the new admin password and click Continue.
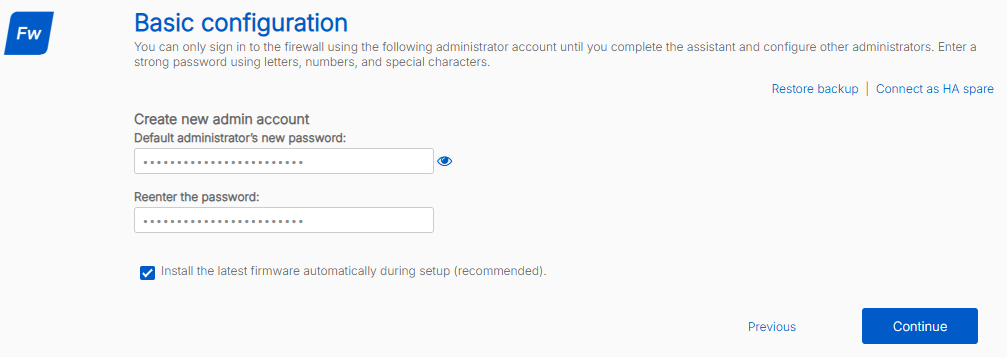
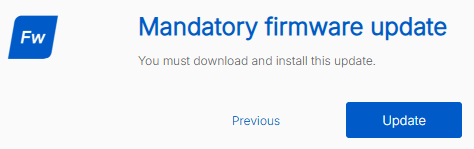
If you leave Install the latest firmware automatically selected, and there’s a new firmware, you will need to install it.
Next, we configure the secure storage master key. The secure storage master key is unique to your firewall and provides additional protection for the passwords and account details stored in the firewall configuration. You will not be able to restore a backup without knowing the master key.
The master key must be at least twelve characters, one uppercase letter, one lowercase letter, one number, and one special character.
- Type the secure storage master key.
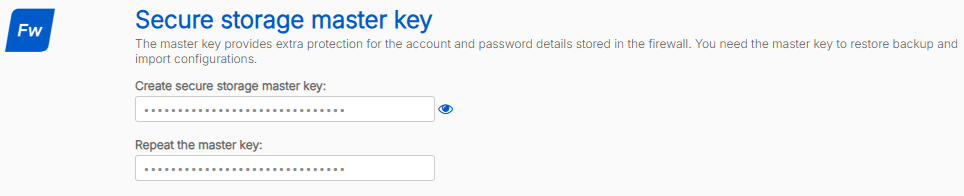
- Save the master key in a secure location and click Continue.

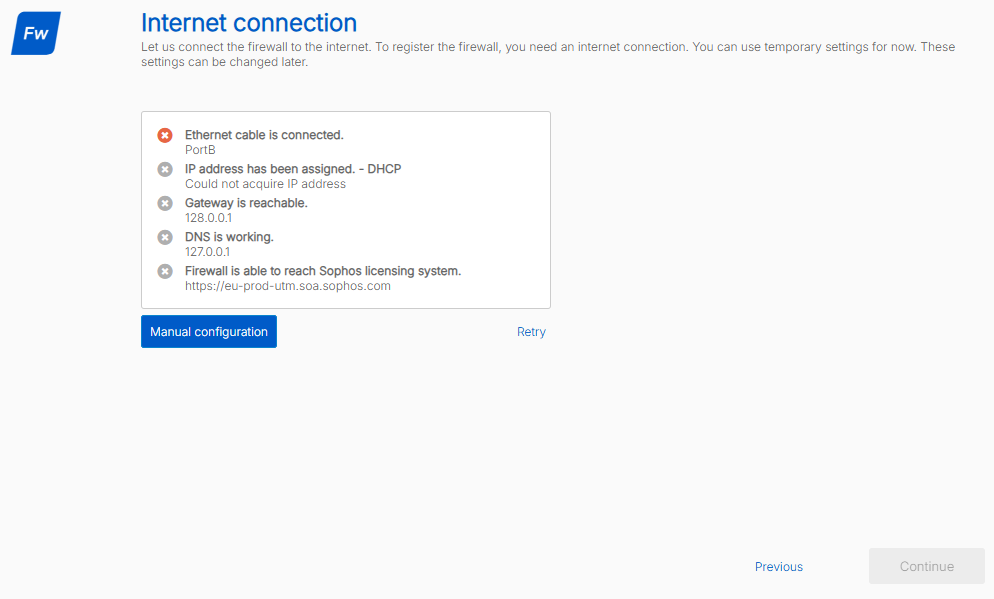
When configuring a virtual SFOS running version 22 or newer, an internet connection is now mandatory. This was optional in SFOS versions prior to 22.
- Configure an internet connection.
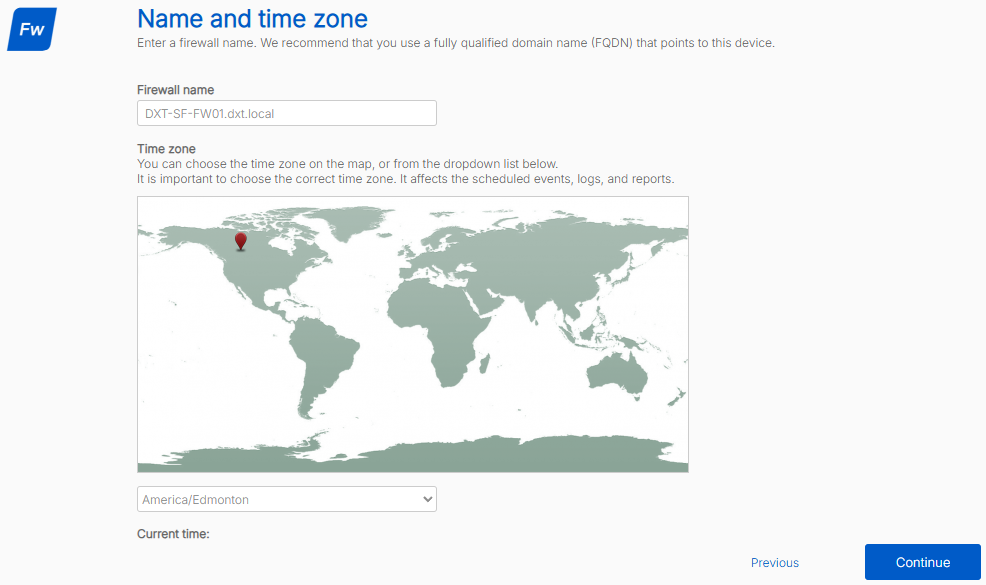
- Enter your firewall’s FQDN (fully qualified domain name) and select its time zone.
In my example, I will use the FQDN DXT-SF-FW01.dxt.local and set the time zone to America/Edmonton.
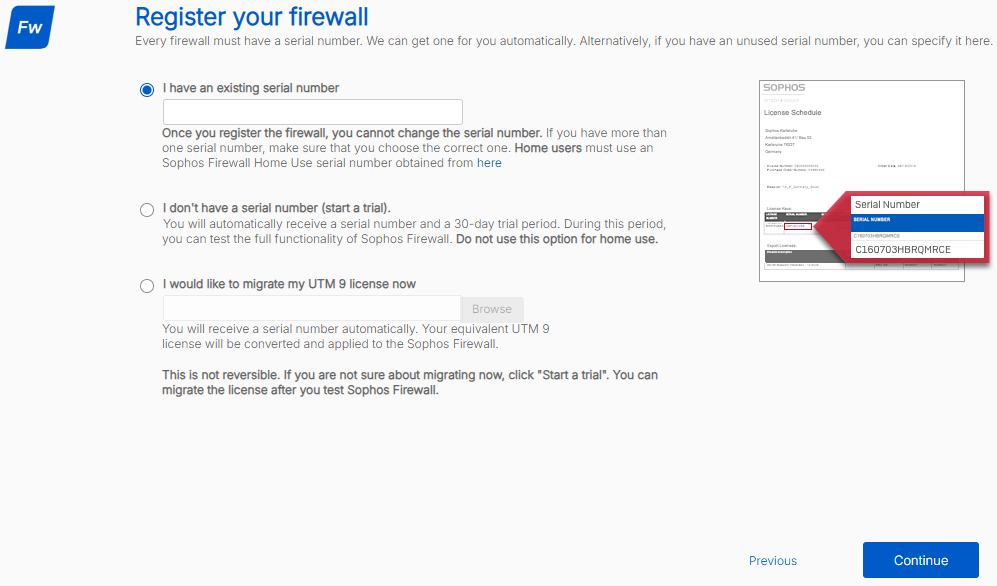
- Enter your serial number or start a trial.
When using a virtual SFOS running version 22 or newer, registering the firewall is now mandatory. In previous versions of SFOS, you could skip the registration.
Make sure you enter the correct serial number, as it can not be changed later.
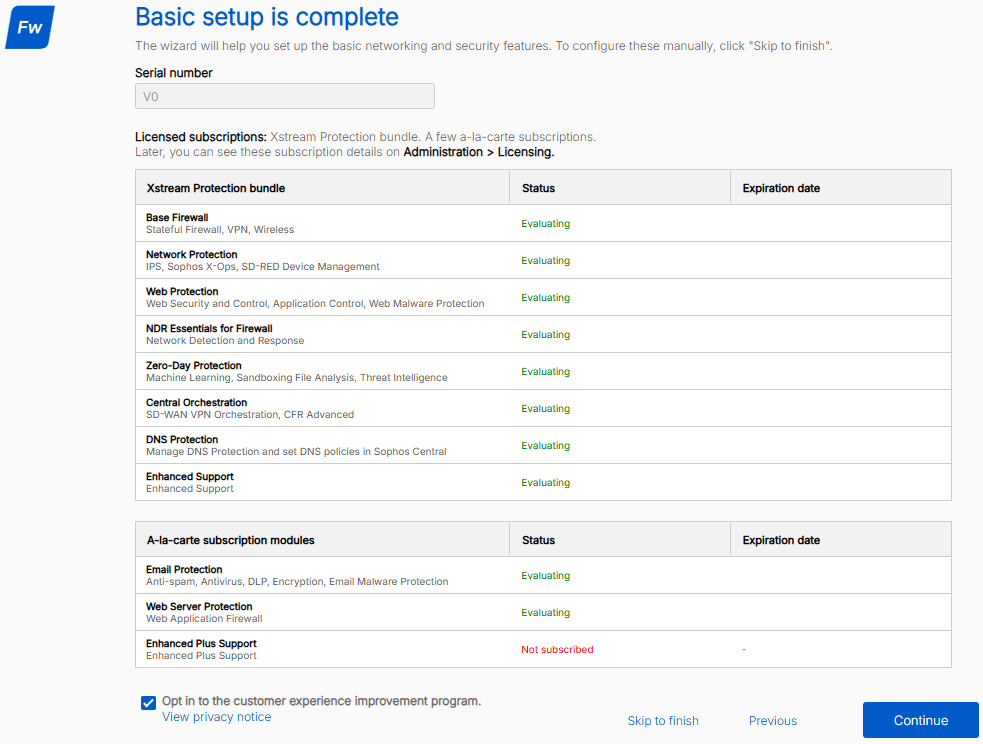
- Review the licensing information and click Continue.
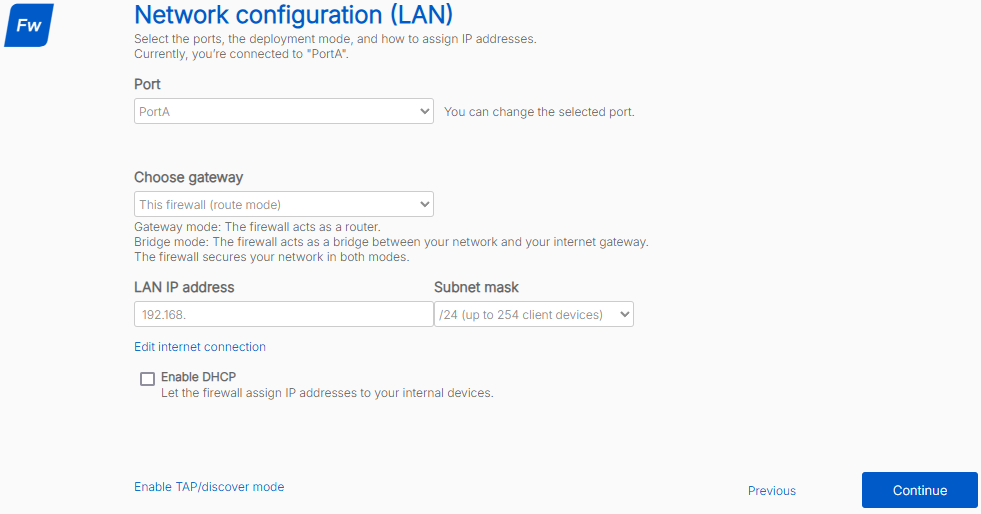
- Select the LAN port to use.
In my example, I will leave the LAN port set to PortA.
- Configure the gateway mode.
Most deployments use route mode (gateway mode).
In my example, I will be using route mode.
- Change the firewall’s IP address if needed.
Because we set the firewall’s IP address using the console, we can skip it.
- Choose whether to Enable DHCP.
In my example, I will not be using DHCP on the Sophos firewall, as I already have a DHCP server.
- Once you have configured the LAN settings, click Continue.
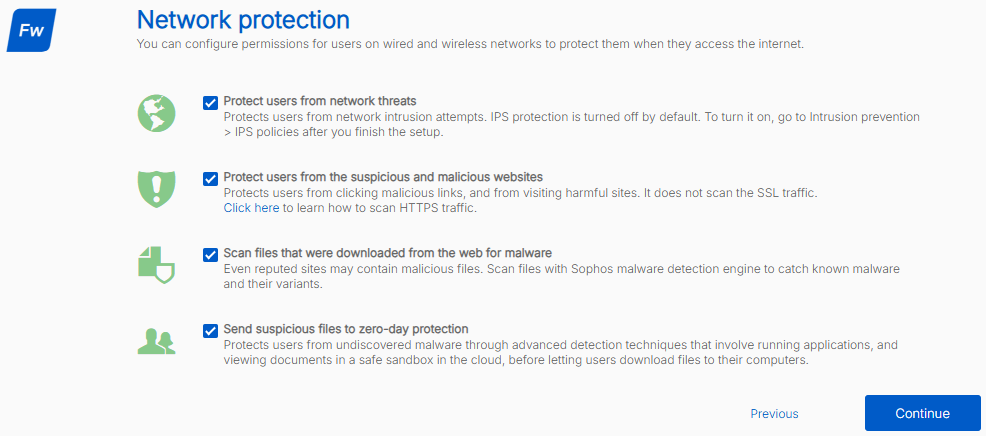
- Select the desired Network protections, then click Continue.
In my example, I will enable all the network protections.
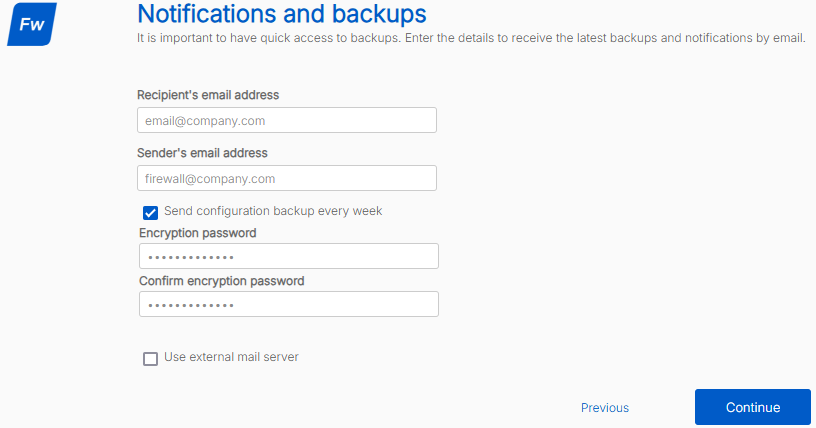
- Type a recipient email address for firewall notifications and backups.
- Type a sender email address for firewall notifications and backups.
- Choose if you want the SFOS configuration backup emailed weekly.
- Type a password to encrypt backups.
The backup encryption password must be twelve characters.
- Once you have configured the notifications and backups settings, click Continue.
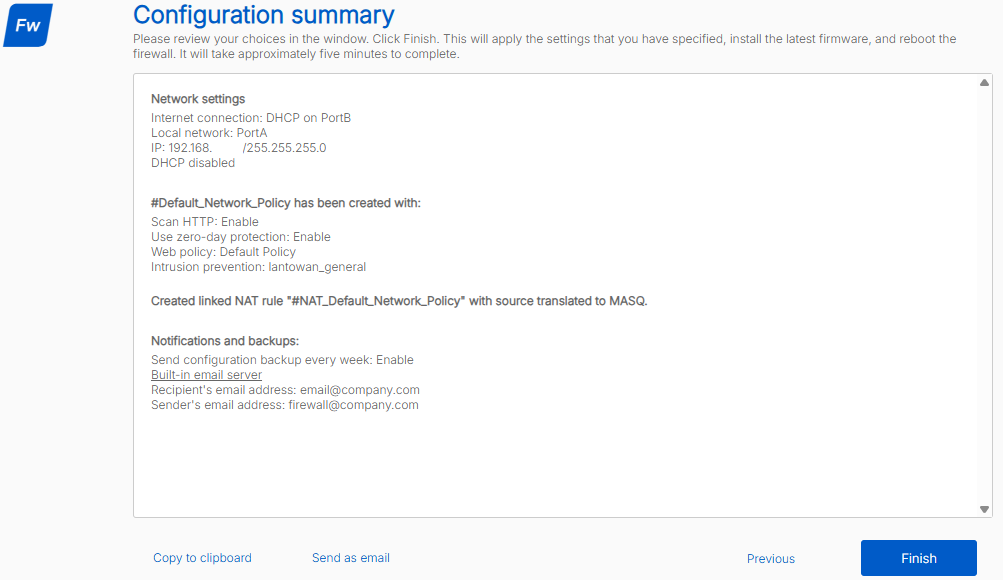
- Review the SFOS configuration summary. If everything looks good, click Finish.
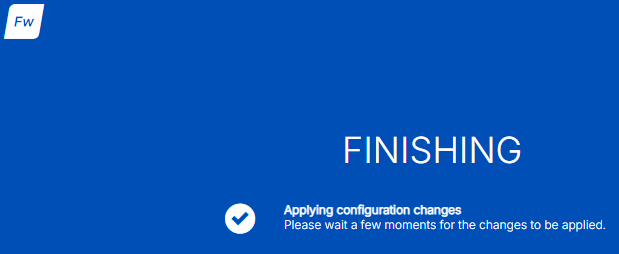
- Wait while the Sophos firewall applies the configuration.
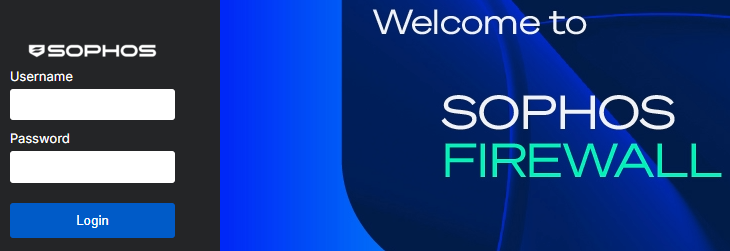
- Once the configuration is applied, you can login to SFOS with the admin account and the password you configured.
That’s all it takes to complete the initial setup on a virtual SFOS (Sophos Firewall Operating System).
If you want to remove the default GuestAP interface, my blog post Sophos Firewall Remove GuestAP Interface, goes into detail on the process.
If you need more than the 3 initial interfaces, my blog post, Sophos Firewall Interface Mapping on vSphere, goes into detail on how to add additional interfaces on a virtual SFOS and how to map them.
If you want to read more about the initial SFOS setup, here is the Sophos documentation.