VMware vCenter OVA Certificate Trust
Typically, importing an OVA or OVF file is straightforward. However, after VMware vCenter version 7.0 Update 2, a new message began appearing when importing an OVA or OVF file. The message would say that the certificate is not trusted.

Technically speaking, you could click ignore and keep going. However, I didn’t want to do that.
In this post, I will show you step-by-step how to resolve the certificate is not trusted warning without clicking ignore.
The Process
Make sure you only follow this process on an OVA file you’ve received from a trusted source and that you’ve verified its authenticity.
- Open the OVA file with a program like 7-Zip.
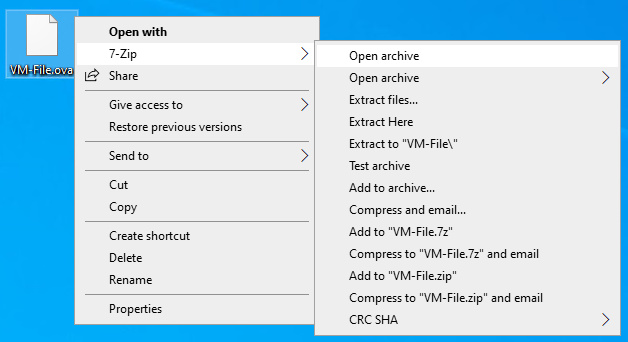
An OVA is technically a tar archive, which is why we can view its contents with most zip programs.
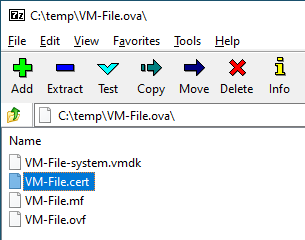
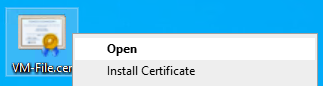
- Extract the
.certfile from the OVA file.
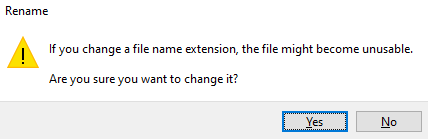
- Rename the
.certfile to.cer.

- Click Yes to confirm the file name extension rename.
- Open the
.cerfile.
- Click on the Certification Path tab.

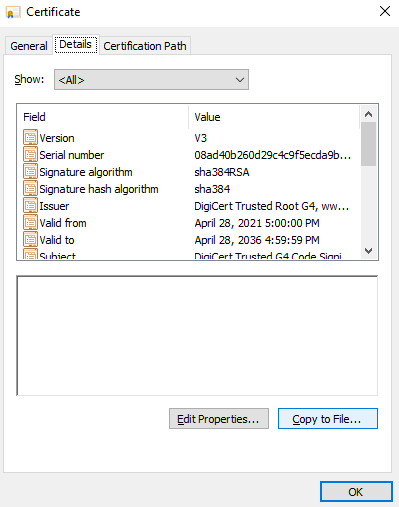
- Click on the root certificate, then click View Certificate.
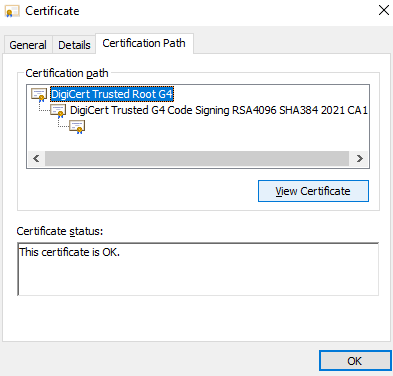
In my example, the first certificate is the root certificate, which is the DigiCert Trusted Root G4 certificate.
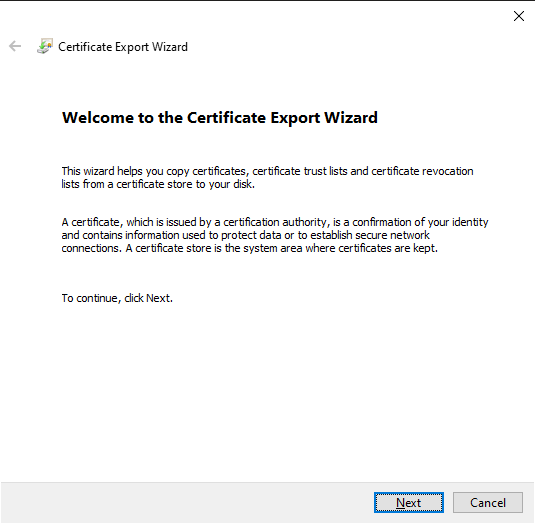
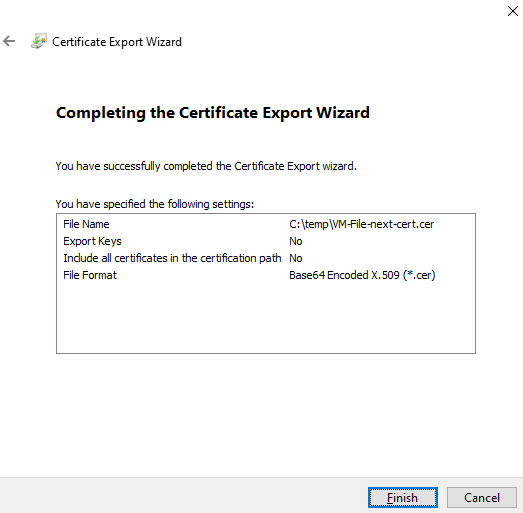
- In the new certificate window, click the Details tab, then click Copy to File.

- Click Next on the Certificate Export Wizard.
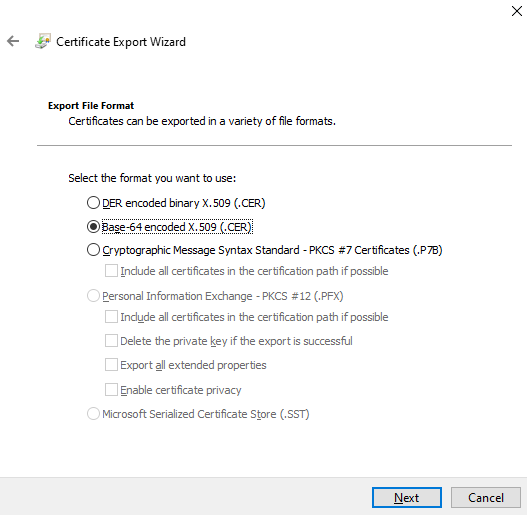
- Select Base-64 encoded X.509 (.CER) and click Next.
- Select a location to export the first certificate to, then click Next.
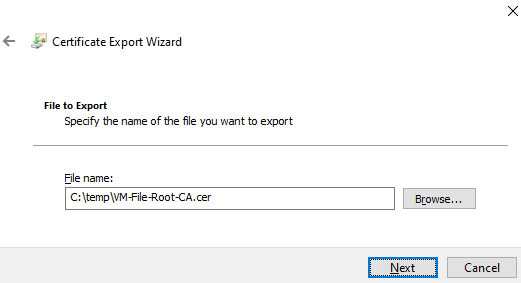
- Review the certificate export details and click Finish.

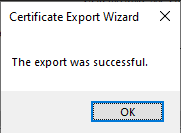
- Click Ok to confirm that the root certificate was exported successfully.
- Close the Certificate window for the root certificate.
- On the Certification Path tab for the main certificate, select the next certificate in the chain, then click View Certificate.

In my example, the next certificate is the intermediate certificate, which is the DigiCert Trusted G4 Code Signing RSA4096 SHA384 2021 CA1 certificate.
- In the new certificate window, click the Details tab, then click Copy to File.
- Click Next on the Certificate Export Wizard.
- Select Base-64 encoded X.509 (.CER) and click Next.
- Select a location to export the next certificate, then click Next.
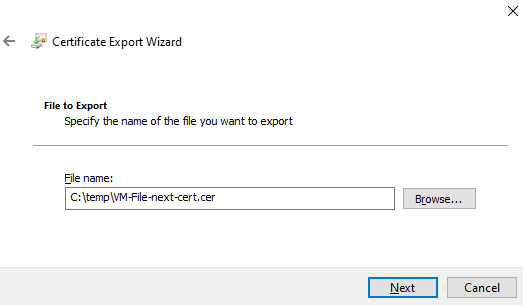
- Review the certificate export details and click Finish.
- Click Ok to confirm that the intermediate certificate was exported successfully.
- Close the Certificate box for the intermediate certificate.
You’ll need to repeat this process for each intermediate certificate.
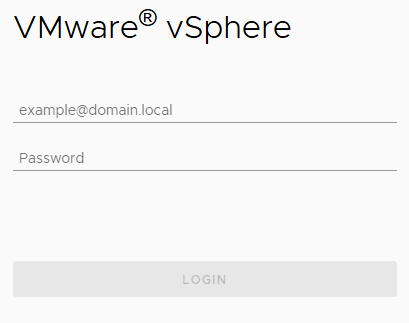
- Log in to your VMware vCenter.
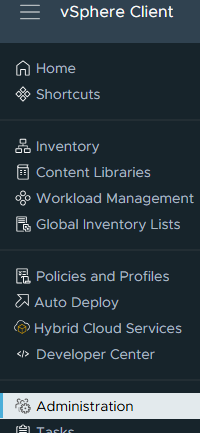
- Open the vCenter menu, then click Administration.
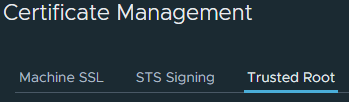
- In the Certificates section, click on Certificate Management.
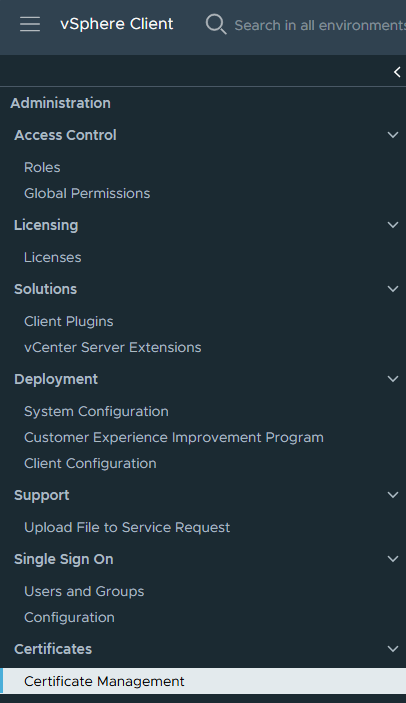
- Click on the Trusted Root tab.
- Click on Add Trusted Root Certificate.

- Browse to the certificates you extracted (you need to do one at a time), then click Add.
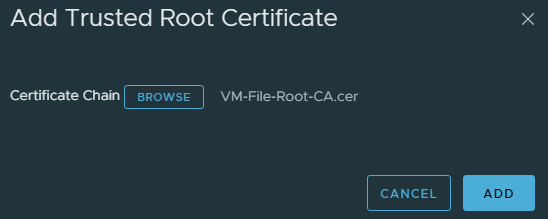
- Repeat the process for each certificate you extracted.
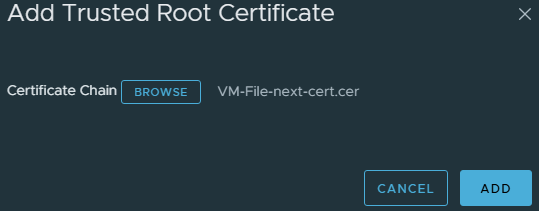
- Once completed, you will see the certificates you added in Certificate Management.

The next time you import an OVA containing those certificates in the certificate chain, it will show as a trusted certificate, and you won’t need to click ignore.
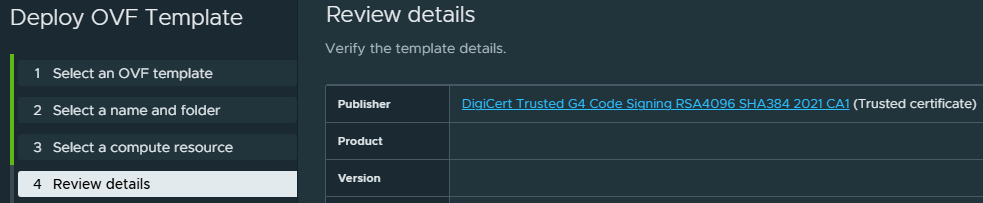
That’s all it takes to trust an OVA certificate chain to resolve the certificate is not trusted warning message.
If you want to read more about adding trusted root certificates to VMware vCenter, here is the VMware by Broadcom documentation about it.