During the installation of VMware ESX, you’re never prompted to set a hostname or domain name. As a result, ESX defaults to the hostname localhost and the domain localdomain. Due to this when ESXi generates a self-signed certificate, it is for localhost.localdomain.
In this post, I will show you step by step how to regenerate the self-signed certificate for ESX.
Prerequisites
- The ESXi hostname has been changed.
For more information about changing the ESXi hostname, my blog post, ESXi changing the host name goes into detail.
The Process
- Connect to your ESXi host.
- Right-click on the ESXi host and select Services > Enable Secure Shell (SSH).
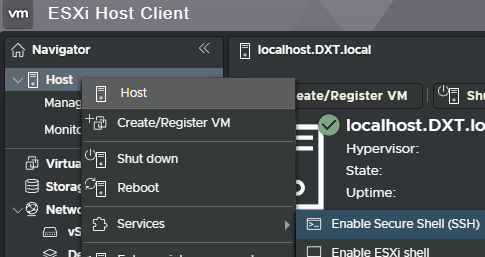
- SSH into the ESXi host.
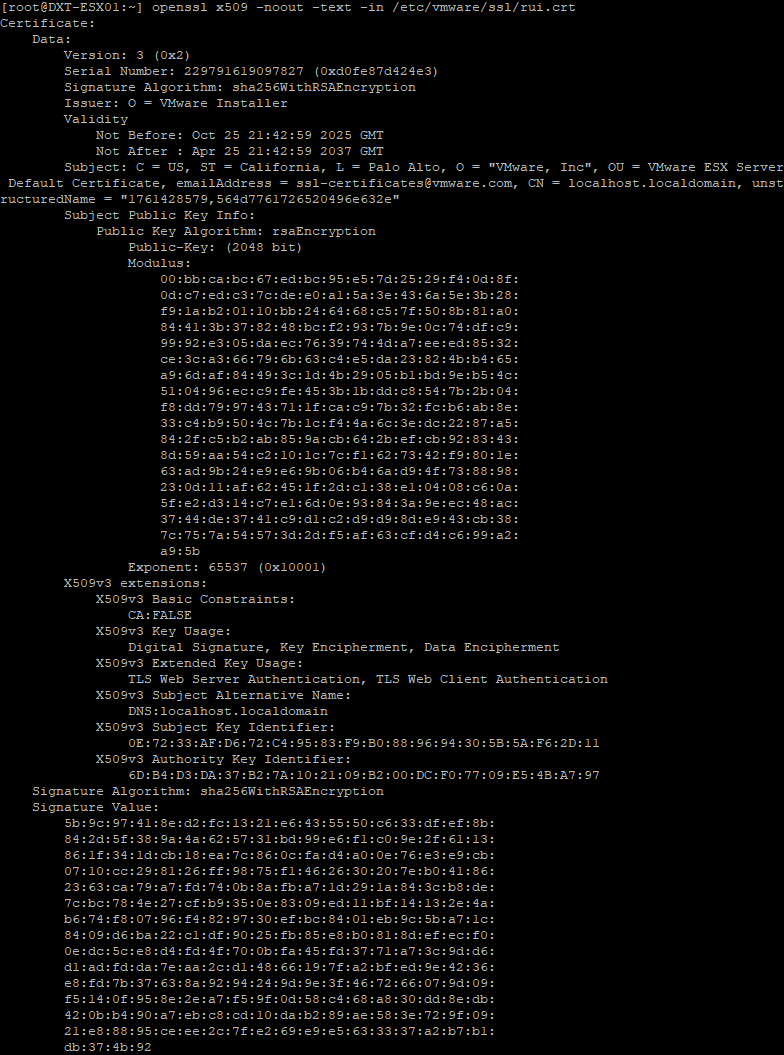
- To view the current certificate installed on your ESXi host, run the following command
openssl x509 -noout -subject -in /etc/vmware/ssl/rui.crt

If you want to view all the details about your ESXi certificate, run the following command openssl x509 -noout -in /etc/vmware/ssl/rui.crt -text
- Run the following command to regenerate the ESXi self-signed certificate
/sbin/generate-certificates

- Restart the ESXi management agents by running the following command
/etc/init.d/hostd restart && /etc/init.d/vpxa restart

Although the official documentation states the process is complete, this is not entirely true. ESXi runs the Envoy proxy Discovery Service, also known as rhttpproxy, which is a reverse proxy for ESXi. To complete the certificate change, restart the rhttpproxy service or reboot the ESXi host.
- Restart the ESXi Envoy reverse proxy by running the following command
/etc/init.d/rhttpproxy restart

- To view your new certificate, run the following command
openssl x509 -noout -subject -in /etc/vmware/ssl/rui.crt

That’s all it takes to regenerate the self-signed certificate on ESX. If you want to read more about regenerating the ESXi self-signed certificates, here is the Broadcom documentation.