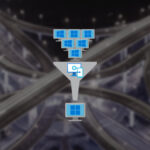
VMware vCenter is a wonderful application that lets you take full advantage of your ESXi hosts. If you have more than one ESXi host you should look at vCenter. The full name of vCenter is vCenter Server Appliance or VCSA.
In this post, I will show you step-by-step how to install vCenter 8. The process is broken up into two stages. Stage 1 is the deployment on the vCenter VM and Stage 2 is the final settings to the vCenter VM.
The Process
Stage 1
- Using a system that has access to the ESXi host you plan to use to create the vCenter VM download the vCenter ISO from VMware.
- Mount or extract the ISO. I’m going to mount it.

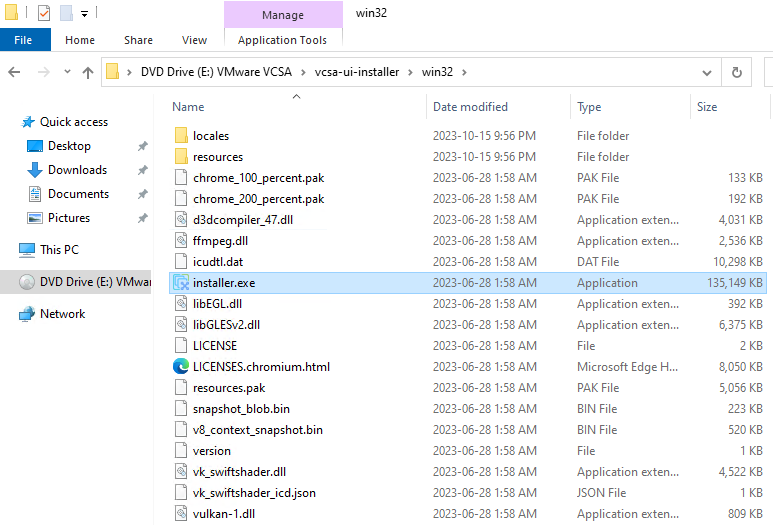
- Browse to
\vcsa-ui-installer\win32and run Installer.exe
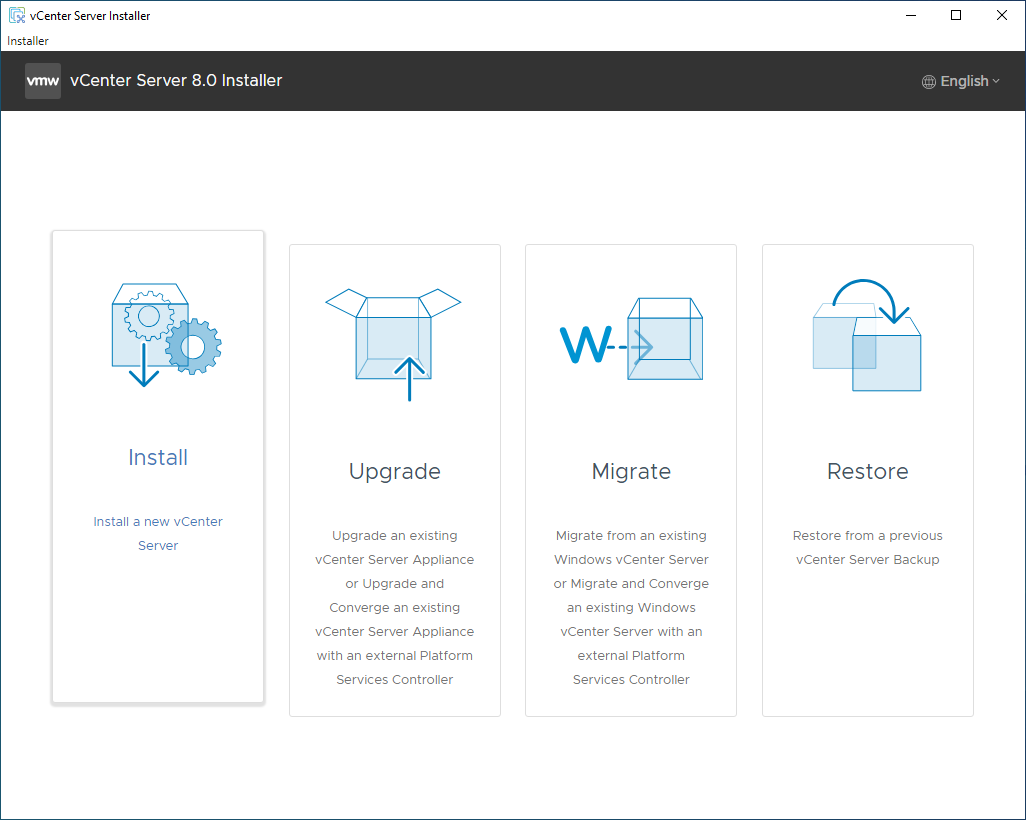
- Select Install
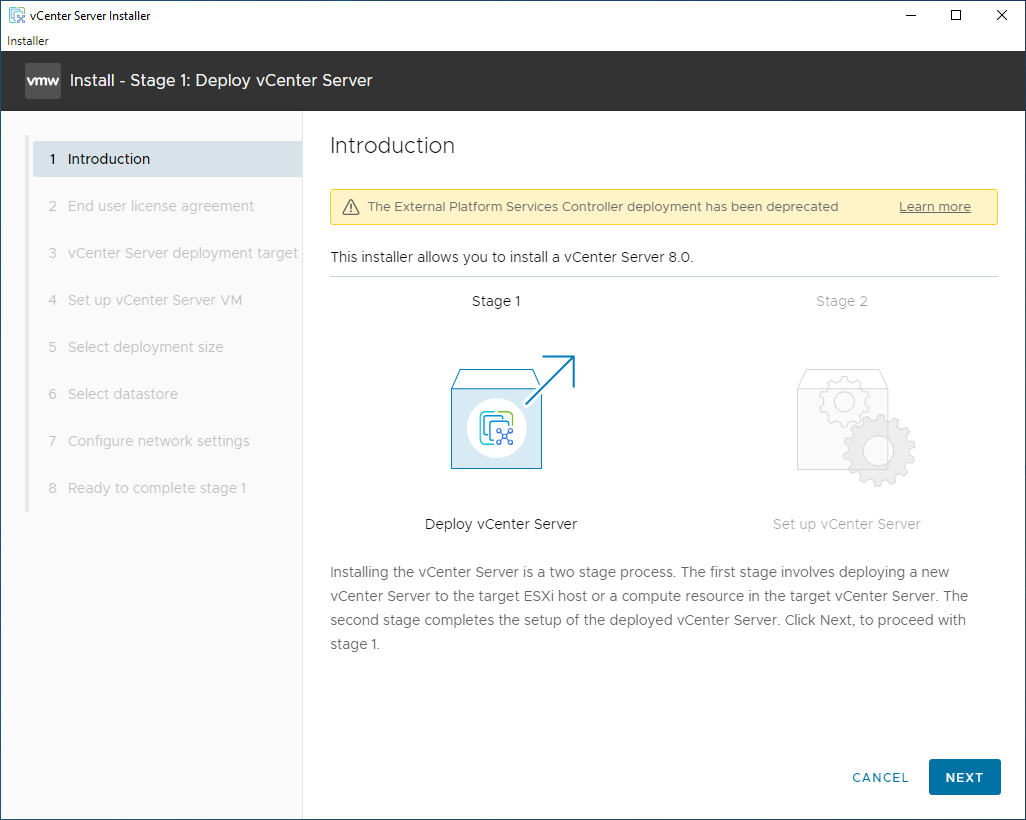
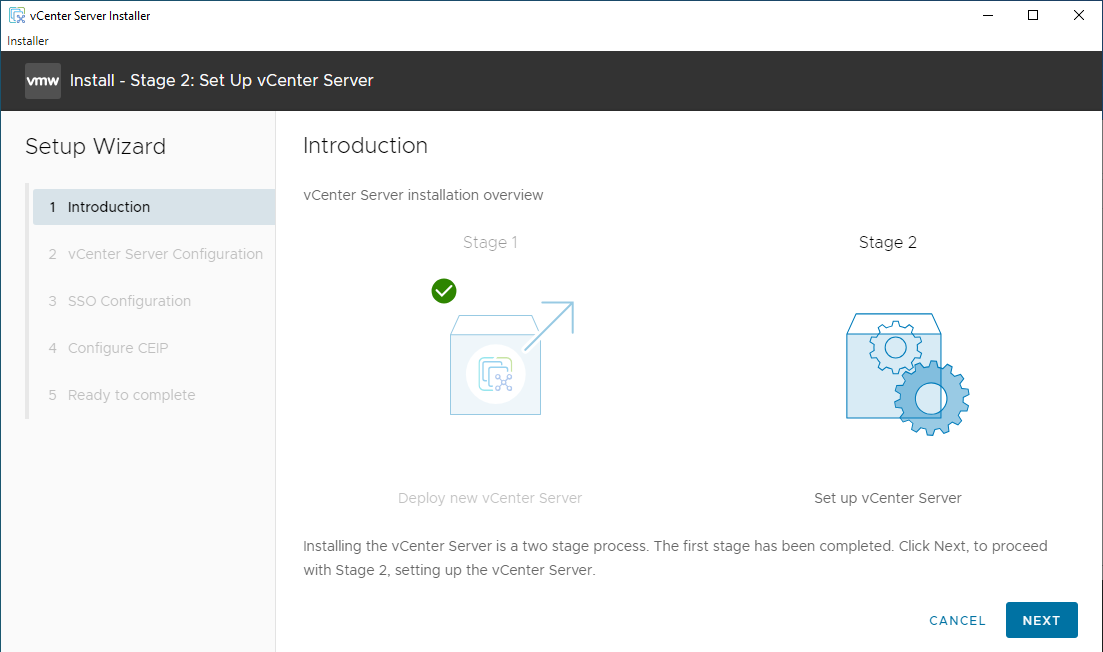
The next screen is the intro screen which lets you know that the process will be in two stages. The first stage is deploying the VM and the second stage is the final settings for the vCenter VM.
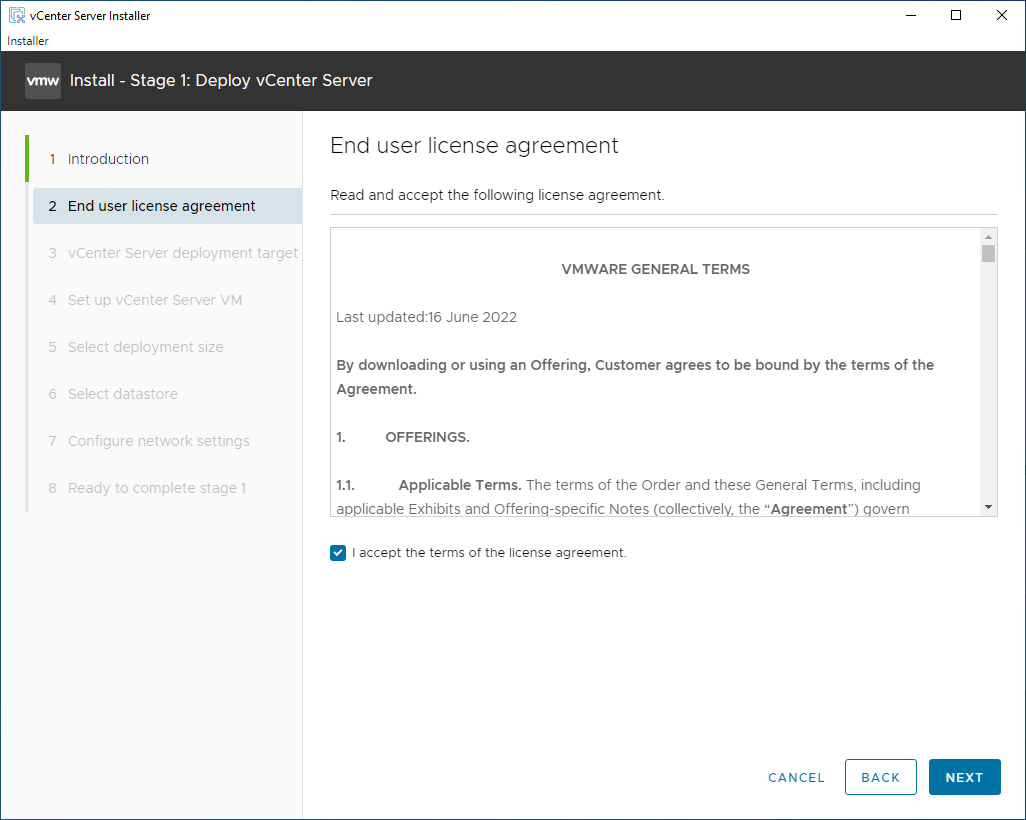
- Agree to the EULA
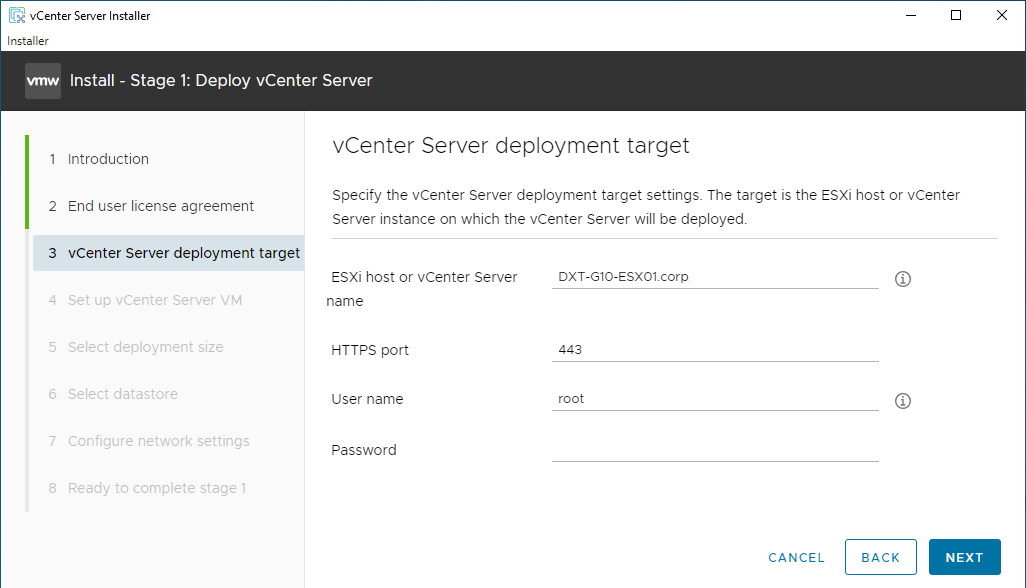
- Enter the IP or the FQDN of the ESXi host that you will be placing your vCenter on. I will be using an FQDN.
- Enter the port that your ESXi is on and the username and password for a user who is allowed to create VMs. My setup is on 443 and I will be using the ESXi root account.
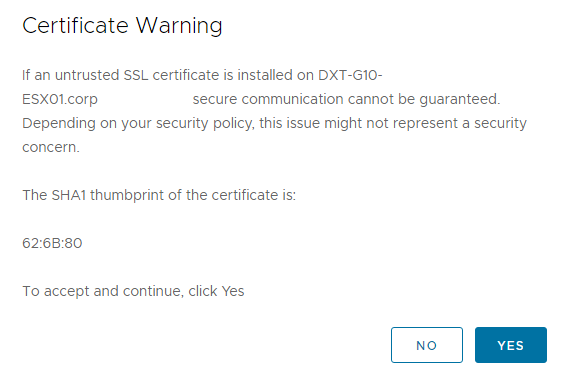
- Accept the Certificate Warning
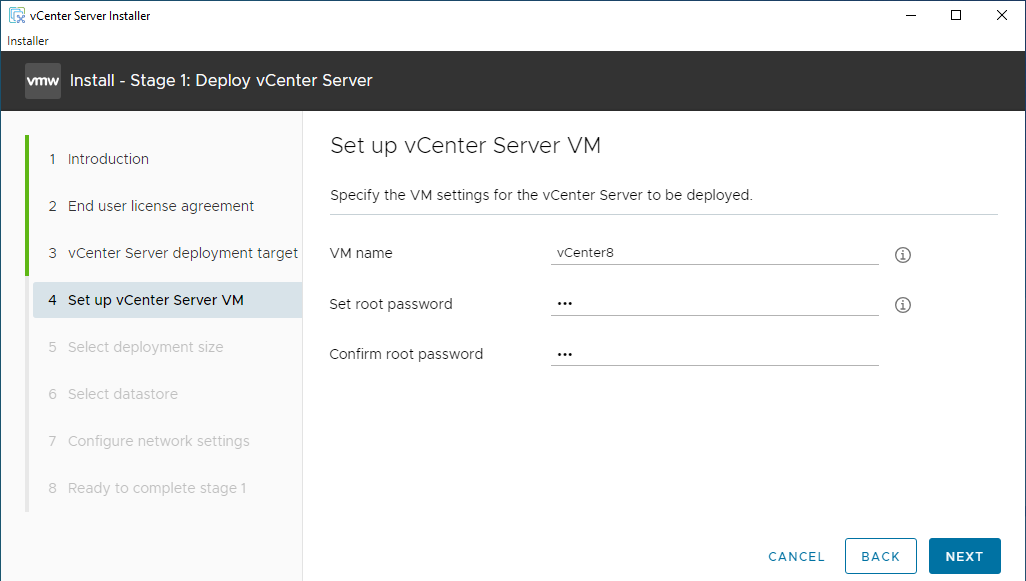
- Name your vCenter VM. I will call mine vCenter8.
When you upgrade to a new major version of vCenter (for example going from vCenter 7 to vCenter 8) there will always be a new VM for vCenter. Due to this, I like to put the version number in the VM name.
- Pick a root password for your vCenter.
The root password is used on the vCenter Server Management interface (it used to be called the vCenter Server Appliance Management interface (VAMI) ). This password can be very important in the future. Having this password has helped me fix many things with vCenter.
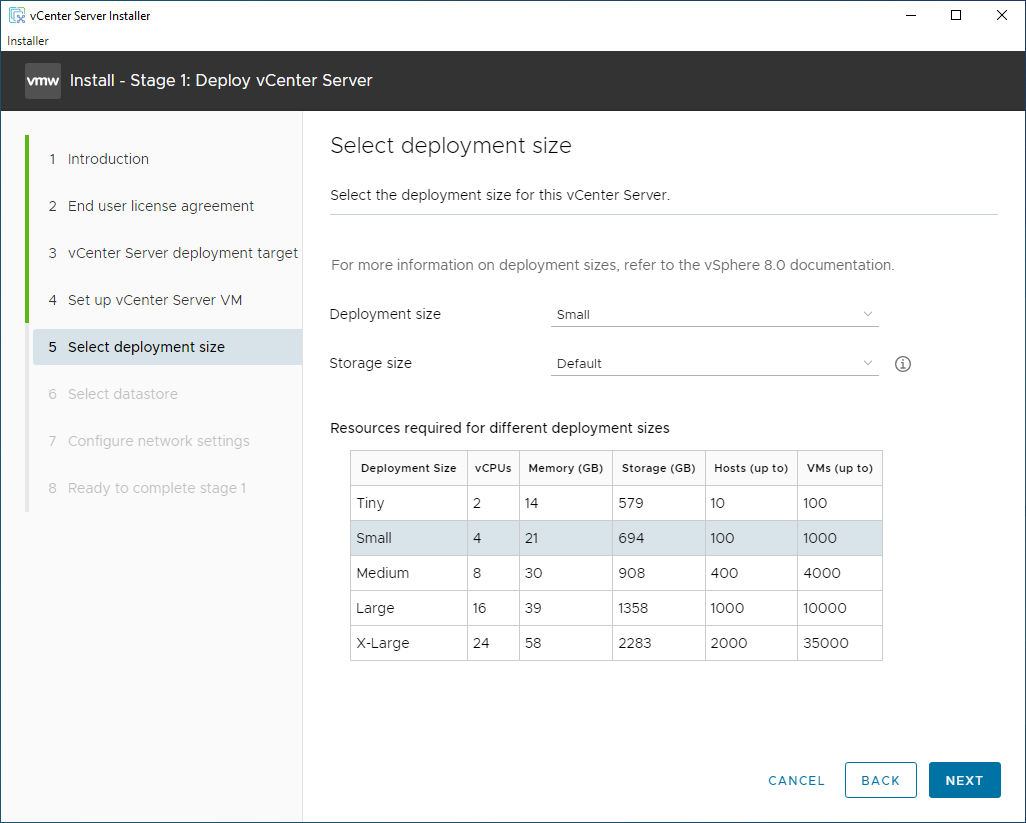
- Select your deployment size.
I like my vCenter to be a bit faster than tiny and I like to make a lot of VMs so I will select small.
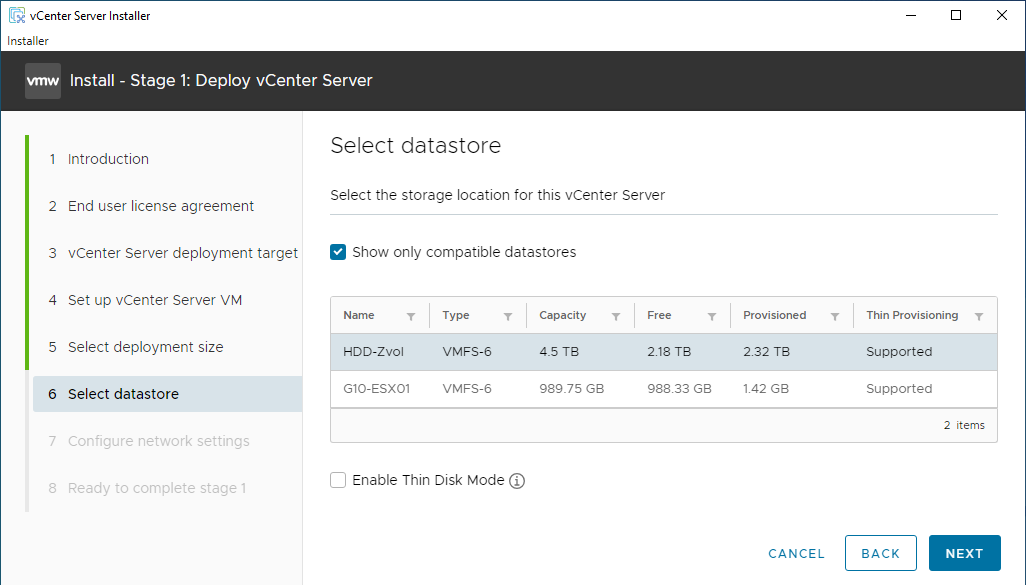
- Select a datastore for the vCenter VM.
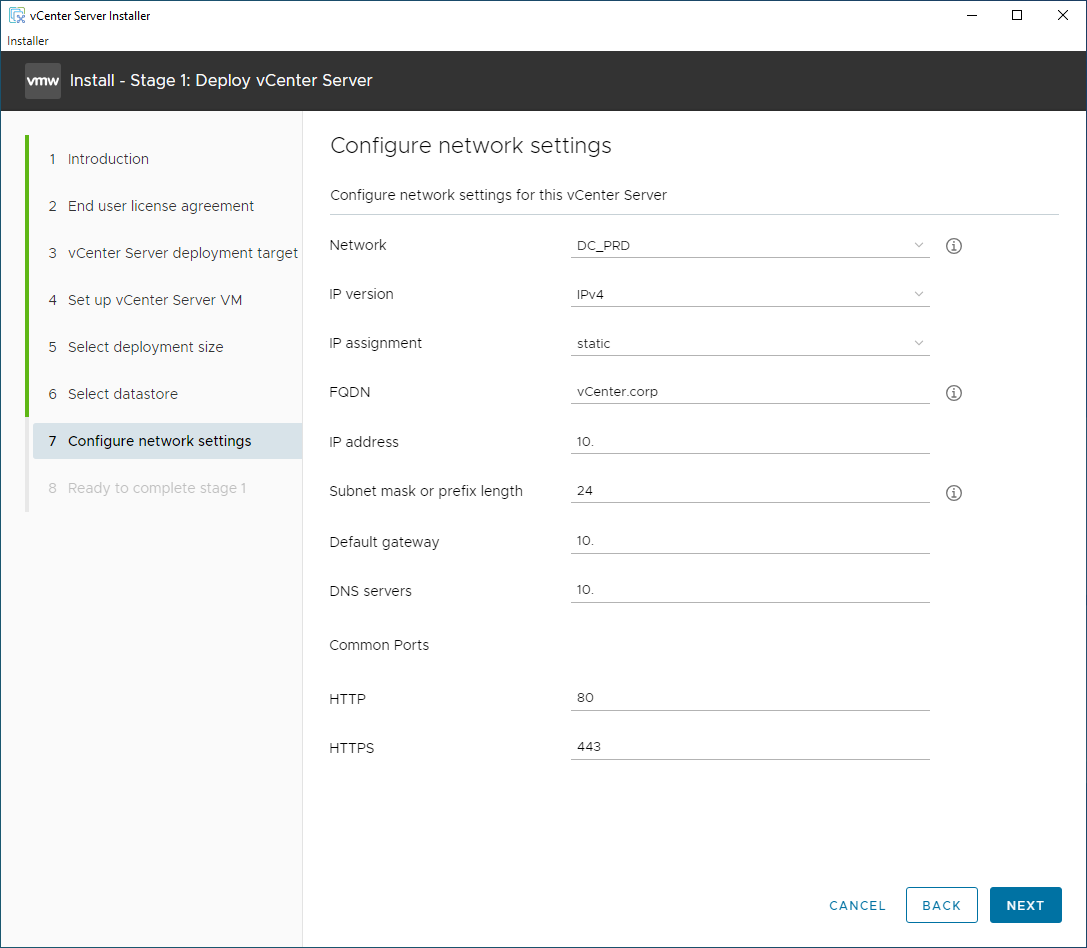
- Enter your network settings.
- Review everything if all looks good click Finish.
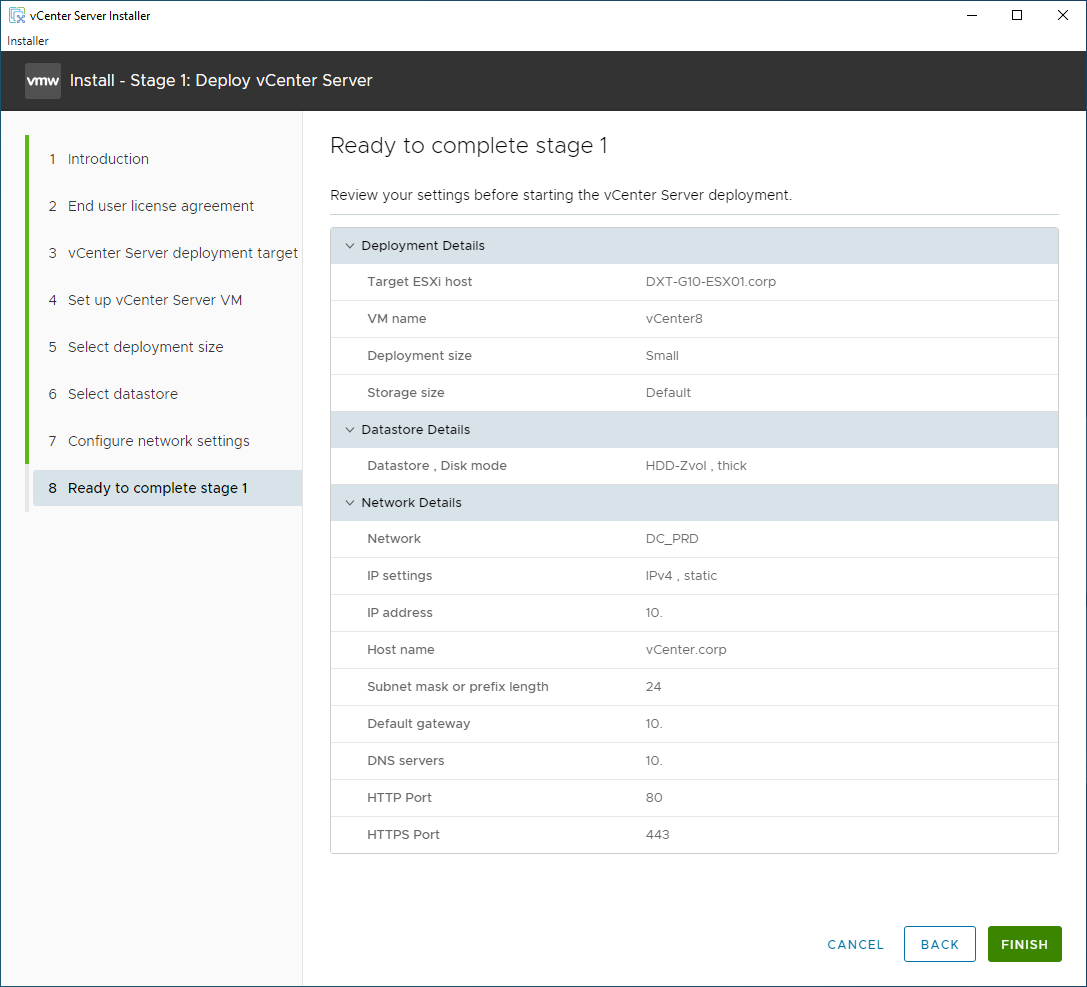
The vCenter installer will now deploy the vCenter VM to the ESXi host. This part will take a while.

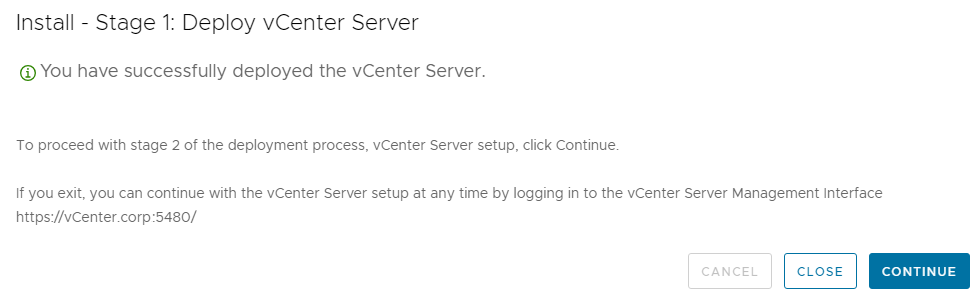
Once Stage 1 is completed successfully we can continue to Stage 2.
Stage 2
The next screen is the intro screen for Stage 2 it lets you know that stage one is completed and it is time for stage two the final VM settings.
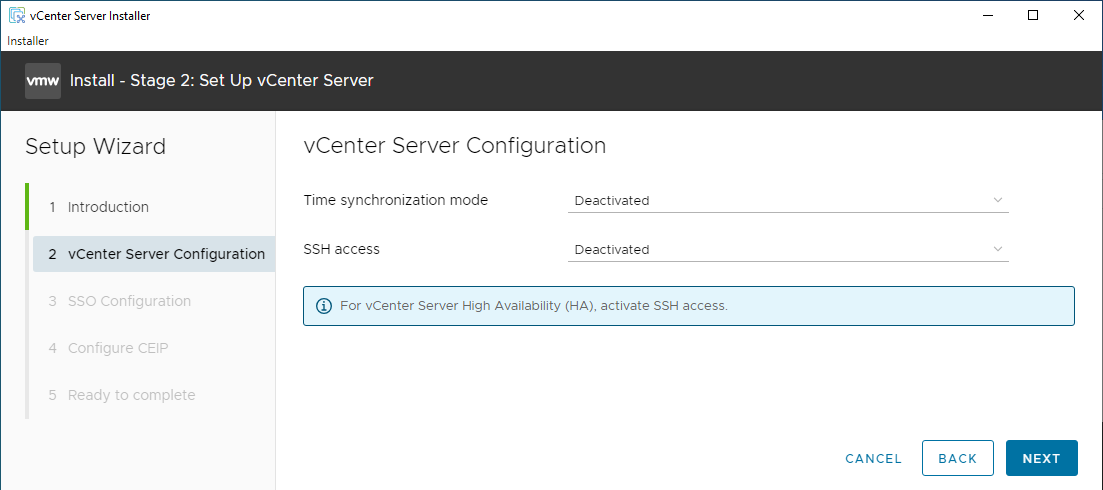
- Set your Time synchronization mode and SSH access as needed and click Next. (You can change this later if needed)
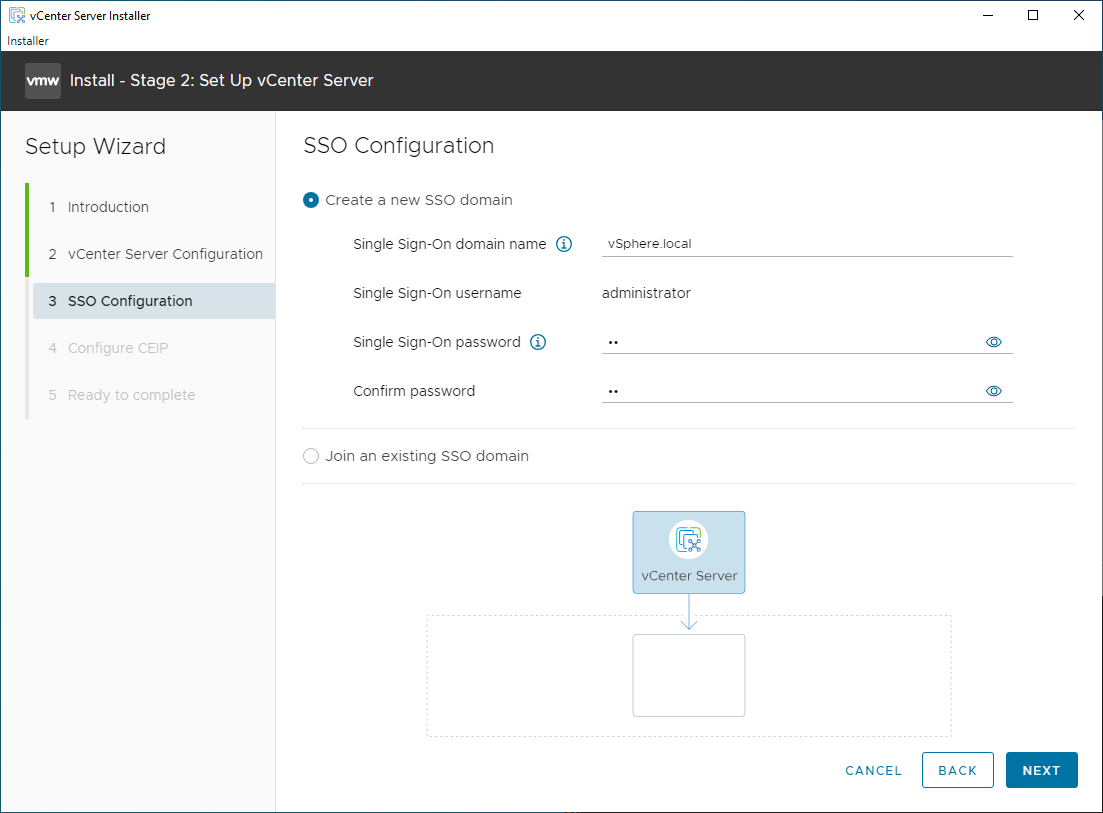
- Pick a name for your SSO (Single Sign-On) domain and a password for the administrator user. I like to use the SSO domain vSphere.local
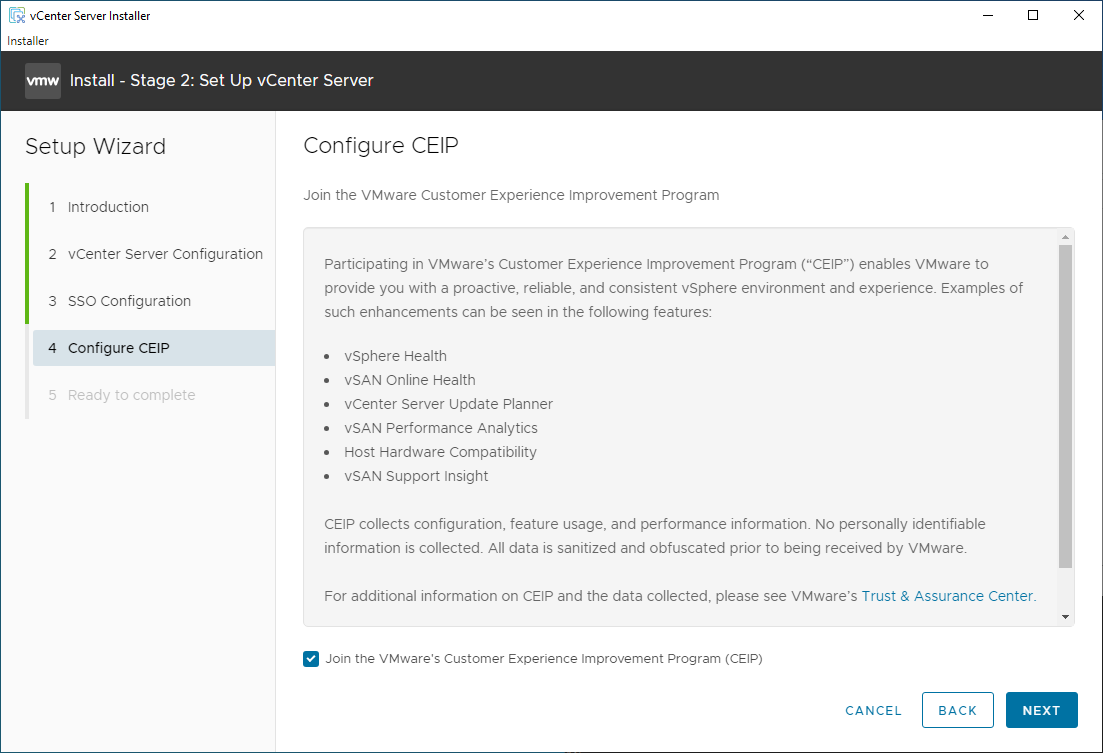
- Select if you want to Join the VMware Customer Experience Improvement Program. I like to join it as the more data VMware has the better they can make their products.
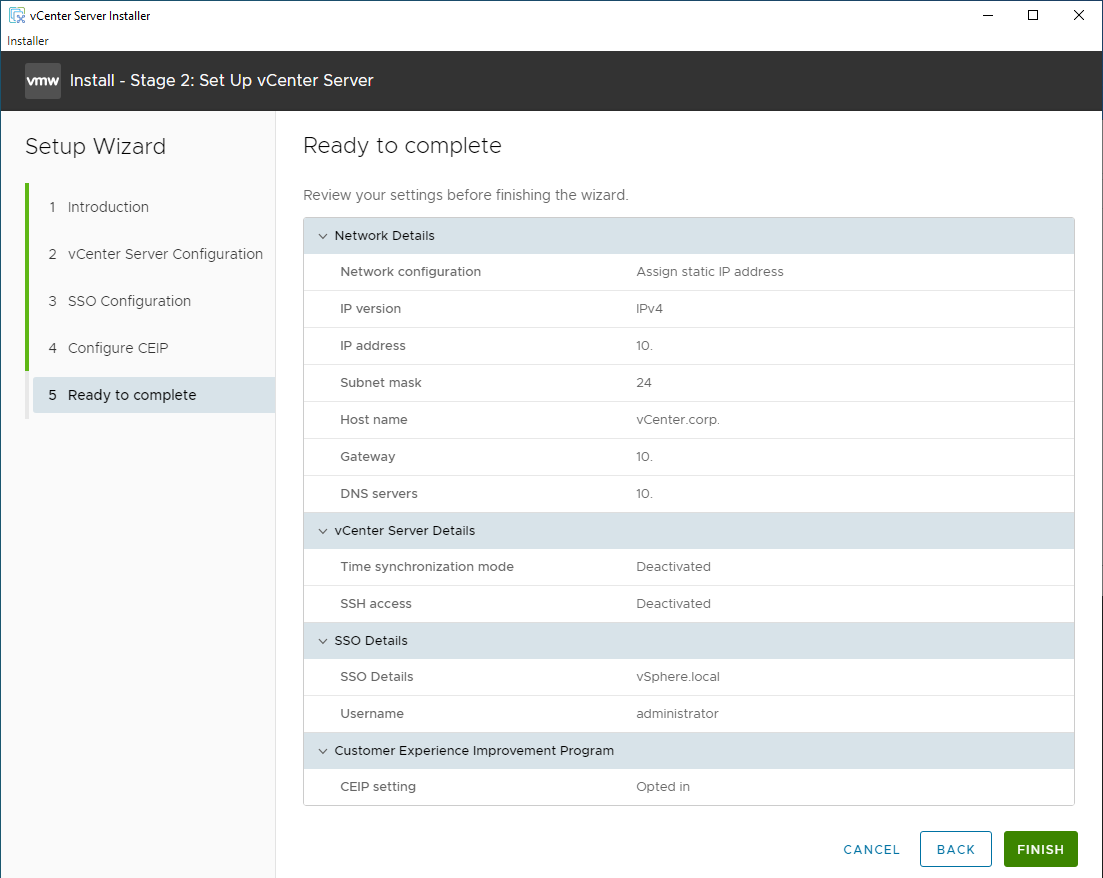
- Review your settings, if all looks good click Finish.
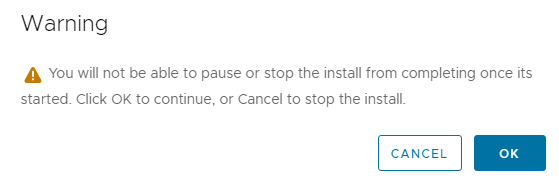
- Acknowledge the warning that you won’t be able to stop the process once you start it.
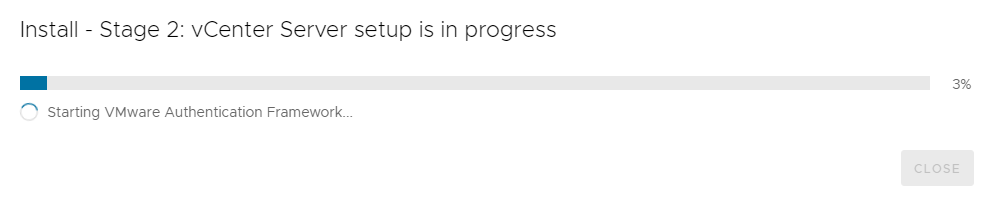
Wait for Stage 2 to complete.
Once Stage 2 is completed we will finally be able to login to vCenter for the first time.
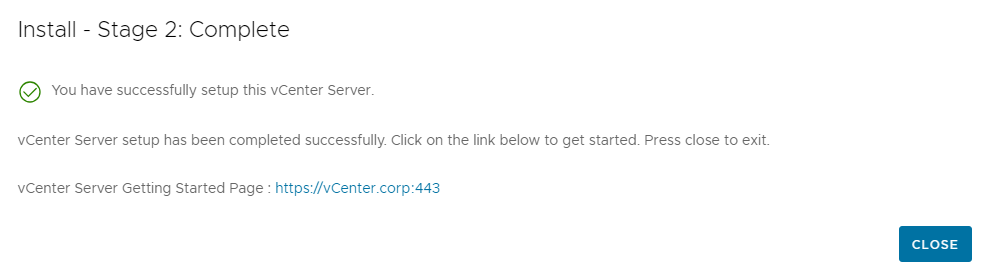
- Go to the vCenter web page and log in.
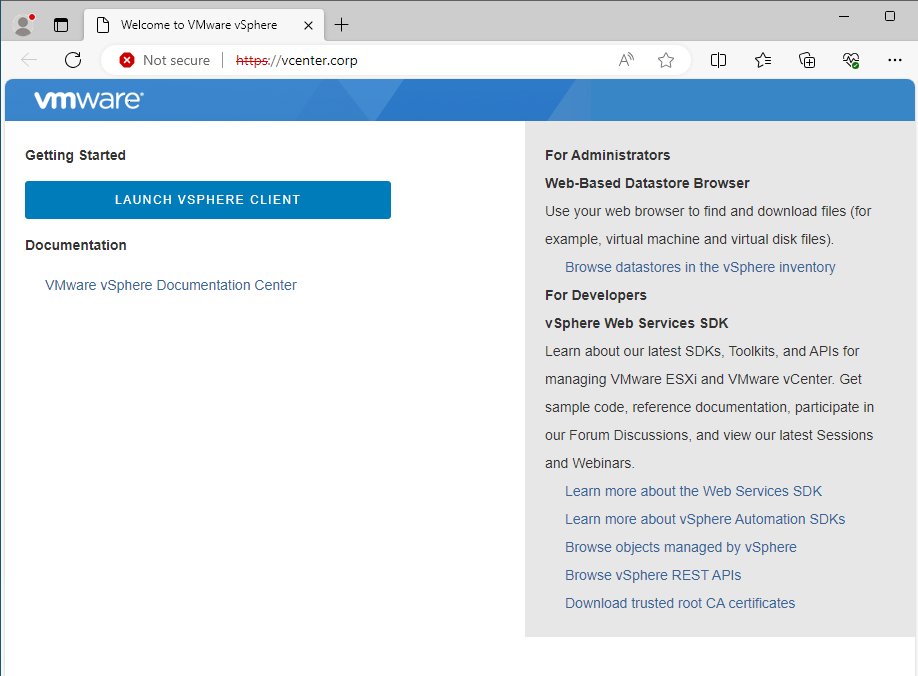
That’s it vCenter is now installed.
If you want to read more about installing VMware vCenter here is VMware’s documentation on it.