There’s been a few times where I needed to setup access to an internal web application but I couldn’t put it on 443 or 80 because something else was using those ports and a reverse proxy would break one of the applications. A solution to this is Cloudflare Tunnel.
Cloudflare Tunnel used to be called Warp when it was in beta and was eventually renamed to Argo Tunnel. When Cloudflare made Argo Tunnel free they renamed it to Cloudflare Tunnel. The magic of Cloudflare Tunnel is handled by a small but powerful client that is known as cloudflared.
What makes a Cloudflare Tunnel awesome is the fact that you can use it to host an application externally without opening any ports on your firewall. It does this by creating an outbound only tunnel directly to Cloudflare.
For my situation I needed to setup access to an internal web application but I didn’t want to do another port forward to make it work. My solution was Cloudflare Tunnel with Docker.
The way I set it up is slight different than what Cloudflare’s documentation says as I wanted to use the Zero Trust dashboard and Docker but also have it in a Docker Compose file, as cloudflared seems to get updated at least once a month and I wanted it to be easy enough to recreate. Here’s how I did it and how everything works.
Tunnel Setup
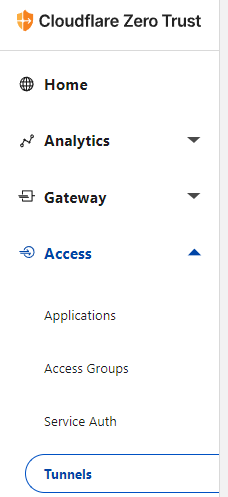
- Login to Cloudflare Zero Trust Dashboard (it used to be called Cloudflare Teams)(https://dash.teams.cloudflare.com/)
- Click on Access > Tunnels

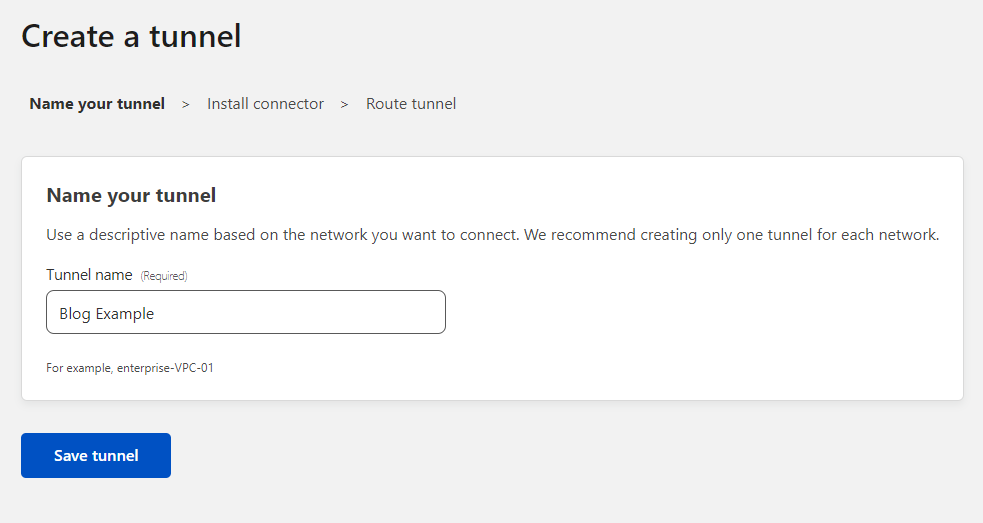
- Click on Create a tunnel

- Give your tunnel a name. I’m going to call mine Blog Example
Base64
After saving your tunnel you are presented with the install command for cloudflared which contains a Base64 encoded string that has a lot of useful info in it that we will need.

Note: I altered the Base64 encoding to better show how it works.
- Use something like CyberChef or another Base64 decoder to decode the install command that Cloudflare provided
This is the Base64 encoded string in my example
eyJhIjoiTXlBY2NvdW50VGFnMTIzIiwidCI6Ik15VHVubmVsSUQxMjMiLCJzIjoiTXlUdW5uZWxTZWNyZXQxMjMifQ==
Once you decode the Base64 you will get an output that looks similar to this
{"a":"MyAccountTag123","t":"MyTunnelID123","s":"MyTunnelSecret123"}
Here is the same input and output directly on CyberChef
- Make note of the decoded Base64 as we will need it later on.
URLs
Now we need to create what the external URL will be for the web application.
- Enter what you want the external URL to be for the web application. For my example I will use blogexample.thedxt.ca

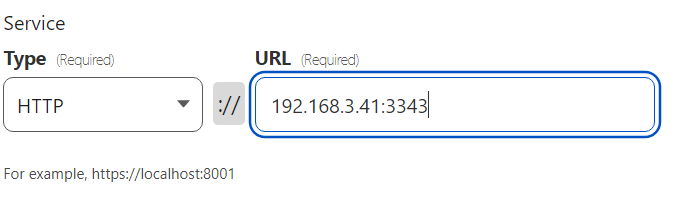
- Enter the internal URL for the web application. In my example my web application is http and running on the IP of 192.168.3.41 and the port 3343.

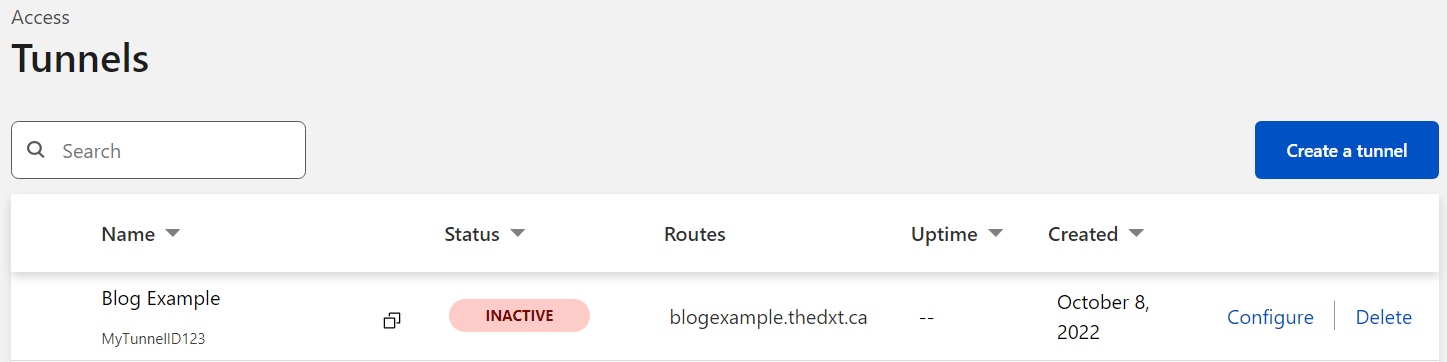
You should now see your tunnels summary page.
Docker Compose Setup
This is how I like to build my Docker Compose setups feel free to do it whichever way to prefer.
- Make a new folder for your Docker Compose setup. I called mine
cloudflared-blog-example. - Make another new folder for the persistent data for the cloudflared client. I called mine
cloudflared-example-data
Credentials File
We need to create a credentials file for cloudflared to use, we will do this by using the Base64 info we decoded earlier from the cloudflared install command.
- In the
cloudflared-example-datafolder make a new JSON file with your Tunnel ID as the name. In my example I created a JSON file calledMyTunnelID123.json - In the Tunnel ID JSON file enter your Account Tag and your Tunnel Secret and your Tunnel ID. It needs to be in the following format
{"AccountTag":"Your Account Tag","TunnelSecret":"Your Tunnel Secret","TunnelID":"Your Tunnel ID"}
This is what my MyTunnelID123.json file looks like
{"AccountTag":"MyAccountTag123","TunnelSecret":"MyTunnelSecret123","TunnelID":"MyTunnelID123"}
We have just created the cloudflared credentials file.
Config File
- In the
cloudflared-example-datafolder make a new file calledconfig.yml - Enter the following information to the
config.ymlfile- Enter your Tunnel ID in the following format
tunnel: Your Tunnel ID - Reference the credentials file we created earlier in the following format
credentials-file: /root/.cloudflared/your Tunnel ID.json
- Enter your Tunnel ID in the following format
- We now need to create the ingress part of the
config.ymlfile- Enter the following
ingress: - Enter the external URL for your web application that you created earlier during the tunnel setup. It needs to be in the following format
- hostname: URL.Your.Website - Enter the internal URL for your web application that you entered earlier in the tunnel setup. It needs to be in the following format
service: http://URL.Internal.Local
- Enter the following
- We now need to create the required catch all rule for if something doesn’t match the info we entered above. We will tell it to serve a 404 page.
- enter the following
- service: http_status:404
- enter the following
This is what my config.yml file looks like
tunnel: MyTunnelID123
credentials-file: /root/.cloudflared/MyTunnelID123.json

ingress:
   - hostname: blogexample.thedxt.ca
     service: http://192.168.3.41:3343
   - service: http_status:404Code language: YAML (yaml)
Docker Compose File
Now we need to create the docker-compose.yml file in the folder named cloudflared-blog-example
This is what mine looks like
---
version: "3.2"
services:
  cloudflared-example:
    image: cloudflare/cloudflared:2022.10.0-amd64
    container_name: cloudflared-example
    volumes:
      - ./cloudflared-example-data:/root/.cloudflared/
    command: 'tunnel --config /root/.cloudflared/config.yml run'
    user: root
restart: unless-stoppedCode language: YAML (yaml)- Now you can start your Docker container
If everything is configured correctly your tunnel should now be up and showing as active in your tunnels list in your Cloudflare Zero Trust dashboard.

If you check your DNS entries in Cloudflare you will see a new CNAME record pointing to yourTunnelID.cfargotunnel.com

Here is my internal web application running internally.

Now that the Cloudflare Tunnel is up and running I can reach it externally via blogexample.thedxt.ca

You have now just created a web application that can run without any port forwards. I think this will keep working even if you have a dynamic WAN IP, however I haven’t tested it. I suspect that if you have a dynamic WAN IP you could just stop and start your Docker container to reestablish your tunnel with your new WAN IP.
When you are ready to update your cloudflared Docker image just make sure you update the cloudflared tag as in my example I version locked it. Here is the list of Docker tags.
If you want to take this a step further you can also put Cloudflare Access in front of it too. If you want to know how to do that read my post Setting Up Cloudflare Access or my post Cloudflare Access IdP with Entra ID.
An Easier Way
I figured out an easier way after I figured out the method that I outlined above. I decided to show both methods as the first way shows in much more detail how everything works together and if you understand how to do it the more complicated way you can make your own decision on which method works best for your setup.
- Make a
docker-compose.ymlfile - Copy the cloudflared install command
- You need everything after
--no-autoupdateincluding the Base64 part
- You need everything after
We don’t need the no auto update part as it will assume no auto update.
Your Docker Compose file should look similar to this
---
version: "3.2"
services:
   cloudflared-example:
     image: cloudflare/cloudflared
     container_name: Cloudflared-token
     command: tunnel run
     user: root
     restart: unless-stopped
     environment:
      - TUNNEL_TOKEN=eyJhIjoiTXlBY2NvdW50VGFnMTIzIiwidCI6Ik15VHVubmVsSUQxMjMiLCJzIjoiTXlUdW5uZWxTZWNyZXQxMjMifQ==Code language: YAML (yaml)
If you want to read more about Cloudflare Tunnel or read Cloudflare’s documentation about all of this you can do so here.